May 31, 2009

The Cupcake Challenge: Apple Spice with Almond Praline

apple spice cupcakes

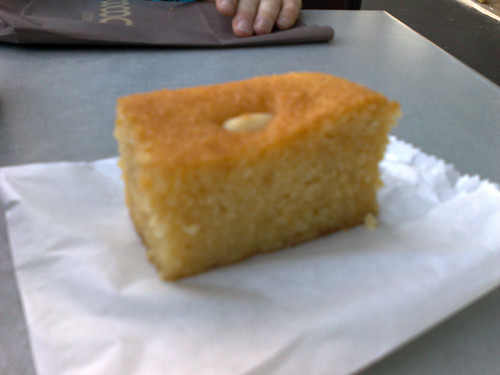
And now for another installment of the cupcake challenge. Recently I had a friend give me a big bag of home ground granny smith apples. There's nothing I love better in life than free food, and it makes it even better when you can turn a great free ingredient into something that is delicious. So I needed to find a recipe to use the apples.......good old google was the answer. I found a recipe for an apple tea cake at Recipezaar, I baked it and it was eaten so quickly it didn't even have time to cool down. So I thought it would be fantastic to cook for my next cupcake challenge.

over head of apple spice cupcakes

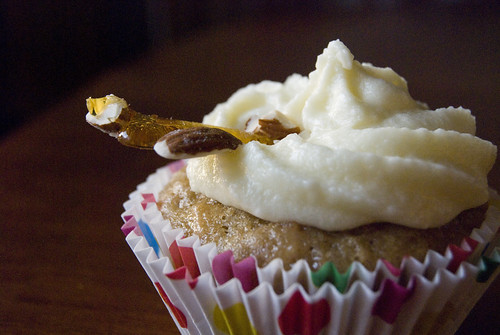
I tweaked the recipe a little so it would translate into the cupcake form. I also frosted it with a butter cream frosting. My original idea was to make an apple toffee cupcake, but somehow that didn't happen, and I ended up making some almond praline and using it as a garnish.

take a bite
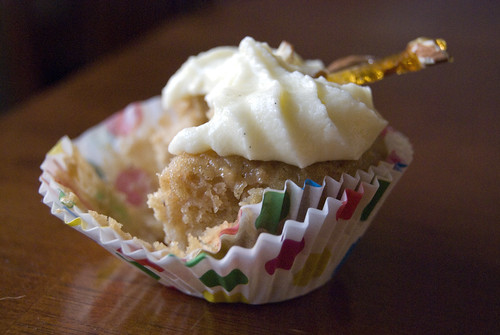
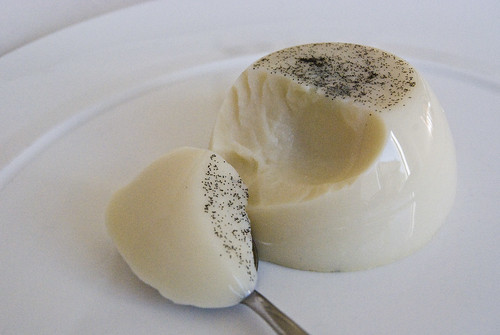
Mmmmmmm, sneaky bites are the best bites

***
Apple Spice cupcakes with Butter Cream Frosting and Almond Praline

Makes about 30 cupcakes

INGREDIENTS

CUPCAKE
1 1/2 cups brown sugar, firmly packed
2/3 cup oil
2 eggs, slightly beaten
1 teaspoon vanilla
3 cups , sifted
1 teaspoon baking soda
1/2 teaspoon salt
2 cups apple, peeled & diced into tiny pieces
2 cups buttermilk, at room temperature

VANILLA BUTTER CREAM FROSTING
1 cup butter, at room temperature
6-8 cups icing sugar
1/2 cup milk, at room temperature
2 teaspoons vanilla extract

ALMOND PRALINE
1/2 cup of almonds, lightly toasted
100 grams Castor sugar

METHOD

FOR CUPCAKE
1. Preheat oven to 180°C
2. Line a muffin tray with cupcake liners
3. Mix brown sugar, oil, egg & vanilla in large bowl.
4. Combine flour, baking soda & salt. Add to wet mixture. Add apple & buttermilk. Mix thoroughly just to moisten.
5. Divide batter into cupcake liners.
6. Bake cupcakes for 12 to 20 minutes, cupcakes are done when they are firm to the touch.

FOR FROSTING
1. Place the butter in a large mixing bowl. Add 4 cups sugar, milk and vanilla. Beat with electric mixer for 3-5 minutes or until the consistency becomes smooth and creamy.
2. Add the remaining sugar, 1 cup at a time, beating well after each addition, or at least 2-3 minutes. Continue to add icing sugar until the frosting is thickened to your liking, you may not need all of the sugar.

FOR PRALINE
1. Lay almonds in a tray lined with baking paper
2. In a small heavy based sauce pan add Castor sugar and enough water to just cover sugar.
3. Heat sugar mixture over medium heat, without agitating or mixing, until sugar turns a golden colour.
4. Immediately pour sugar over almonds and allow to cool. Once hardened break into small pieces and use as garnish.

take a bite take 2

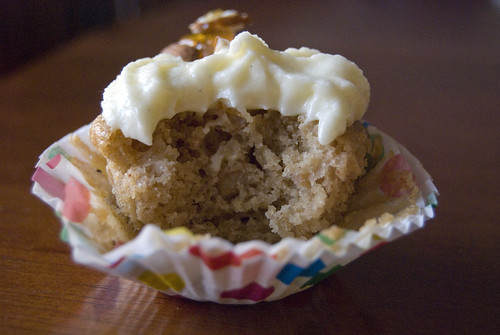
I think the frosting is a little too sweet for this cupcake. The next time I make it I will seriously re-think what I will frost the cupcake with. But it they are a fantastic moist and gorgeous cupcake. Especially considering that winter is just around the corner, I always match apple desserts with winter nights.

all gone
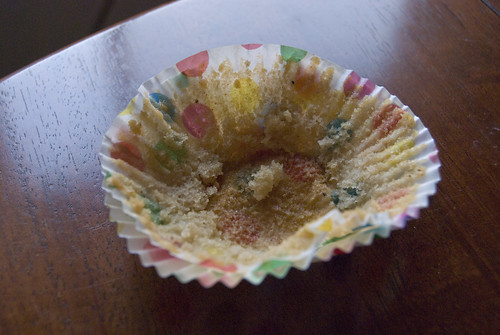
Oh no, its all gone!

***

EDIT: I finally got some comments back from Daz, so here they are:

"I had one and I enjoyed it thoroughly. May [insert name of favourite footy team] have a winning weekend."

--

"Thank you (and your girlfriend) very much. Mmmm very tasty!"
--

"Awesome as always. Maybe your girlfriend should start a business."

May 25, 2009

Results - Rare poached ocean trout with esqueixada, ox heart tomatoes, kipfler potatoes and green herb mayonnaise

pearls rare trout
All I have to say is YUMMMM!!! This has to be the best dish I've attempted so far. However, I think I liked it so much because it was quite challenging. From the recipe, the ingredients read like a J.R.R Tolkien novel, long and confusing. Each step was time consuming, but yet so enjoyable. And I just absolutely loved bringing the whole thing together at the very end. It was like building a piece of art. With each step needing a steady hand and careful consideration....or am I over thinking this? But in the end it was just oh so nice to eat the thing and be left with the pile of dirty dishes. All I need is that dish fairy I've been asking Santa for some many Christmas's.

So lets start from the start. I cheated, yep....I cheated. The whole time I've been attempting this challenge I promised that I would strictly stick to the original recipe, in order to give it full respect. But on this occasion I wavered. Instead of using Ocean trout, I used Rainbow trout. Not a massive sin I know, but quite different in taste and texture. I had gotten some farmed rainbow trout from a workmate and thought this would be a perfect recipe to use the trout with. To tell the truth, this worked really well. The subtle taste was tantalising on the palate. Considering there were so many ingredients in the dish, if something was fuller flavour than another component it would have overshadowed the dish and ruined it.

pearls rare trout 3
I can see how someone could really dislike this dish though. It was extremely fishy, which I actually like. But if you have an aversion to seafood, or the smell of fish, this is probably not the dish for you. The main culprit of the fishy flavour is the salted cod. I used much less than the recipe called for, simply because I knew just how salty it could be. But I thought it worked well. There was no need for extra salt, the cod supplied more than enough.

salted cod 2
Salted cod, a little goes a VERY long way.

***
I love the translucent texture of the salted cod when you slice it very thinly. If you hold it up to the light you would be able to see straight through it. I don't know why you would do such a thing, but its always good to know, especially when you get into those unexpected dinner party conversations.

salted cod
Dinner party conversation:-
Me: "Did you know salted cod is almost see through when sliced thinly?"
Host: "Is that right? tell me more"

***
Another aspect of the dish that I really enjoyed was the herb mayonnaise. I adore basil, in fact I always joke that when I get married, I will have a bunch of basil as my bouquet when walking down the aisle, but somehow I think it would wilt before reaching the other end, but think how delicious I would smell! Anyway I lost the point. The herb mayonnaise was delicious.
herb oil
Food processors are cool, but I still want a kitchen aid

***
herb oil after straining
Herb oil, after straining.

***
It was so easy to make and the flavour held a massive punch. Drizzled across the plate like this is both pretty and practical. It helped to cut through the fishy flavour, and added a dimension of summer, even though we are dead smack in the middle of autumn. I will make this mayonnaise over and over again.

herb mayonaise
Bubbles!

***
So here are the construction pictures, from the foundation, up.

Pearl trout step 1
Step 1: skin removal from fish

***
Pearl trout step 2
Step 2: tomato goes onto trout

***
Pearl trout step 3
Step 3: Potatoes go onto trout

***
Pearl trout finishing up
Step 4: Finish plating by adding rest of ingredients and expertly drizzling mayo onto plate
Step 5(Not shown): EAT!

***
The only criticism I had is that this dish was pretty expensive to create, at about $15 per serve, despite my frugal shopping skills. It might be due to some of the ingredients being out of season, which I know is a no no. But I think I made up for this by re-using and recycling. I HATE throwing perfectly good food away. I would rather put on a few kg's before throwing something edible away. So the left over herbs from the herb oil was transformed into a Pesto sauce for pasta...yum yum, and the left over mayo, which there was quite a bit of, turned into the most amazing potato salad. I mean it was FANTASTIC! Best potato salad ever. It was just potatoes, this mayo and same freshly chopped parsley, simple and delicious. I have a craving for it right now!

Pearl's rare trout
I'm loving this challenge, I seriously get to eat restaurant food at home at a fraction of the price, and I get to have so much fun doing it! Bring on the next one!

May 20, 2009

Rare poached ocean trout with esqueixada, ox heart tomatoes, kipfler potatoes and green herb mayonnaise

Restaurant: Pearl (Victoria)

Recipe from Chef Geoff Linsay (appeared on Australian Gourmet traveller website)

2009 Rating: Number 25, 2 Stars

I think its time to do another round of top 100 cooking. This dish will officially be the longest titled dish I have attempted so far, and in fact its a little daunting just reading the name of it! I've chosen to do this particular dish because of two reasons. 1. I've been craving fish for ages! and no I'm not pregnant! and 2. I've managed to get my hand on some nice fresh trout, so what better way to cook it than in grand fashion.....or I will ATTEMPT to cook it in grand fashion. No guarantee's the end result will resemble anything Geoff Linsay from Pearl intended, it might just be fish and chips in the end. But heck, that's half the fun! So without any further ado, here is the recipe, with hopefully the results to come soon.

Serves 2
Cooking Time Prep time 10 mins, cook 20 mins (plus standing)

INGREDIENTS

Ocean trout

4 (about 180gm each) ocean trout fillets, skin on and pin boned
4 small ox heart (beefsteak) or other firm-fleshed tomatoes, cut into 5mm-thick slices
4 kipfler potatoes, cooked, peeled and thinly sliced
80 gm salt cod, excess salt removed, thinly shaved with a sharp knife
2 spring onions, thinly sliced diagonally

Green herb mayonnaise

1 cup (loosely packed) flat-leaf parsley leaves
½ cup (loosely packed) basil leaves
200 ml olive oil
2 egg yolks
1 tsp Dijon mustard
1 tsp white wine vinegar

Court bouillon

½ carrot, coarsely chopped
1 stalk celery, coarsely chopped
½ onion, coarsely chopped
1 sprig each of flat-leaf parsley and thyme
1 fresh bay leaf
1 clove garlic, coarsely chopped
4 black peppercorns
½ lemon, juice only
125 ml (½ cup) dry white wine

METHOD

1. For green herb mayonnaise, process herbs and olive oil in a food processor and stand for 20 minutes, then strain through a fine sieve, discarding solids. Whisk yolks, mustard and vinegar in a bowl to combine, then gradually whisk in herb oil in a thin stream until emulsified and thick. Season to taste with sea salt and freshly ground black pepper. Thin with a little hot water until it reaches drizzling consistency. Makes about 1 cup.

2. For court bouillon, combine all ingredients with 1 litre of water and 1 tsp sea salt in a heavy-based saucepan over medium heat, bring to the boil, reduce heat and simmer for 15 minutes. Cool to 60C, add fish and poach for 4-5 minutes or until fish is warmed through but still rare.

3. To serve, remove skin from fish, halve horizontally without cutting all the way through, then open out flat and place on plates. Fan tomato slices over fish, then repeat with potato and scatter with salt cod. Drizzle with green herb mayonnaise, scatter with spring onions and season to taste.

Note Esqueixada is salt cod salad, a typical Catalan dish.

May 17, 2009

Honey and Vanilla Bean Milk Pudding

milk pudding 1

I recently read an article in the Age written by Richard Cornish about the the difference between milk brands available on the market, and the way that an entire generation has become accustomed to processed milk that many of us get from our supermarket shelf. This totally intrigued me, for a while I had wanted to try out this idea I had of making milk pudding, and after reading the article I thought now is a great time to try it out. So I read over the information about the different types of milk that were showcased in the article and decided to try the milk produced from Elgaar farm. 

Elgaar farm milk

Elgaar Farm is an organic dairy farm situated in Tasmania priding themselves on delivering pure organic milk that is non-homogenised. I thought this would be perfect for my pudding. The creamy layer would surely translate into the texture of my pudding. 

Elgaar farm milk lid
That label says...."Produced by contented cows dining on organic grass....." I wanna be a contented cow!

***
My pudding, or maybe better described as a milk jelly turned out great! I was aiming for something that was subtle in flavour, something that you would enjoy eating after a particularly rich meal. The milk in fact is not too creamy and doesn't come across as too rich. I only used honey as a sweetener, and this was a great move. I felt that if I added sugar it would spoil the sweetness from the milk, and in fact the honey just added another layer of flavour. 

milk pudding 3

The black specs that the vanilla bean add is a favourite of mine. I love seeing the distinct black dots against the pure white backdrop. So pretty. I had thought that the vanilla would be evenly distributed throughout the pudding, but some how it all fell to the very base of the pudding and gave a cute black pearl crown to the top of the wobbly creation. 

milk pudding 2

The next time I make it I will add a little extra cream, just to see if its addition adds a sense of lushness. I like the recipe as is, but I just cant help myself and I must tinker with it!


milk pudding 4

So here's the recipe

Honey and Vanilla Bean Milk Pudding

Serves 4

INGREDIENTS

2 cups of whole milk
1 vanilla bean
2 tbsp Strong honey
1 sachet of Davis gelatin

METHOD

1. Add the milk to a small saucepan and set over a low heat.

2. Spilt the vanilla bean in half and scrap all the seeds out. Place into the milk along with the halved vanilla bean. Add the honey.

3. Heat milk until just before boiling point. Remove from heat and stir in gelatin, making sure to make as little amount of froth as possible.

4. Allow to cool slightly, then remove vanilla bean and pour the milk into 4 small ramekins that have been placed on a tray. Place tray into the fridge making sure that the tray remains level. Allow to refrigerate for at least 4 hours.

To serve, place individual ramekin into a bowl of hot water (not boiling) an allow the outside of the ramekin to warm for a minute or two. Invert ramekin onto a serving dish and tap sharply until pudding transfers to plate.
 
Lastly, just for a bit of fun I poured some of the pudding into a tiny milk bottle, just for a laugh. But it was so damn cute I couldnt bring myself to eat it, until all the other puddings were gone, and then it was bye bye time for the cute one.

milk pudding in a milk bottle

May 13, 2009

The Results - Arroz Con Pulpo (Octopus Paella)

octopus paella
First of all I feel like I need to apologize for the delay in posting the results to this recipe. I had cooked it for mothers day and planned to do all the post-cooking posting on Monday night.....but....I became an auntie! My sister-in-law got a very nice late mothers day present and I now have a tiny little niece call Sasha Belle. She's cute and at only a couple days old already taking up a whole heap of my time. So please forgive me, but if you want to blame someone, blame 4 day old Sasha! hehehe

So onto the results. I'm pleased to say that it turned out ok. I was really worried about it and thought that I would do a poor job. The rice was nice and fluffy, yay! and the octopus was extremely tender. I highly recommend cooking octopus this way. It was so tender, so much so that it withstood refrigeration and then microwaving the next day, and it was still as tender as when it first come out of the pan.

I did find it a bit bland though. I thought it needed a bit of a kick, maybe a little chilli, or maybe some smoked paprika so it could make up for the lack of other ingredients. I must say though, the next day it tasted a thousand times better. The flavours seemed to develop and become a bit more pronounced and in the end I thoroughly enjoyed it. 

So here are some photos.....

sofrito before cooking down
All the ingredients in to be cooked down for the sofrito

***
I'm so glad that I choose to cook the chicken to make the sofrito, it made it so extremely tasty. I had a little left over so on the next night I cooked some pasta and tossed the remaning sofrito into the pasta with a little olive oil. Gosh it was delicious. I will cook it again just to make this pasta dish.

octopus cooking
Octopus cooking

***
The stock that the octopus made turned such a brilliant pink colour, almost violet. Once the rice was cooked in the stock, it turned it a pale grapefruit colour. Very pleasing to the eye.

sofrito in pan
Sofrito in the pan

***

rice in the pan
Rice added and tossed to cook individual rice grains with sofrito

***

stock in
Followed by the stock

***

octopus in
A few minutes later the rice has fluffed up and the octopus slices are arranged around the pan

***

parsely and paprika please
Lastly, the parsely and paprika is scattered around the pan and its almost ready to be served

***
There is one thing that I got completly wrong though. My socorat (crust) turned out more burnt than crusty. But if I had taken the rice off the heat any sooner it would have been undercooked and possibly unplesant. Luckily the burnt socorat did not ruin the taste of the paella. 

socorat gone wrong
Burnt socorat

***
I may not cooked this dish again, but I will deffinately cook my octopus in this way in the future. Everyone should try it, it will completely change your mind on what tender octopus is.

May 9, 2009

Arroz Con Pulpo (Octopus Paella)

Restaurant: MoVida (Victoria)

Recipe from Chef Frank Camorra

2009 Rating: Number 63, 1 Star

Its been a while since I've cooked something from the top 100 list, so I thought I should really stop being slack and cook something delicious. Earlier this week, while having a relaxed morning tea and doing some light reading, I came across a MoVida recipe in Melbourne Living Magazine. It was one of the recipes from the MoVida book, which I've been meaning to get my hands on. I quickly photocopied the precious page and have decided that this will be the dish I will cook for mothers day.

So here's the recipe

Serves 4-6

INGREDIENTS

1 kg octopus tentacles (about 2 or 3 tentacles), frozen, thawed and drained (see note)
60mL olive oil
2 garlic cloves, finely chopped
250g sofrito
400g Calasparra rice (see note)
1 handful flat leaf parsley, chopped
1 tablespoon Spanish sweet paprika
sea salt flakes to sprinkle

METHOD

1. To cook the octopus, bring a large saucepan of unsalted water to the boil. Meanwhile, rinse octopus under sold running water. When the water is rapidly boiling, plunge the octopus in for 15 seconds then remove. Allow the water to boil again then repeat the process four times, allowing the water to reach the boil again between each plunge. After the last plunge reduce the heat and leave octopus on a very low, slow simmer for 30-40 minutes. The octopus should be tender and the outside pink layer still intact. Carefully remove the octopus from the water, allow to cool, drain and cut into 1cm slices.

2. Reserve approximately 1 litre of the octopus stock over low heat, as it will be used to make the paella.

3. Heat the olive oil in a 34cm paella pan or large, deep, heavy-based frying pan over medium heat. Saute the garlic for 30 seconds then add the sofrito and cook for a further minutes. Reduce the heat to low-medium.

4. Add the rice and mix to coat the rice with the sauce, cook for 2 minutes, or until the rice just starts to become translucent.

5. Gradually stir in the reserved octopus stock and increase the heat to medium. From this point onwards, do not stir the paella, as the socorat (crust) needs to form on the bottom of the pan. If the Flame or element doesn't cover the base of the pan, move the pan around during cooking to allow the paella to cook evenly

6. Cook for 10 minutes or until the rice has swollen just a little. Reduce the heat to low - medium and arrange the octopus slices around the top of the paella. Sprinkle with parsley and paprika.

7. Cook for a further 10 minutes the increase the heat to high for 1 minute to form a crust on the bottom of the pan.

8. Remove from the heat, cover with a clean tea towel and allow to rest. Sprinkle with sea salt flakes and serve warm.

Note. During freezing, the ice crystals break apart the cell walls and this makes the octopus more tender. Calasparra rice is grown in the village of the same name in the Murcia region of Spain. The plump, round grain absorbs three times its quantity in liquid, but it is not creamy so the grains remain firm.

After I read over the recipe I realised that there was no recipe included for the sofrito. I'm sure that there would be a recipe in the book, but not right here in front of me now. So I did a bit of scouring around. I wanted to remain as close to a MoVida creation as possible so I found another recipe on Gourmet Traveller by Frank himself. Oh good old Gourmet Traveller.

SOFRITO (From Movida recipe for Rice with chicken and runner beans (Arroz de perol) which appeared on the Gourmet Traveller website

Cooking Time
Prep time 15 mins,
cook 45 mins

INGREDIENTS
1.6 kg chicken or rabbit, cut into 12 pieces
80 ml (1/3 cup) olive oil
onions, finely chopped
1 red capsicum, finely chopped
1 green capsicum, finely chopped
5 tomatoes, peeled and finely chopped

METHOD

1. Thoroughly season chicken or rabbit pieces with fine sea salt and freshly ground black pepper.
2. Heat olive oil in a perol (see note) or large heavy-based casserole, add chicken pieces and brown for 4 minutes on each side, then remove and cover with foil. Add onion to perol and cook for 10 minutes or until soft but not coloured, then add capsicum and cook for 10 minutes or until soft. Add tomato and cook for another 15 minutes. (This is called sofrito; cooking it slowly and gently for a long time intensifies the flavour and is the key to all good Spanish rice dishes.)

NOTE: A perol is a traditional Spanish pan with deep sides and rounded edges, available from Spanish delicatessens and specialist cookware stores.

Fingers crossed everything turns out well and hopefully mum will love it, stay tuned for the Results!

May 7, 2009

Random Post

On a recent trip to the Yarra Valley I came across this in a Yarra Glen antique shop....

butter churner

I found it extremely funny to see it in a shop after I had read Jess's post on making home made butter on That Jess Ho by using the old cream in a jar trick. And then read George's from Culinary Adventures of a Kitchen Godess butter making method using the more modern Kitchen aid. I found it amusing that I had only just read two different takes on making home made butter and then happened to come across this churner in a jar. It was kinda quaint and cute, but there was nothing cute about the price.....$62.50. I think I can buy a couple of slabs of butter from the supermarket with that kinda money.

While on the same trip, we stopped in at Domain Chandon, for some much needed injection of bubbles. After have a few glasses we decided to take a bit of a walk around the gardens, and low and behold we found a giant champagne cork!

massive cork

Now, I don't think I have yet confessed my dorky addiction on this blog yet.....but.....I am completely obsessed by two things, food and.....BIG THINGS! And I don't mean things that are of a particular large size, like elephants, I mean Big Australian Tourist Attractions. I do two things when travelling Australia, seek out good food and produce, and find any big things I can get my hands on. So when I saw this huge cork, despite the fact that it is NOT an official big thing, I was still extremely excited.

After the fun and frivolities of the Big Cork, the bubbles started to go to my head so I decided to take a seat. And what a view I had!

yarra valley

May 3, 2009

The Pleasure Dome

Cocoa Patisserie
167 High Street, Kew

Pleasure dome

The title of this post is very fitting. I often get distracted by the tittle of dishes and there was no exception when one day I walked into Cocoa Patisserie and saw the Pleasure Dome. The first time I purchased it, it was from sheer novelty. It was such a good looking cake that I just HAD to have it. I knew it was a chocolate mousse cake but I had no idea how the thing was constructed. I had taken it into work for a colleague's birthday, and for hours before actually cutting it open there was heated discussion as to the internal make up of the "dome". I had suggested that it consisted of a cake shell and then filled with mousse. Oh how wrong I was. It was much more complex than this. In actual fact it is many layers of cake followed by mousse and then covered in chocolate ganache, with ganache piping, chocolate flowers and juicy blueberries. 

Deconstructed pleasure dome

Recently I purchased it again for my brothers birthday. This time I decided to go for the coffee Pleasure Dome. The flavour of coffee is definitely there. When you think of mousse cakes, you think of something that is light and airy, in fact this cake is extremely dense and rich. It should only be eaten with a tall glass of icy milk.....well thay's how I like it.

I really like Cocoa. I try to buy most cakes from there, but so far they have all proven to be extremely rich, this isn't a problem so much if you take it into account when giving out portions, portion size is always important......the bigger the better I say! 

pleasure dome cut up

Even though they stock a healthy range of small pastry's and biscuits, I had never tried anything else they have on offer. So when we stopped by to purchase the Pleasure Dome we decided to indulge ourselves. I had a polenta, lemon and almond cake, and Daz had an apricot danish (which is extremely boring, he always buys apricot danish's). My polenta cake was beautiful. Polenta cakes have a tendency to be very heavy and a little bland, but they had soaked it in a thick lemon syrup, which made it moist and tasty. I thoroughly enjoyed it, a great way to start the day. Daz also enjoyed his danish, he especially enjoyed the thick vanilla custard that the apricots were sitting on.  

Polenta lemon and almond cake

apricot danish

At the moment Cocoa only has the one store in Kew, but I think this might quickly change when everyone discovers the awesomeness of this place. Laurent has 13 stores in Melbourne and I think Cocoa's is much better. All you have to do is walk past their window fronts to be instantly lured within.

Cocoa window front

Its been almost 2 weeks since my last visit, I think I will have to go back soon, I'm starting to get withdrawal symptoms!