Showing posts with label Other. Show all posts

March 8, 2011

Peanut butter Chocolate Fondants

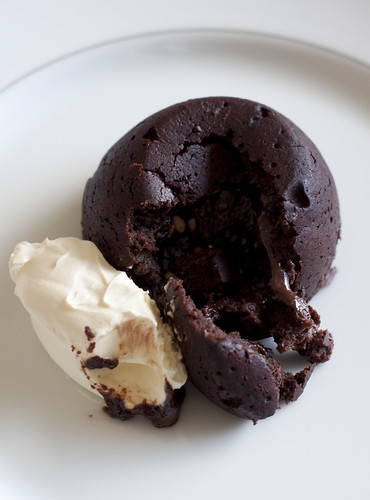
inside fondant

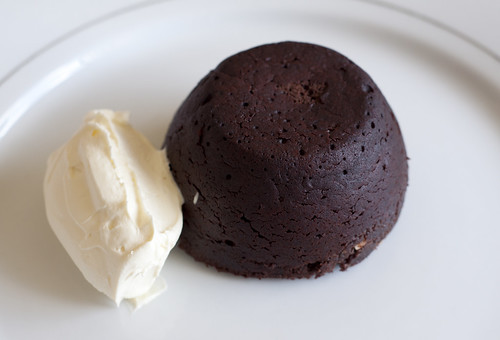
Who doesn't love chocolate? Everybody loves chocolate!! Do you know whats better than chocolate? Chocolate with peanut butter! Since we've been having some cold weather of late, oh summer how I wish that you hadn't stood me up, I had a craving for something sweet, hot and rich. So naturally I turned to the good old chocolate fondant. But the plain old chocolate fondant just wasn't doing it for me anymore, so I decided to make it a little more interesting by adding a little peanut butter to the centers so when you dig in a volcano of peanut butter spurts out of the middle. My grand visions certainly didn't turn out that way, but it was pretty satisfying nonetheless.


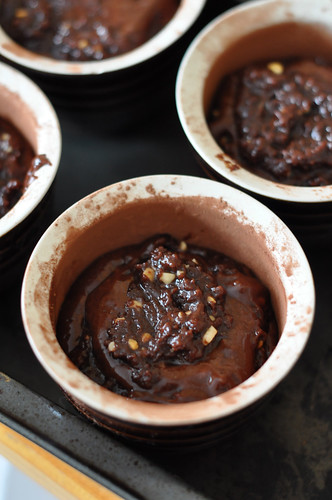
raw Peanutbutter chocolate fondants

To make the peanut butter center, I keep aside a little of the chocolate mixture and then add a generous amount of peanut butter to that. Then I put the peanut butter/chocolate mixture into the middle of the 2/3 filled ramekins. The peanut butter changes the consistency of the chocolate batter, instead of ending up with a very fluid lava like center the peanut butter makes it all a bit thick. So the centers stay soft and gooey, but not as runny as I would like. I think it needs a bit of tweaking. Anyway here is the recipe and a video to tease you with.


Peanut butter Chocolate Fondants

INGREDIENTS
Makes 4

100g good quailty dark chocolate
100g unsalted butter
2 eggs
2 egg yolks
50g castor sugar
30g plain flour
2 tbsp crunchy peanut butter
extra butter and cocoa powder

METHOD

Preheat oven to 180C

In a double boiler, melt together the chocolate and butter, set aside and allow to cool slightly. In a separate bowl whisk together the eggs, yolks and castor sugar until light and fluffly roughly 2-3 minutes on medium speed.

Combine the chocolate into the eggs, then fold through the flour. Using 1 cup capacity ramekins, grease the outside with a little butter, then dust the grease with some cocoa powder, this will prevent the batter from sticking. Spoon the mixture into the ramekins, about 2/3 of the way full. Add the peanut butter to the remaining chocolate mixture, mix until just combined. Divide this evenly into the 4 ramekins, making sure to get the peanut butter mixture as close to the center of the ramekin as possible.

Bake for 12 minutes at 180C

The mixture can be made ahead of time and kept in the fridge in the ramekins, when baking adjust the cooking time by 2-3 minutes to compensate for the cold mixture.

Peanutbutter chocolate fondants

February 11, 2011

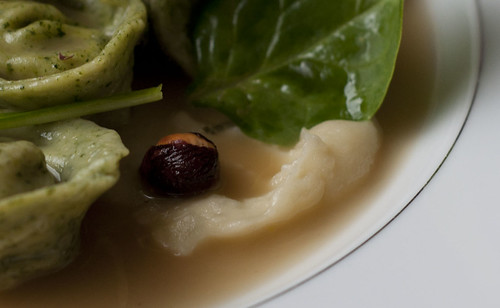
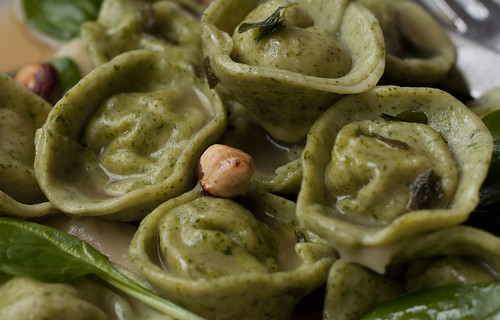
Rabbit tortellini, Jerusalem artichoke Puree and Rabbit Broth

rabbit tortellini2

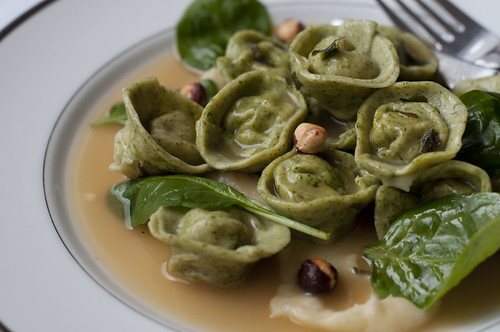
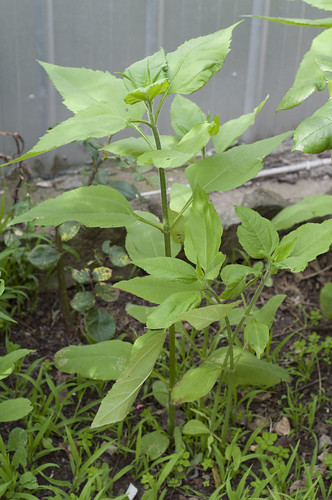
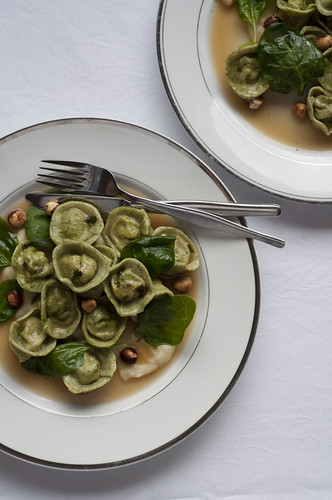
To be honest, I made this recipe a little while ago. After eating at Sarti I was inspired by the flavours in their rabbit tortellini with Jerusalem artichoke puree, so of course me being me I decided to recreate the dish. I actually made the dish back when Jerusalem artichokes were in season. They grow in my garden and at the moment the plant is well above my head ready to burst out into its floral prettiness. Anyway back to the dish, since its Chinese new year and it’s the year of the rabbit, I thought what better time to post this recipe than now.

jerusalem articoke plant

Jerusalem Artichoke plant

I love all the flavours in this dish, the nuttiness from the hazelnuts, the richness from the broth and the subtle gamy flavour from the rabbit all work so fantastically together. I’m actually very proud of my effort, and without tooting my horn too loudly I actually think my dish turned out better than the one I had at Sarti.

rabbit tortellini


The whole recipe is pretty straight forward, the only difficult part is folding the pasta so it looks pretty, I’m getting better but by no means am I perfect yet. As a kid, my mum never had the patience to fold all her tortellini properly, they were usually plain half moon shaped so I’ve had to learn the art of tortellini making as an adult. The other piece of advice I would offer is to really invest some time and effort into producing a good quality rabbit stock, it’s really the star of the dish and any hard work put in the preparing stage will pay off when it comes to the eating. So without any further delay, here is the recipe.

jerusalem articoke puree


Rabbit Tortellini Filling
INGREDIENTS

1 medium sized rabbit
2 egg whites
2 small golden shallots, peeled cut in half
2 cloves garlic, peeled cut in half
2 tablespoons of double cream
Salt and pepper

METHOD

1. Debone the rabbit, make sure to remove as much meat from the rabbit as possible. Set the bones aside, you will need these to prepare the rabbit stock.

2. Roughly cut the rabbit meat into small pieces and place in a food processor. Pulse the meat until it has been roughly chopped by the food processor, this step helps to get the whole process underway.

3. Add the shallots and garlic and processor further. Then add the eggwhites and cream, not forgetting to season well with salt and pepper, process the mixture until you get the consistency of sausage meat. Once this is achieve place in the fridge until needed.

Rabbit Broth
This can be flavoured any way you want. If you like it plain it can be just the rabbit bones and some simple white wine, if you like it herb infused you can go mad with plenty of different herbs. I’ll give you the ingredients that I used which resulted in a subtle but rich flavour.

INGREIDENTS

1 rabbit carcass (left over from rabbit tortellini filling)
4 golden shallots
4-5 garlic cloves
100mL dry white wine
2 bay leaves
4-5 large sage leaves
10 whole black peppercorns
1 tablespoon butter
Olive oil

METHOD

1. In a large stock pot add a splash of oil olive and heat over medium heat. Add the rabbit bones and sear until the rabbit bones and any meat left on them turn a deep golden colour. This is a very key step, a big portion of your flavour will come from the browning of the bones, so take your time here. Don’t do it too fast because you’ll just burn your bones and add a bitter flavour, however a nice golden colour will add a caramelised flavour.

2. Add the shallot and garlic to the pan and cook until fragrant, 1-2 minutes. Add the white wine to deglaze the pan. Cook until the alcohol in the wine has evaporated, 2-3 minutes. Add the bay leaves, sage leaves, pepper corns and enough cold water to cover the bones, and a little salt to season. Allow the water to come to a simmer and leave it to gently simmer for at least 45 minutes. The longer the better.

3. Allow the broth to reduce down to a ¼. Once at this stage strain the bones and transfer the broth to a small clean saucepan. Add the butter, check the seasoning – adjust if necessary and set aside until needed. Before serving, reheat the broth.

Jerusalem Artichoke Purée
INGREIDENTS
500g Jerusalem artichokes, peeled
500ml whole milk
30g butter
One small potato, peeled
1-2 tbsp double cream

METHOD
1. Cut the Jerusalem artichokes into pieces along with the potato, ensure that all the pieces are roughly the same size so that they cooked evenly. Place in a pan with the milk. Bring the milk to a simmer and cook the artichokes for about 20 minutes, stirring occasionally, until they are very soft.
2. Remove the artichokes and potato from the milk, do not discard the milk as it may be required later. Place the artichokes and potato in a food processor bowl.
3. Add the butter and process until a puree is achieved, you may need to add some of the reserved milk to achieve the right consistency. At this point you may be left with a few lumps in you puree, to remove the lumps pass the puree through a fine sieve. Transfer the puree to a pan and add the cream and season well with salt and pepper. Set aside for later, before serving re-heat puree.

Spinach Pasta with Semolina Flour

INGREDIENTS

1/4 cup very finely ground semolina flour
3/4 cup plain flour
2 egg yolks (room temperature)
3/4 teaspoon salt
1 tablespoon olive oil
2 cups of spinach leaves

METHOD
1. Remove stems from spinach leaves and blanch in boiling water for 2 minutes. Remove from water and rinse in cold water to quickly cool the spinach. Squeeze as much water out of the spinach leaves as possible. In a blender or food processor, blitz spinach to get a smooth puree.

2. In a food processor, combine the egg yolks and spinach puree and mix until combined, this will only take a few seconds

3. Add the remaining ingredients and pulse until a firm dough is formed. If the mixture seems a little dry then add a few drops of lukewarm water until the mixture comes together.

4. Turn out onto a lightly floured surface and knead the dough for a few minutes, just to make sure that everything is incorporated evenly. Wrap the dough in some glad wrap and Put aside to rest for 10-20minutes.

5. After resting, roll the pasta out thinly and put together the rabbit tortellini. Since I always have trouble with my tortellini (sometimes they get a little soggy before I get them into the boiling water) I give my self a little insurance. As I make the tortellini, I place them on a freezer tray and snap freeze them. That way they stay exactly as I made them and are easier to handle come cooking time. This also means I can make my pasta well in advance. Just make sure to adjust your cooking time according to the state of your tortellini.

6. Cook tortellini in boiling salted water until the pasta is al dente. I won’t give a cooking time because it depends on too many factors, thickness of your pasta, the temperature of your tortellini, the quantity of tortellini that go into the pan and so on. The best way to judge is to taste test, always an excuse for a sneaky nibble right?
Plating
To garnish -

A few spinach leaves
A few roasted hazelnuts
Place a big tablespoon of puree on the plate. Add a few of the tortellini and sprinkle the spinach and hazelnuts on top. Spoon a few tablespoons of the broth over the entire dish and enjoy.

rabbit tortellini4


February 1, 2011

Josie Bones. Meat + Beer = Full

Josie Bones
98 Smith Street
Collingwood
03 9417 1878

naked rabbit

Look! Its a naked rabbit *giggles*

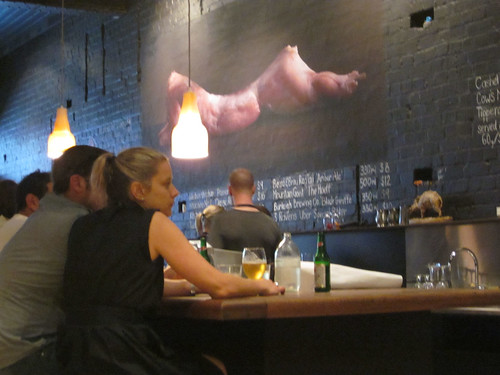
When Conor from Hold the beef was in town recently to watch a furry little yellow ball getting smashed across a tennis court, Agnes from Off the Spork suggested Josie Bones for a catch up, I was more than willing to join in on the meat and beer fest. If you’re not familiar with Josie bones, thats ok – neither was I. It was only on the morning of the planned dinner that I realised that Josie Bones is actually run and owned by the guy who came third on the first season of masterchef, that's Chris Badenoch and Julia Jenkins from the same show. Josie Bones open in the last quarter of 2010 and it looks like they are doing a roaring trade. That aside, I was totally intrigued by the notion of a speciality beer place that serves small plates of mostly meat inspired dishes, sounds like its completely up my alley. To all my vegetarian friends, I love spinach but I’m sorry meat is what makes me tick.

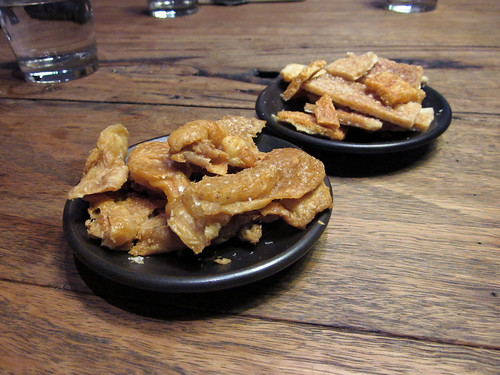
At the time, the weather in Melbourne was a little on the fresh side. Now that the temperature has really ramped up, it would be a great spot to get some friends together – have some crackling of the day and slowly make your way through the long list of local and imported beers. And when I say long, I mean LONG. But back to the crackling of the day, that was GOOD! We ended up with chicken crackling and pork crackling. My preference was the chicken crackling. Slightly on the salty side and really packed a crunch. The pork crackling was almost teeth shattering. A great way to get the stomach juices flowing. Although by the end of it, I wondered where they got all the chicken skin from. There was a distinct lack of chicken on the menu. I envisioned a flock of naked chickens roaming the country side getting seriously sunburnt.

crackling of the day


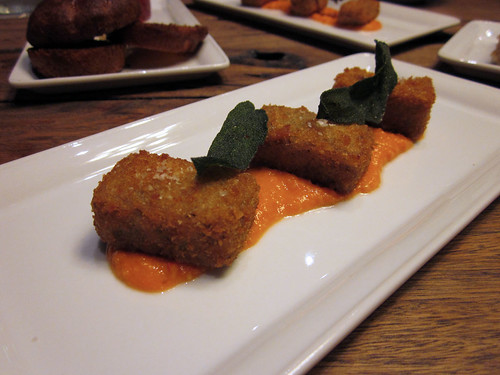
We ordered a variety of dishes to share amongst us. We’ll start with the trotter fritters and romesco sauce. They were really crunchy on the outside with a soft juicy pork center. They were darn good until I got to the other end of my trotter square. One side had loads of soft meat and chopped up skin, while the other end was a big chunk of pork skin. Slightly disappointing, but sometimes these things happen. I was the unfortunate one to cop it.

pigs trotters


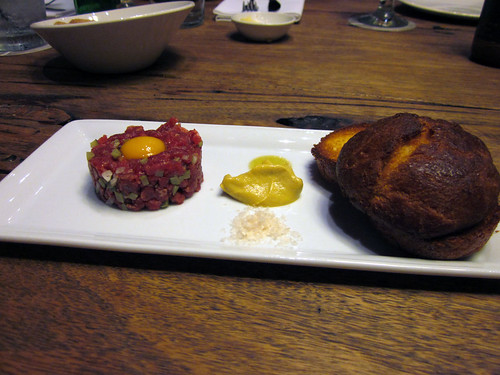
Next we had the lamb tartare, radish and mint and wheat beer brioche. This was a first for me, I had never eaten raw lamb before, so wasn’t exactly sure what to expect. I imagined a fatty mutton tasting hunk of meat that would be really chewy, luckily this wasn’t the case. The lamb was really lean and tender. The cute quail egg sitting ontop added an element of lusciousness, just like a good traditional tartare. I threw a good smothering of mustard on my portion, and I thoroughly enjoyed it.

lamb tartare


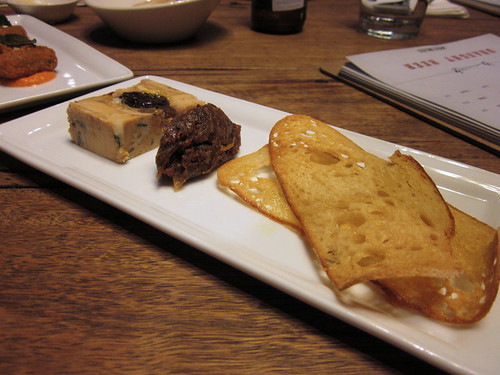
Hmmm, this is a blogger fail so bear with me. We order a special which was rabbit terrine with prunes soaked in some alcohol (which I cant remember) along with...I think...onion jam. I’m sure someone will correct me. I really liked this dish, the rabbit was really moist and the whole terrine was light on gelatine. Daz hates gelatinous dishes, so this was a hit for him too.

rabbit terrine


So far have you noticed the distinct lack of vegetable matter? Well to counter act the protein overload we ordered Baby Nicola potato salad. It was creamy and a pretty decent potato salad. It served its purpose to introduce some fibre into our meal, well the small amount of fibre that resided in the skin of the potatoes.

potato salad


Next we had octopus and bone marrow cigar with green mango salad. I’m not going to lie, I’ll give it to you straight. This was HORRIBLE! I wanted to love it...I really did. I love bone marrow and the whole notion of it being paired with octopus sent me into imagination overdrive, but sadly the reality of the taste bought me crashing back down. It was just a fishy oily mess, I think that is enough said.

octopus and bone marrow cigars


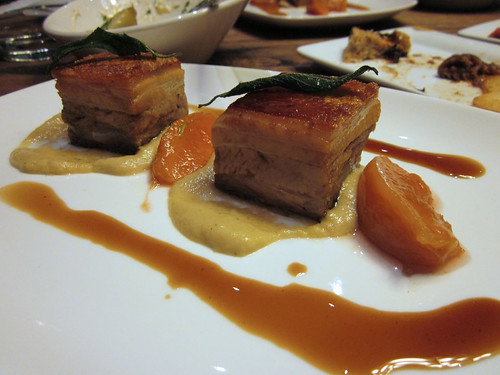
Thankfully the second special we ordered saved the day. Pork belly with pickled peach and a creamy puree of some description (Help anyone??). This was good. If I see pork belly on a menu, I more than likely to order it. The skin was crispy and the pork had just enough of fat to make it juicy and moist. I enjoyed the pickled peach with the pork and I’m definitely going to steal that idea for myself.

pork belly


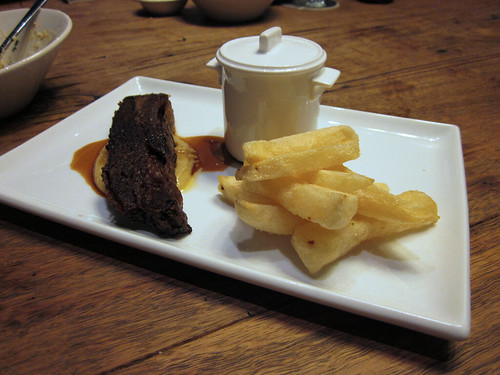
Last we had Grain feed beef meat, thrice cooked chips and horseradish hollandaise. When I saw this on the menu I had flash back to the thrice cooked chips I had at the botanical. Sadly, to me, these didn’t stack up. They were nowhere near crispy enough for chips that have been cooked three times. You can tell from their pale appearance that they weren’t going to be quite right. Dont get me wrong I still enjoyed them, but it was a little bit of a let down. What was the most interesting moment was that Conor actually had some of the beef....shocking huh?

beef and thrice cooked chips


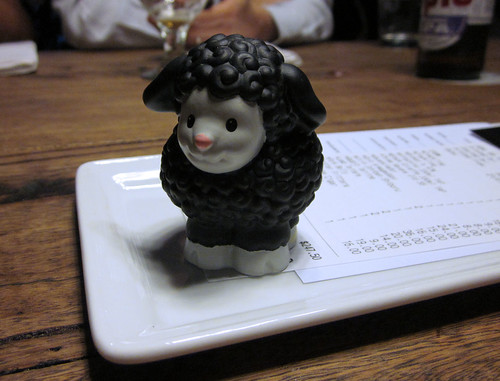
What I will say about Josie bones is that it has exceptional service. The staff are all so friendly and extremely willing to help on food, wine or beer selection. It was a great way to put you in a seriously good mood, so some how the beer tasted that much better. After we gorged ourselves on meat from a variety of animals, we braved the walked to Cutler and Co in an attempt to score a spot for some dessert. We failed. We ended up at the crepe place across the road, which seems to be fast becoming my backup dessert destination. Everyone has one right? Check out the uber cuteness of our bill patron....bahhh

small sheep

Josie Bones on Urbanspoon

September 8, 2010

Beer Doughnuts

beer doughnuts


Donuts or doughnuts? Who cares!! These ones have beer in them!! As a treat recently Daz and I trekked out to Healesville to visit the White Rabbit Brewery. There are two things that I really like about White rabbit beer. Firstly the White ale is one of my favs, very subtle, low on the bitterness and sweetend with honey....isnt everything better sweetened with honey? Secondly they have a very cute white rabbit on the logo, I base my drinking habbits on very important aspects.

white rabbit white ale


white rabbit
These are some rabbits that I dont mind running over with my car.

After purchasing way too much beer for two people to consume, I contemplated using the beer to prepare a recipe. But what recipe? Beer Chicken....too cliché, beer battered fish....I’ll let the fish swim for another day. Then I channelled Homer Simpson and realised that Beer Doughnuts were the only way to go. As soon as I mentioned the idea to Daz, his eyes lit up...... “beer and doughnuts? But its not my birthday”. I did a quick Google search (where were we before the “don’t be evil” Google?) and came across this recipe.

white rabbit2
Oh look, they've multiplied!!

white rabbit3
Quick cross the road now while I distract this drive with my bare leg

What really appealed to me about this recipe is that the doughnuts are actually baked rather than deep fried, so in fact they are a healthier choice when doughnuts are concerned. So of course I made a couple of changes to the recipe, I can’t help it, I must always tinker with things. Once I made the batter it quickly became fluffy. I’ve never smelt the combination of nutmeg and beer before, and oddly I found it very appetizing, it instantly made me hungry! I half filled my pan and shove it in the oven. I followed the recipe and took them out before they began to colour.

beer doughnuts2


They tasted pretty darn good, a tiny hint of yeasty beer and loads of nutmeg. They were really fluffy, with massive air pockets in the dough, in fact they were more cake like rather than doughnutty. I thought they really lacked the deep golden outer crust and I’m sad to admit I missed the greasy after taste you get from eating a regular doughnut.

beer doughnuts inside


I had some batter left over, so I made the decision to throw away my initial intentions to make a healthier doughnut and committed to deep frying the rest of the batter, I’ve always been the fickle type. First doughnut, disaster!! The batter was way too runny, it managed to turn into a fat pancake sucking up loads of the oil! Solution....I added a whole heap of flour to the rest of the batter. Heck, I didn’t have enough to make another oven baked doughnut so I might as well be a big kid and play with goop. Surprisingly, they turned out really well. They fluffed up exactly the same way as the oven baked doughnuts - resulting in crater sized air pockets. However, they still managed to soak up a lot of the oil. I would much prefer the oven baked version. Next time I’ll just let them cook for a lot longer and actually become golden brown. Screw you recipe, I will not listen to you!!

fried beer doughnuts


Beer Doughnuts (My tinkered version)
Prep time : 30 minutes
Makes 9 Doughnuts

Ingredients:

1 cup plain flour
1/2 cup castor sugar
1 teaspoon baking powder
1/4 teaspoon ground nutmeg (fresh ground is best)
1/4 teaspoon salt
60 mL buttermilk (at room temperature)
2 large eggs (at room temperature)
90 mL amber ale
4 tablespoons melted butter, cooled

Method:

1. Preheat oven to 170C. Grease a doughnut pan with a generous amount of butter.

2. Melt butter and let cool. Sift all dry ingredients together into large mixing bowl. In a separate bowl, whisk together eggs, melted butter and beer until well-blended. Pour the liquid blend into the dry ingredients all at once, and mix just until blended (do not overmix, or the doughnuts will be tough).

doughnut batter


3. Fill each doughnut form half full. Bake in the preheated oven in the middle rack for 9-12 minutes. The doughnuts should not be browned on top. Remove pan from oven, let cool for a minute, remove from pan and roll in castor sugar.

doughnut batter in doughnut pan


July 25, 2010

Bastille Day 2010

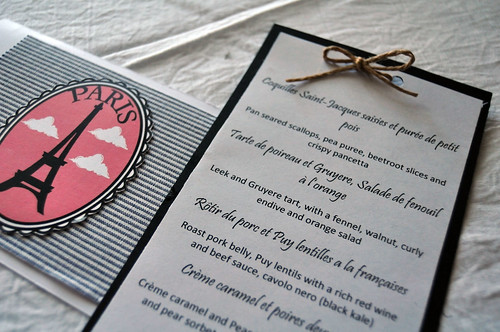
french party menu


Every year I host a French Party in celebration of Bastille Day, and this year was no different. Loads of French inspired food, and a few corny French accents to boot. It usually involves alot of preparation, followed by even more drinking, which usually ends in a massive hangover. I’m proud to report that 2010 was no different to any other year....except this year I let Daz help with the dishing process. He did an awesome job at handing out the plates to everyone, but when I asked him to help with the actual food to plate process he didn’t quite listen to me as closely as I had hoped, so some of the dishes looked a bit wonky. Not to worry, they tasted pretty darn fine in the end.
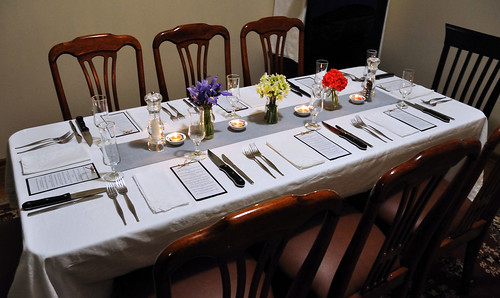
tale setting french party


Since this may possibly be the longest post I’ve ever written, I’ll keep my intro short. I prepared a 4 course meal with petite fours to end. I’ll explain the dish with the recipe to follow straight afterwards.

scallops


First we had Coquilles Saint-Jacques saisies et purée de petit pois (Pan seared scallops, pea puree, beetroot slices and crispy pancetta). I had a little issue with presentation on this one. I trial the dish 2 times before hand and each time the presentation was different. In the end I went with simply stacked together. In this photo you can’t quite see the pea puree in the background and the crispy pancetta.

PAN SEARED SCALLOPS WITH PEA PUREE

INGREDIENTS

Serves 8 entree size portions
16 scallops
200 gram baby peas
2 cloves garlic, finely diced
3 shallots, finely diced
1 tbsp cream
1 tsp butter
4 thick slices of pancetta
1 beetroot
1 Star anise
1 cinnamon quill
2 tbsp white vinegar
2 tbsp white sugar
Olive oil

METHOD

1. Start by poaching the beetroot. In a small pot place the beetroot, star anise, cinnamon quill, sugar and vinegar and fill with enough cold water to just cover the beetroot. Place over medium heat and simmer until the beetroot is tender. Cool under running water. Gently peel the beetroot and thinly slice it.

2. To make the pea puree, boil the peas in some salted water until the peas are just cooked. Drain and keep to a side. In a frying pan melt butter and sauté garlic and shallots. Add peas and then transfer to a food processor. Add the cream and process until a smooth puree forms. You may need to add a little more cream to achieve the right consistency. Season with salt and pepper to taste.

3. For crispy pancetta, preheat oven to 180C. Slice pancetta into small triangles and place on a baking paper lined tray. Cook in the oven until the pancetta is crispy. 10-15 minutes. Remove form tray and drain on a paper towel.

4. For scallops, season the scallops with salt and pepper, drizzle a little olive oil over the scallops – just enough to coat the scallops. Heat a frying pan until very hot, then add the scallops. A very hot pan is important to get nice caramelisation on the surface of the scallop without overcooking it. Cook for 1 minutes or so on each side, depending on the size of the scallop.

To assemble dish, on a small plate place a quenelle of pea puree, then in front place one scallop followed by a slice of beetroot and then another scallop. Place a piece of pancetta to the side of the scallop.
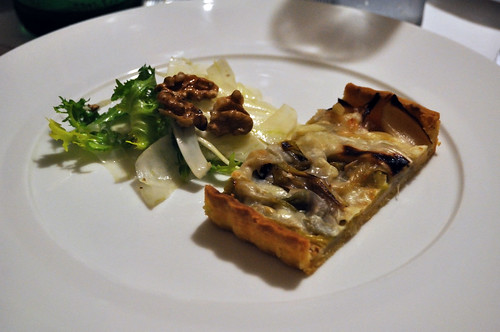
leek and gruyere tart


Next we had Tarte de poireau et Gruyere, Salade de fenouil à l’orange (Leek and Gruyere tart, with a fennel, walnut, curly endive and orange salad). To make my life alot easier I served this course cold. Except I think it would have tasted a little better slightly warmed, just so the cheese was a little softer. Despite my criticism, this was one of my favourite dishes or the night. My pastry was so crumbly and short I was really impressed with myself. There were 3 portions of this tart left over. Daz made short work of them and polished them off while I was preparing for the next course. At least he helped with the shortage on bench space!

LEEK AND GRUYERE TART, FENNEL AND WALNUT SALAD

INGREDIENTS

For Shortcrust pastry (From Gourmet Traveller)

250 gm (2/3 cups) plain flour
190 gm unsalted butter, coarsely chopped, chilled
1 egg yolk

For Tart

3 medium sized leeks
50 grams Gruyere, grated
50 grams Parmesan, grated
20 grams butter
2 shortcrust lined tart tins, blind baked

For Fennel and Walnut salad

1 fennel bulb, thinly shaved
50 gram walnuts, shelled roasted and roughly chopped
Juice of 1 orange
Yellow leaves of 1 bunch of curly endive
Oliver oil
Salt and pepper

METHOD

For Short crust Pastry
Cooking Time Prep time 10 mins, cook 25 mins (plus chilling, resting)
Makes 2 x 12 cm rectangular tarts

1. Process flour, butter and a pinch of salt in a food processor until fine crumbs form.

2. Add egg yolk and enough chilled water (about 3-4 tsp) and process until mixture just forms a dough (2-4 seconds).

3. Turn pastry onto a floured surface and lightly knead with the heel of your hand until the pastry comes together.

4. Form pastry into a disc, wrap in plastic wrap and refrigerate until chilled (2-3 hours).

5. Roll pastry, using a rolling pin, on a lightly floured surface to 3mm thick.

6. Brush excess flour from pastry with a pastry brush, then use pastry cutters to cut lining for individual cases or roll pastry backwards over rolling pin to lift pastry and line large tart case. Refrigerate for 30 minutes to rest.

7. Preheat oven to 200C. Blind bake pastry until golden (15-25 minutes), then cool on a wire rack.

For Tart

1. Preheat oven to 170C.

2. Slice leeks into long batons, making sure to only use the white flesh of the leek. In a small frying pan, melt butter over medium heat. Add the leeks and cook until leeks have completely softened. Approximately 10 minutes. Season to taste with salt and pepper.

3. Sprinkle the parmesan over the base of the two blind baked tart shells. Layer the leeks over the cheese. Sprinkle the Gruyere cheese over the leeks. Place in the oven and bake for 20 minutes, or until the cheese has become golden.

4. Remove from the oven and leave in the tin for 5 minutes. Then remove from the tin and allow to cool on a cooling rack. This will ensure that the pastry will not sweat and that it will be very crisp and crumbly.

For Fennel and Walnut Salad

1. In a large bowl add, walnuts, fennel, endive. In a separate small bowl add orange juice, olive oil and salt and pepper. Add enough olive oil/orange juice to get a nice vinaigrette. Add to the fennel/ endive and toast until all components are covered in the dressing.

To assemble the dish, slice the tart into individual portions. Add to the plate with a little Salad to accompany.

roast pork


For main we had Rôtir du porc et Puy lentilles a la françaises (Roast pork belly, Puy lentils with a rich red wine and beef sauce, cavolo nero (black kale)). This dish tastes almost a life time to prepare, but I swear every last moment of it is worth the result. The pork becomes so tender with the long cooking time, especially decadent with the really crispy crackling. And the rich puy lentils are a thing to be marveled over. I actually tried to recreate the puy lentils I had a Bistro Vue, I got close – but I don’t care, my version is different but just as nice. I do have one bone to pick though. Everyone at the table got such crispy crackling, mine wasn’t quite as crispy throughout the whole piece. I didn’t need praise at the end of the meal, all I need to do is remember the lack of talking and crunching sounds coming from everyone’s smiling faces.

SLOW ROASTED PORK BELLY

Will make 8 serves
This recipe needs to be started 24 hours in advance

INGREDIENTS

2 kg pork belly
1 tbsp fennel seed
1 tbsp chilli flakes
2 tbsp rock slat
2 carrots, roughly chopped
1 garlic head cut in half
2 celery stalks, roughly chopped
2 brown onions, quartered
300 mL white wine
150 mL water

METHOD

1. Wash and thoroughly dry the pork belly. With a sharp knife cut diamond shape cuts roughly 2mm into the pork skin. In a mortar and pestle, add salt, fennel seeds and chili flakes, crush until a coarse powder is formed. Rub this mixture into the skin of the pork belly, making sure to get into the cuts on the skin. Place in the fridge over night uncovered. This process will both flavour and dry out the skin, so it will result in a super crisp pork crackling.

2. Pre-heat the oven to the highest temperature it can go. Season the flesh part of the pork with freshly ground pepper and salt. Transfer to the very hot oven and sear for roughly 1 hr. In this time, you should notice that the pork will take on a very golden colour and the crackling will begin to form.

3. Remove pork from the oven and decrease the temperature to 160C. Transfer pork to a plate and add vegetables to the roasting pan. Add the water and white wine, this will work as a humidifier for the meat while it cooks in the oven, keeping the meat moist. Return the pork to the roasting pan, placing it on top of the chopped vegetables. Wrap the outside of the pork with aluminium foil, leaving the crackling exposed.

4. Cook for 3 hours at this very low heat. At the very end, if the crackling is still not to your liking, turn the grill portion of your oven on for 5 minutes, this will crisp up the remaining moist parts of the skin. The pork will now be very tender, moist with the crackling super crispy.

CAVOLO NERO (BLACK KALE)

Serves 8 small sized portions

INGREDIENTS

2 bunches of black kale
2 tbsp olive oil
salt and pepper

METHOD

1. Rinse kale, remove the end 3 cm of the stalk. The stalk can be pretty tough and horrible to eat. Chop into 5 cm long pieces.

2. Heat a shallow frying pan and add olive oil. Throw in kale and sauté for 1-2 minutes. Add small splashed of water at a time while flipping the leaves. This will act as a steamer and slowly cook the kale. Since kale is a tougher green vegetable compared to normal cabbage, it may take a little while for it to cook. Continue to cook in this way until the steam part of the leaf has begun soften, about 5 minutes or so. Season with salt and pepper.

PUY LENTILS WITH RICH RED WIN SAUCE

Serves 8 small sized portions

INGREDIENTS

For Beef /Pork Stock, makes roughly 2 litres – this can be prepared well in advance and frozen if necessary

1 kilo beef bones
1 kilo pork bones
2 brown onions, quarters
1 garlic head, halved
2 carrots, roughly chopped
half a cup of dried mushrooms
half a bunch of fresh thyme
half a bunch of sage
2 leeks, cut into 3 pieces each
3-4 sprigs of rosemary
5-6 bay leaves
5 white pepper corns
5 black pepper corns
Olive oil

For Puy lentils

200 gram puy lentils, rinsed under cold water
1 carrot, finely diced
1 celery stalk, finely diced
1 clove of garlic, finely diced
2 shallots, finely diced
2 tbsp olive oil
1 tbsp bi-carb soda
300 mL red wine
400 mL beef/pork stock

METHOD

For Beef/Pork Stock

1. Pre-heat the over to 230C.

2. Rinse bones under cold running water. Alot of butchers cut their bones with blade saws, so it is very important to remove as much of the bone dust as possible. Place on a baking tray with onions, garlic and carrots. Add a little olive oil and mix bones and vegetables together until they are lightly covered in the oil. Place in the oven and bake until the bones have taken a deep golden colour, roughly an hour.

3. Transfer bones/vegetables to a large pot. Add a little boiling water to the roasting tray and remove as much of the baked on particles on the baking tray. The caramelized flavours of the stock will come from this process. Add the liquid to the stock pot. Add the herbs, peppercorns, leek, and mushrooms to the pot. Cover with plenty of cold water.

4. Place pot over low-medium heat, gently simmer for 6-7 hours. During the cooking process remove as much of the scum that comes to the surface as possible. Continually top the pot up with fresh cold water.

5. Once all the vegetables have almost disintegrated, and the bones have all fallen apart, strain thorough a fine sieve and place in a container. Transfer to the fridge and allow to completely cool. Roughly 2 hours. Once all the fat has settled on the top, remove and discard. The stock can now be used.

For Puy Lentils

1. Bring a large pot of water to the boil. Add the lentils and the bi-carb soda. The bi-carb soda will lock in the green and speckled colour of the lentils. Make sure not to add any salt during this cooking process, as the salt will make the lentil skin tough and unpleasant to eat. Cook the lentils until they are tender. Puy lentils remain firm after cooking, they do not become soft like other varieties of lentils. Once they are cooked, drain and keep in an bowl covered with cling wrap. This process can be done well in advance.

2. In a large frying pan over medium heat add olive oil, garlic and shallots. Saute for 2-3 minutes until the garlic/shallots have become soft. Add the carrots and celery and sauté for 2-3 minutes until they begin to soften. Add the wine and reduce by half. Add the beef/pork stock and reduce to a 1/3 of the original volume.

3. Add the lentils and lightly season with a little salt and pepper. Continue to cook until the sauce become very thick and sticky. You can wish to stop the coking process earlier and have a much thinner sauce. At the very end season to taste with salt and pepper.

To assemble dish, place a slice of pork, a little lentils and some cavolo nero on a plate
french party dessert


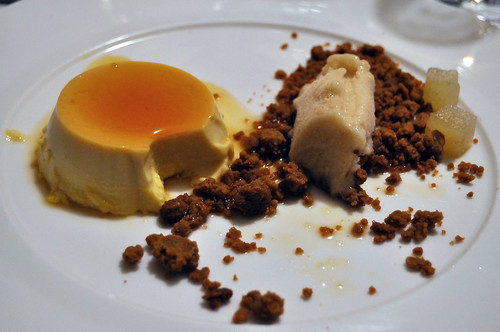
For dessert we had Crème caramel et poires deux voies (Crème caramel and Pear two ways – poached pear and pear sorbet on a burnt butter shortbread crumb). Apologies for the half eaten dessert, by this stage the wine had taken over and I forgot that I was taking photos. I had quite a bit of trouble coming up with something for dessert. I wanted something that I could prepare in advance, but still looked lovely. In the end I went we a dessert that can almost be called two desserts on one plate. The shortbread crumbs and sorbet was inspired by the awesome pear dessert we had a Cummulus Inc.

CREME CARAMEL RECIPE from Taste.com.au

Preparation Time

30 minutes
Cooking Time

60 minutes

INGREDIENTS (serves 8)

270g (1 1/4 cups) caster sugar
80ml (1/3 cup) water
375ml (1 1/2 cups) milk
250ml (1 cup) thickened cream
4 eggs
2 egg yolks
55g (1/4 cup, firmly packed) brown sugar
2 tbs golden syrup

METHOD

1. Preheat oven to 160°C. Place the caster sugar and water in a saucepan over low heat. Cook, stirring, for 2 minutes or until sugar dissolves. Increase heat to high and bring to the boil. Boil, without stirring, occasionally brushing down side of pan with a pastry brush dipped in water, for 3-4 minutes or until golden. Pour sugar mixture evenly among eight 125ml (1/2-cup) capacity ovenproof ramekins. Set aside for 5 minutes or until set.

2. Combine the milk and cream in a medium saucepan over medium heat. Bring to a simmer (do not boil). Remove from heat.

3. Place the eggs, egg yolks, brown sugar and golden syrup in a large heatproof bowl. Use a fork to whisk until well combined. Gradually whisk the milk mixture into the egg mixture. Transfer the mixture to a large jug, then carefully pour over the caramel in the ramekins.

4. Line the base of a large roasting pan with a tea towel and fold to fit. Place the ramekins on the tea towel in the roasting pan. Pour enough boiling water into the pan to reach halfway up the sides of the ramekins. Cover the roasting pan with foil. Bake in preheated oven for 40-45 minutes or until custards are just set. Remove from oven.

5. Transfer the ramekins to a baking tray and set aside for 2 hours to cool. Cover the ramekins with plastic wrap and place in the fridge for 6 hours or overnight to chill.

6. To serve, run a flat-bladed knife around the inside edge of the ramekins and carefully turn onto serving plates.

CARAMEL AND BURNT BUTTER CRUMBS

INGREDIENTS

60 grams castor sugar
100 grams butter, cut into small cubes
170 grams plain flour

METHOD

1. Make a caramel first. Add castor sugar to a small pan and add a few tablespoon of water, just enough to wet the sugar. Heat sugar over medium heat until a dark caramel develops. Make sure not to stir the sugar as it will crystallize. Brush down the sides of the pan during the cooking process with a pastry brush dipped in water, this will stop any sugar stuck to the sides from burning.

2. Add the butter and stir until the butter and caramel form something similar to a butterscotch sauce. Continue to cook until the butter and caramel take on a dark golden colour. This wont take very long at all because the sugar is already extremely hot. Remove from the heat and allow to cool slightly.

3. Add flour to the pan and stir with a wooden spoon until all ingredients are combined. Turn out onto a clean surface and gently work the dough and form a flat disc. If the butter begins to bleed out too much you can add a little extra flour to soak it up. Wrap tightly with cling film and refrigerate for an hour. Preheat oven to 170C.

4. Crumble the dough into crumbs. Chunky pieces are fine, as they will add texture. Scatter on a lined baking tray and bake for 10-15 minutes until the crumbs take on a very golden colour. Make sure to mix the crumbs once or twice during the cooking process as the crumbs on the outer edge will cook quicker.

5. Allow to cool complete and store in an airtight container. Will last about a week. These can also be frozen.

PEAR SORBET AND POACHED PEAR CUBES

Makes roughly 500mL of sorbet and 24 cubes (depending on size)

INGREDIENTS

100 g castor sugar
1 vanilla pod - cut lenthways with beans scrapped or 1 tsp vanilla paste
4 medium sized pears, peeled and cored
1/4 cup honey
150 mL water
1 cinnamon quill

METHOD

1. Place water, sugar, honey, vanilla bean and cinnamon quill into a medium sized pan. Place over low heat and slowly begin to heat.

2. Place a small ceramic bowl or plate in the freezer. This plate will be used to place the poached pear on, the coldness of the plate will quickly cool the pear after the cooking process, prevent it from cooking any longer.

3. In the mean time, cut as many equally sized cubes from the pear as possible. It doesnt matter if you get alot of thin or oddly shaped pieces of pear left over, as these will all be put in the pot to create the sorbet.

4. Poach the pear cubes in the sugar and honey mixture. The cooking time will depend on the ripeness of the pear. The pear should be soft but still firm in the center. Usually 3-5 minutes should be enough. Sample cubes during the cooking time to achieve the perfect texture. Once the cubes are cooked, place on frozen dish and place in the fridge.

5. Roughly chop the remaining pear and place in the sugar and honey mixture. Cook on low to medium heat until the mixture is reduce by half and the pears are soft but not falling apart. Place on a small baking tray and place in the freezer for 1 hr

6. Once the pears have cooled in the freezer for an hour and the syrup is very thick but not frozen, place the whole lot in a food process and process until a very pale and fluffy mixture forms. This will instantly give you a sorbet mixture. Place the sorbet in an airtight container and return to the freezer until it is required.

To assemble dish. Turn out the crème caramel onto a plate. Directly next to the crème caramel, place a long line of burnt butter crumbs. Place three poached pear cubes next to the crumbs and finally top the crumbs with a quenelle of pear sorbet. Serve immediately.
white chocolate champagne truffles


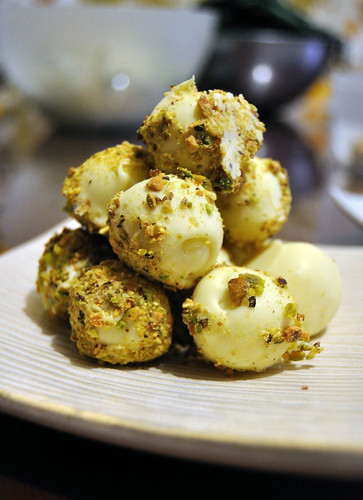
And to end the meal we had Truffes de champagne et chocolat blanches (White chocolate Champagne truffles, with a crushed pistachio coating). I made so many of these, over 30. I was certain that I would have some left over. I remember only eating one on the night. The next morning in my groggy state I went in search for a sweet fix, the truffles would be perfect. I stumbled into the kitchen to find that one mere truffle was left. I sobbed gently before shoving in my mouth and quickly forgetting my troubles.

WHITE CHOCOLATE CHAMPAGNE TRUFFLES WITH PISTACHIOS CRUMBS

Makes roughly 30 truffles

INGREDIENTS

200 grams white chocolate
3 tbsp of cream (45% fat)
1 tbsp butter
50mL champagne
150 grams white chocolate to coat
80 grams pistachios, toasted and crushed

METHOD

1. In a duble boiler, melt 200 gram of white chocolate, cream and butter. Once the chocolate had completely melted, add the champagne and stir until thoroughly combined. Place cling wrap over the surface of the melted mixture and place in the fridge for 1 hr

2. Roll the chocolate ganache into small 2 cm balls and place on a baking paper lined tray. Place in the fridge to harden.

3. Melt remaining white chocolate, then individually roll the ganache balls in the melted chocolate followed by rolling them in the crushed pistachios. Store in an airtight contain and keep in the fridge. Allow to come to room temperature before eating. Will last for 1 week.

There’s only one thing I truly hate about having dinner parties. And that's dirty glasses. I hate not just washing them, but having to put them away. There’s no wonder I don’t own a complete set of matching glasses, I’m more likely to break them before washing them and putting them away safely.

June 13, 2010

Old Town Kopitiam Mamak

The wonderful Conor from Hold the Beef recently made a flying visit to Melbourne before her world-wind tour of the northern hemisphere. So a bunch of Melbourne food bloggers got together and headed down to Old Town Kopitiam Mamak at QV on Penny's recommendation. You can always count on Penny for a good recommendation!

The location is nice and easy, located on the second floor of QV, even though I don't work in the city I often find myself in and around the CBD so a quick visit is never a big ask. I enjoyed the atmosphere, nice and noisy with plenty of over hanging lights, something I've become very pleased at seeing. The food was also good, although I really regret not getting an Ice Kacang for dessert!

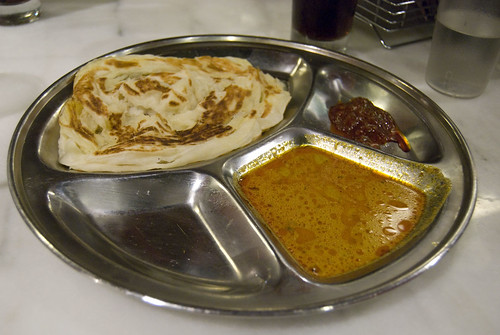
So Daz and I shared a Roti to start. Perfect way to get the stomach juices flowing and get yourself seriously hungry.
Roti

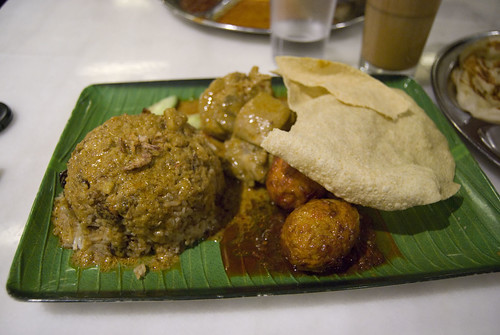
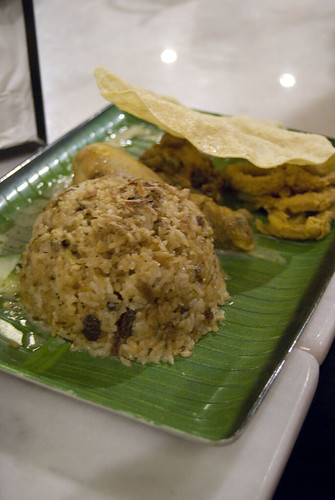
I like a menu that is part appetizing, part chose your own adventure. I'd never had a Nasi Kandar before so opted for that, the adventure part required a couple of selection choices. This always causes a bit of nervousness, will I choice the best thing? will someone else get something better?? So I closed my eyes and dove in - Briyani Rice with 2 selections - chicken curry and sambal eggs. The eggs were a little over cooked for my liking, but everything else was great. Packed with flavour and topped with a crispy papadum. Can't go wrong with a little more texture in your dish. I wish I had asked for chili, everything tastes better with chilli.
rice dish

Daz chose the same Briyani Rice with 2 selections, he also chose chicken curry, but with fried calamari. Since his dish was so similar to mine, I chose not to sample it. He polished off the whole dish, so I'm sure it tasted great.

rice dish2

I think I found a new favourite. The meals are really tasty, pretty great value for money and all the dishes came pretty quickly after being ordered. I strongly recommend getting yourself down there to give this place a go, let me know how the Ice Kacang is!

My fellow food bloggers on the night were;
Conor from Hold the Beef
April from My food Trail
Agnes from Off the Spork

March 13, 2010

Shocolate

(website should be up and running soon)
3/296 Brunswick St, Fitzroy
03 9415 6556

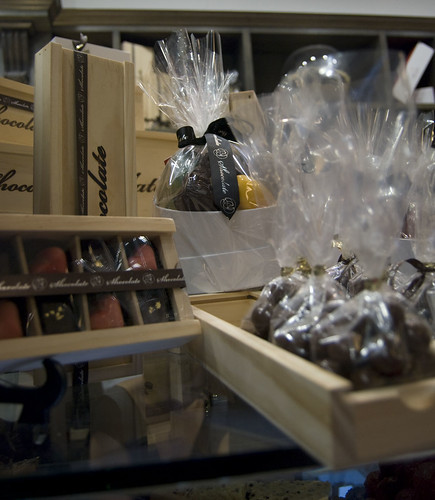
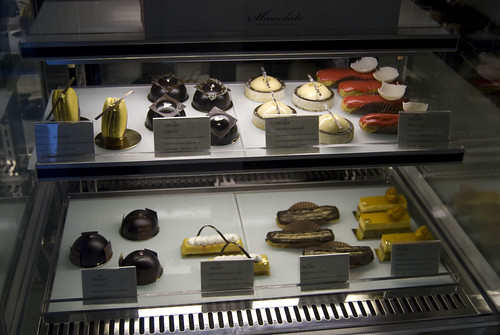
display

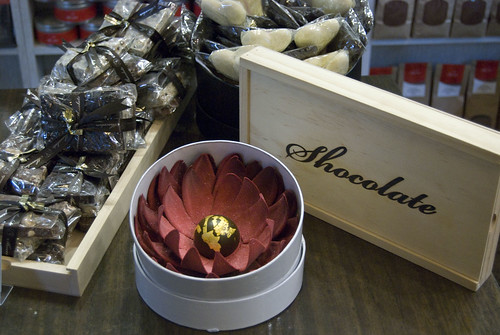
After driving past Shocolate for the past few months and trying to come up with any excuse to go in, we finally bit the bullet and had some chocolate with the dynamic V duo. Shocolate opened its doors in the latter half of last year, and it seems from a few reviews going around the blogsphere they are ding some good work. WE had the pleasure of meeting Nick the owner, and had a good old chat about all things chocolate. After asking nicely if I could take a few photos I got the royal treatment with lights turned on and chocolate ark taken out of the display cabinets, I was pretty chuffed. You could tell that Nick and his staff are extremely dedicated to their field and the service we got was above none, I couldn't help but feel that they put this type of service on for anyone who walked through the door. If you're not a fan of chocolate, still get down there to check out there chocolate art. Its really impressive!!

chocolate art

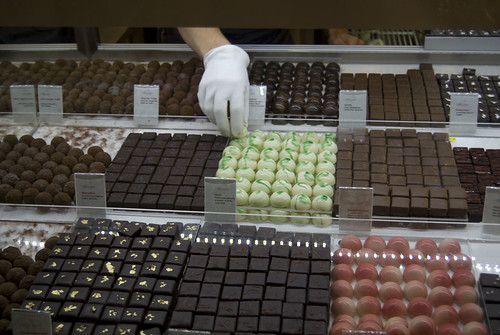
So bring on the chocolate I say!! All their chocolates and patisserie's are made on site with quality ingredients, such Callebaut cocoa powder. We started our chocolate indulgence with a few hand hand chocolates.

chocolates

chocolate

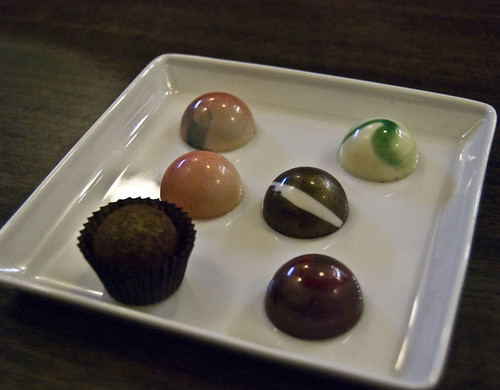
Top two chocolates, left: Bloody Fruit - A mix of berried encased in white chocolate. Right: Basil - Fresh Basil ganache encased in white chocolate

Middle two chocolates, left: Strawberry and Lime - Fresh strawberry puree with a hint of lime ganache encased in white chocolate. Right: Irish - Whiskey flavoured ganache encased in dark chocolate

Lower two chocolates, left - Champagne chocolate. Right: Chilli - ganache infused with a chilli spice blend encased in dark chocolate

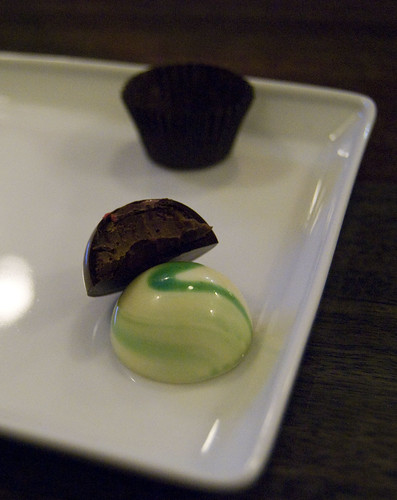
They were all so good! Often you get ganache centered chocolates that have a very thick outer coating, not these ones. The shells were as thin as an egg shell, giving you a bigger hit of the inner ganache.

thin shell

My favorite by far was the basil. V1 hit the nail on the head, saying that only I would order basil, yes its true I am addicted to basil and will almost always order it if given the option....but I'll try to put my bias aside. The basil flavour was so subtle, meaning that you could eat a whole hand full and not feel like you've just eaten pesto. I really enjoyed it. I was just a little annoyed that I had eaten the chilli chocolate first, meaning that everything from then on had a tainted taste. Don't get me wrong, the chilli was great.....just over powering on anything else.


display2

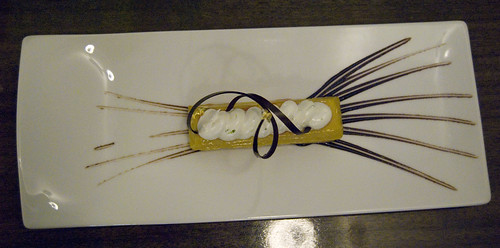
Desserts were a piece of art. Not only were they appetising in the display cabinet, but they were so beautifully presented. V2 had the Exotic Meringue tart: A combination of citrus, banana and passionfruit topped with a fresh lime meringue. I didn't get to taste this one, but it was so darn pretty it was almost a same to ruin it.

meringue

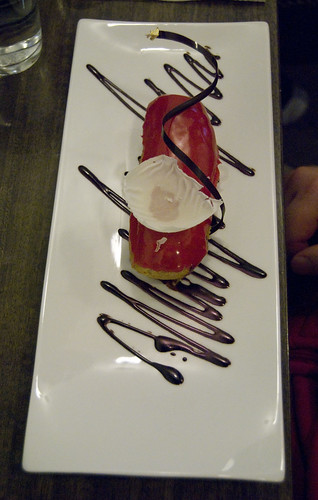
Daz had the Berry Eclair: Chox pastry filled with raspberry, strawberry and blackcurrent cream with vanilla bean and lychee. Oh my!! This was good, totally delivered on everything it promised. The berry combination was just great. The choux was soft and yielding, with the creme patisserie fluffy and creamy. I wish I had ordered the eclair!!

berry eclaire 2

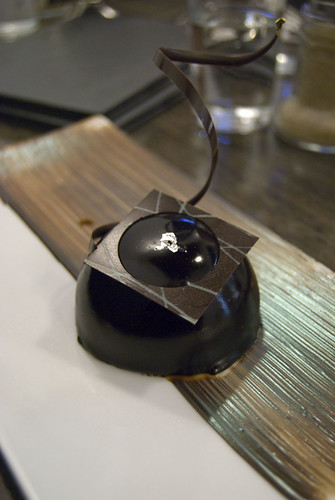
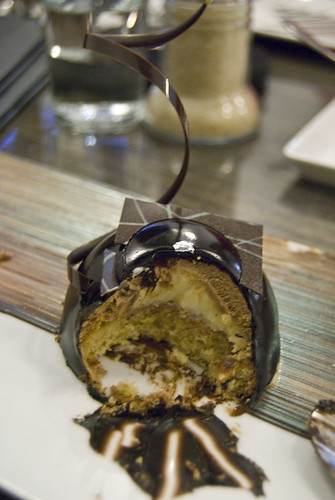
V1 and Myself ordered the Bombay: Hazelnut mousse with a creamy cardamom epicenter on a pane de gene sponge. This was pretty darn good, except I would have loved to taste more of the cardamom. The dark chocolate ganache seemed to cancel it out, although the dessert was good, I would have loved to taste more of the flavouring.

bombay

bombay inside

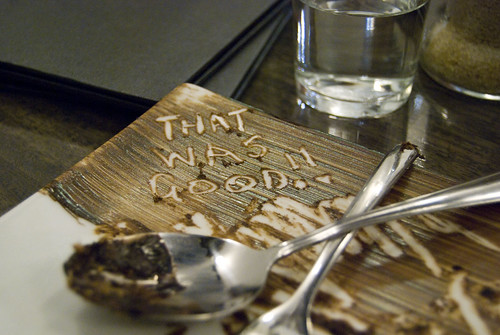
We decided to write Nick a note in our chocolate smear. Nick tells us that a customer tried to pass their mobile number onto him this way, unfortunately it got washed off before he could note it down!!

that was good

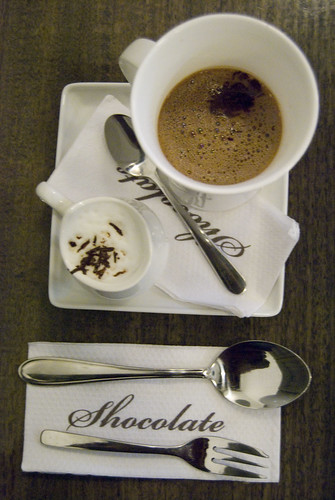
We all drown our chocolate feast with more chocolate. We ordered a few different hot chocolates; Chef's Blend: flavoured with nutmeg, cinnamon and lemon zest; Orange: Flavoured with fresh orange zest; Classic: authentic European recipe.

hot chocolate

We spent about 5 minutes just sniffing the hot chocolates! The aroma was intoxicating, especially the chefs blend. My favourite was definitely the chefs blend. When the weather gets cooler, I definitely recommend trying one of these to warm your winter nights!!

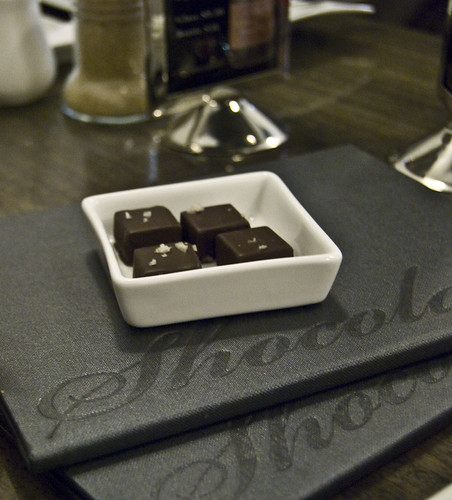
Before we left Nick wanted to treat us to one of his favourite chocolates. He brought out a small plate with four chocolates, Caramel: salty caramel ganache. It was wonderful! I swear it was filled with dulche de leche!! We all know that chocolate, caramel and salt are a winning combination. A perfect end to a perfect adventure out for dessert.

salted caramel

Next time I get down to Fitzroy I'm trying this......Tropical Macaroon: Crispy yet tender French style biscuit, centered with fresh mango sauteed with passionfruit pulp, enclosed with whipped milk chocolate ganache.....its HUGE!!

macaron