Showing posts with label Non Restaurant Recipes. Show all posts

March 8, 2011

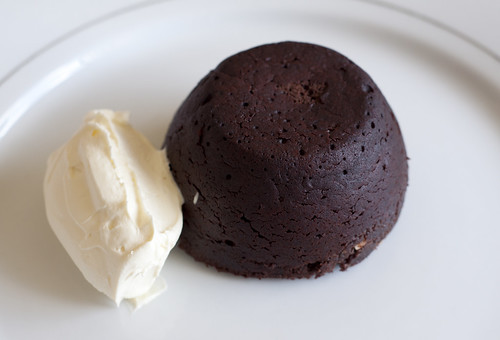
Peanut butter Chocolate Fondants

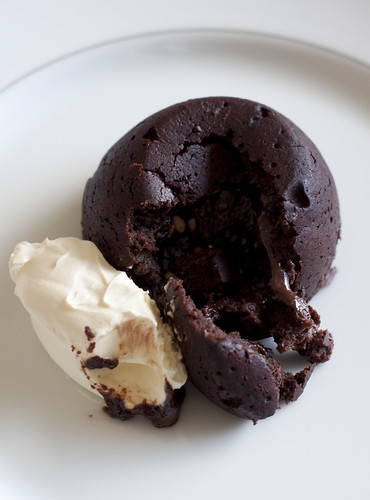
inside fondant

Who doesn't love chocolate? Everybody loves chocolate!! Do you know whats better than chocolate? Chocolate with peanut butter! Since we've been having some cold weather of late, oh summer how I wish that you hadn't stood me up, I had a craving for something sweet, hot and rich. So naturally I turned to the good old chocolate fondant. But the plain old chocolate fondant just wasn't doing it for me anymore, so I decided to make it a little more interesting by adding a little peanut butter to the centers so when you dig in a volcano of peanut butter spurts out of the middle. My grand visions certainly didn't turn out that way, but it was pretty satisfying nonetheless.


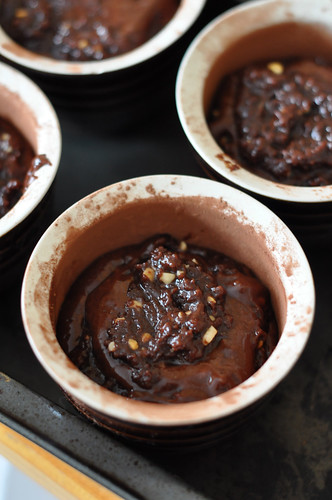
raw Peanutbutter chocolate fondants

To make the peanut butter center, I keep aside a little of the chocolate mixture and then add a generous amount of peanut butter to that. Then I put the peanut butter/chocolate mixture into the middle of the 2/3 filled ramekins. The peanut butter changes the consistency of the chocolate batter, instead of ending up with a very fluid lava like center the peanut butter makes it all a bit thick. So the centers stay soft and gooey, but not as runny as I would like. I think it needs a bit of tweaking. Anyway here is the recipe and a video to tease you with.


Peanut butter Chocolate Fondants

INGREDIENTS
Makes 4

100g good quailty dark chocolate
100g unsalted butter
2 eggs
2 egg yolks
50g castor sugar
30g plain flour
2 tbsp crunchy peanut butter
extra butter and cocoa powder

METHOD

Preheat oven to 180C

In a double boiler, melt together the chocolate and butter, set aside and allow to cool slightly. In a separate bowl whisk together the eggs, yolks and castor sugar until light and fluffly roughly 2-3 minutes on medium speed.

Combine the chocolate into the eggs, then fold through the flour. Using 1 cup capacity ramekins, grease the outside with a little butter, then dust the grease with some cocoa powder, this will prevent the batter from sticking. Spoon the mixture into the ramekins, about 2/3 of the way full. Add the peanut butter to the remaining chocolate mixture, mix until just combined. Divide this evenly into the 4 ramekins, making sure to get the peanut butter mixture as close to the center of the ramekin as possible.

Bake for 12 minutes at 180C

The mixture can be made ahead of time and kept in the fridge in the ramekins, when baking adjust the cooking time by 2-3 minutes to compensate for the cold mixture.

Peanutbutter chocolate fondants

December 7, 2010

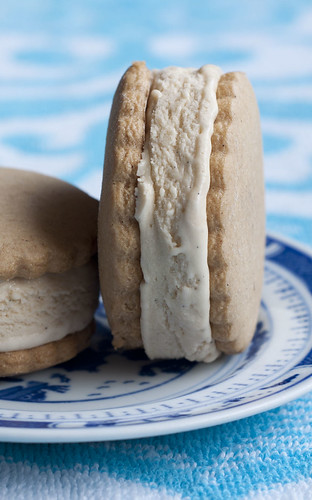
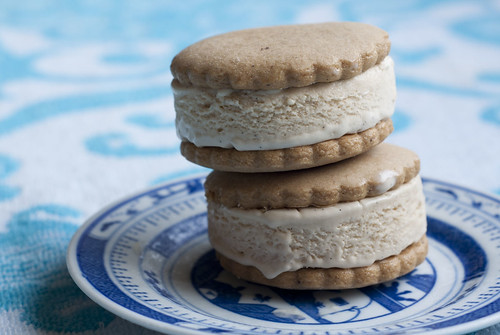
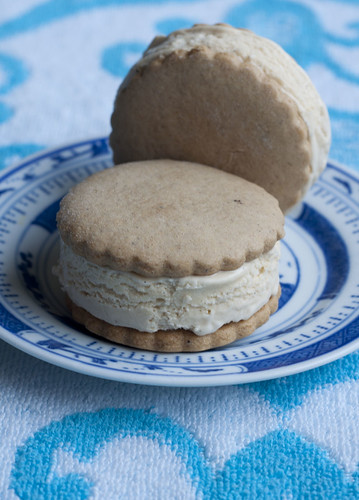
Ginger Bread Almond Ice Cream Sandwiches

ginger almond ice cream sandwiches

Its December and that means two things, hot weather and Christmas!!!! Its been a funny start to December in Melbourne, hot weather coupled with torrential downpours converting our once mild little town into a tropical oasis. There’s not much you can do to get away from the sticky-ness, apart from jumping in a swimming pool, or if you’re in the city - the Yarra river. Note – I do not advocate the practice of jumping into the Yarra river, do that at your own peril. Another way to get away from the heat is to eat ice cream.

I’ll find any excuse to eat ice cream, I’ve been known to eat ice cream in the middle of winter, and I don’t mean sitting at home on my couch….I mean going out and hunting down some gelato! So considering that Christmas is just around the corner (oh gosh…already!), I decided to make ginger bread almond ice cream sandwiches.

ginger almond ice cream sandwiches 2


The ginger bread cookies are chewy, so when you bite into the sandwich you get the soft spicy goodness of the cookie, coupled with a cool creamy ice cream middle. I wanted to make the ice cream really creamy, similar to commercial ice cream sandwiches so you’ll notice that my recipe calls for 2 types of cream to boost the fat content of the ice cream…hmmmm fat. If your health conscious, you can skip that and just use more of one type, but lets face it, how many people who are making their own ice cream are truly health conscious? I’ve also devised an easy way to make ice cream without owning an ice cream machine. It involves a KitchenAid and funnily enough, a freezer. Check out the recipe for more info.

ginger almond ice cream sandwiches 3

While I was making the ginger bread cookies, Daz asked me to make him ginger bread men. I wasn’t going to deny him, I really didn’t have an excuse not to make them, dough was ready to go and I already had a ginger bread man cookie cutter. And they were so cute in the end anyway, especially with their green t-shirt. Everyone had a lot of fun, until someone got their head bitten off!

chewy gingerbread men


Chewy Gingerbread Cookies

Ingredients:

Makes roughly 30 cookies.

3/4 cup malt extract or tracel or golden syrup
1/3 cup packed brown sugar
1/8 cup castor sugar
1/3 cup water
80 gram butter, softened
3 1/4 cups plain flour
1 teaspoon baking soda
½ teaspoon ground nutmeg
1 teaspoon ground cloves
1teaspoon ground allspice
1 teaspoon ground ginger
1 teaspoon ground cinnamon

Method

1. Combine together the tracel, brown sugar, sugar, water and butter in a medium sized bowl until smooth. Sift together the flour, baking soda, nutmeg, allspice, ginger, cloves and cinnamon. Gently stir the dry ingredients into the wet mixture until all of the ingredients are properly combined. Make a large ball and wrap the dough in gladwrap and place in the fridge for least 4 hours or overnight.

2. Preheat oven to 175 degrees C. On a lightly floured surface, roll the dough out to achieve roughly a 5mm thickness. Using a round cookie dough cutter, cut dough then transfer cookies to an ungreased baking paper lined baking tray. Make sure to leave a small distance between each cookie, they wont get much bigger, but you don’t want to run the risk of them sticking together.

3. Bake for 8 to 10 minutes. Remove from oven and place on wire racks to cool. At this stage the cookies can be placed in an airtight container and will keep at room temperature for 1 week. If constructing ice cream sandwiches, once cooled place cookies in the freezer ready to have ice cream filling added.

Almond Ice cream

INGREDIENTS

100ml almond milk
3 egg yolks
100g caster sugar
50ml pouring cream
80 mL double cream
1 vanilla bean, split and scraped or 1 teaspoon of vanilla bean paste

METHOD

1. Bring almond milk to the boil in a small saucepan, once boiled add vanilla bean, and set aside.

2. In a medium sized stainless steel bowl whisk egg yolks and sugar together by hand, then pour almond milk onto the egg yolk mixture while whisking. Cook mixture over a bain-marie while whisking continuously for about 10 minutes or until it begin to thicken thickened. A good way of testing it is if it still smells like raw egg than its not cooked enough, or if it coats the back of a spoon and keeps a straight line when you wipe some away with your finger.

3. Once thickened cool sabayon over ice while still whisking. Once completely cooled whisk both types of cream into the sabayon. Place the mixture into an ice cream machine and follow manufacturers instruction. Or use my method: A couple of hours before starting place your KitchenAid stainless steel bowl in the freezer. Once you get to the cooled sabayon/cream mixture, transfer to the frozen mixer bowl and whisk with your KitchenAid for 2 minutes. Transfer to the freezer for 15-20minutes then whisk again for 2 minutes, making sure to scrap down the sides. Repeat this again 4 or 5 times until the ice cream becomes the consistency of a thick soft serve. No need to buy a ice cream machine, and you’ll get perfect, icicle free ice cream every time!

4. To make the ice cream fillers for the sandwiches, place ice cream in a glad wrap lined rectangular plastic container. For thick ice cream sandwiches, make sure that that ice cream is roughly 2 cm thick. Cover the top of the ice cream with more glad wrap and place in the freezer for 2-3 hours to fully set. Once set, use the same sized cookie cutter you used for making the gingerbread cookies and cut round ice cream sandwich fillers. Place back in the freezer for 10 minutes or so and then assemble your sandwiches. Cookie, ice cream filler, cookie……enjoy!!

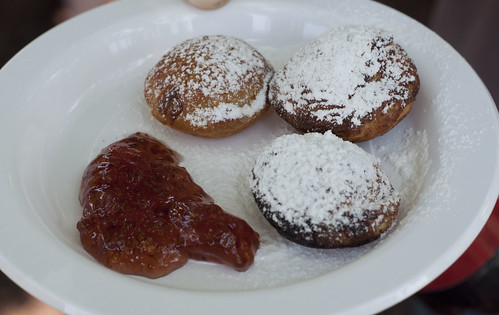
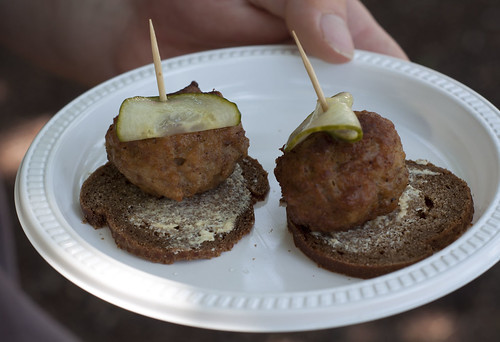
While we’re on the subject of Christmas, on the weekend Daz and I went along to the Scandinavian Christmas Bazaar. It was a last minute decision, so I wasn’t exactly sure what was going to be instore, I was imagine fire breathing donkey’s, three legged men and loads of Swedish meatballs. Sadly, of the three only the last one was on offer. We had a quick bite to eat, devouring Räksmörgås, Æbleskiver's and Frikadeller's . It seemed like fun, so I’ll definitely be adding it to my calendar for next year.

ebleskiver
Æbleskiver

swedish meatballs Frikadeller's
Frikadeller

September 8, 2010

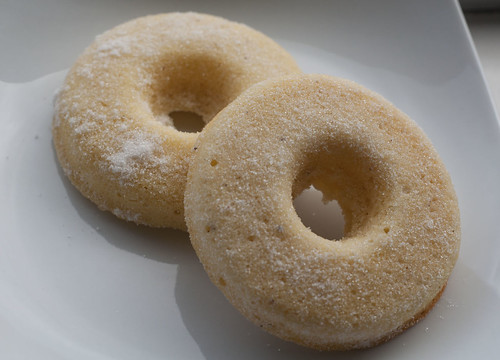
Beer Doughnuts

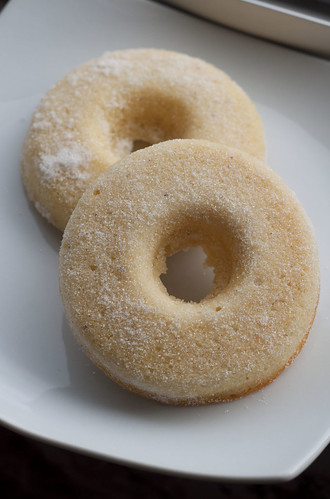
beer doughnuts


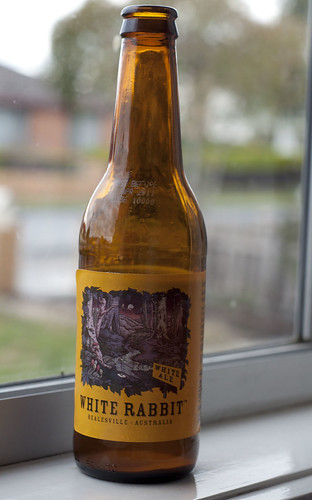
Donuts or doughnuts? Who cares!! These ones have beer in them!! As a treat recently Daz and I trekked out to Healesville to visit the White Rabbit Brewery. There are two things that I really like about White rabbit beer. Firstly the White ale is one of my favs, very subtle, low on the bitterness and sweetend with honey....isnt everything better sweetened with honey? Secondly they have a very cute white rabbit on the logo, I base my drinking habbits on very important aspects.

white rabbit white ale


white rabbit
These are some rabbits that I dont mind running over with my car.

After purchasing way too much beer for two people to consume, I contemplated using the beer to prepare a recipe. But what recipe? Beer Chicken....too cliché, beer battered fish....I’ll let the fish swim for another day. Then I channelled Homer Simpson and realised that Beer Doughnuts were the only way to go. As soon as I mentioned the idea to Daz, his eyes lit up...... “beer and doughnuts? But its not my birthday”. I did a quick Google search (where were we before the “don’t be evil” Google?) and came across this recipe.

white rabbit2
Oh look, they've multiplied!!

white rabbit3
Quick cross the road now while I distract this drive with my bare leg

What really appealed to me about this recipe is that the doughnuts are actually baked rather than deep fried, so in fact they are a healthier choice when doughnuts are concerned. So of course I made a couple of changes to the recipe, I can’t help it, I must always tinker with things. Once I made the batter it quickly became fluffy. I’ve never smelt the combination of nutmeg and beer before, and oddly I found it very appetizing, it instantly made me hungry! I half filled my pan and shove it in the oven. I followed the recipe and took them out before they began to colour.

beer doughnuts2


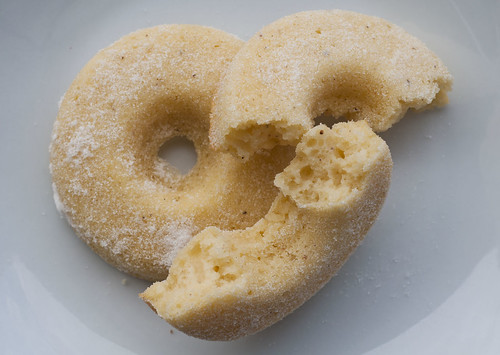
They tasted pretty darn good, a tiny hint of yeasty beer and loads of nutmeg. They were really fluffy, with massive air pockets in the dough, in fact they were more cake like rather than doughnutty. I thought they really lacked the deep golden outer crust and I’m sad to admit I missed the greasy after taste you get from eating a regular doughnut.

beer doughnuts inside


I had some batter left over, so I made the decision to throw away my initial intentions to make a healthier doughnut and committed to deep frying the rest of the batter, I’ve always been the fickle type. First doughnut, disaster!! The batter was way too runny, it managed to turn into a fat pancake sucking up loads of the oil! Solution....I added a whole heap of flour to the rest of the batter. Heck, I didn’t have enough to make another oven baked doughnut so I might as well be a big kid and play with goop. Surprisingly, they turned out really well. They fluffed up exactly the same way as the oven baked doughnuts - resulting in crater sized air pockets. However, they still managed to soak up a lot of the oil. I would much prefer the oven baked version. Next time I’ll just let them cook for a lot longer and actually become golden brown. Screw you recipe, I will not listen to you!!

fried beer doughnuts


Beer Doughnuts (My tinkered version)
Prep time : 30 minutes
Makes 9 Doughnuts

Ingredients:

1 cup plain flour
1/2 cup castor sugar
1 teaspoon baking powder
1/4 teaspoon ground nutmeg (fresh ground is best)
1/4 teaspoon salt
60 mL buttermilk (at room temperature)
2 large eggs (at room temperature)
90 mL amber ale
4 tablespoons melted butter, cooled

Method:

1. Preheat oven to 170C. Grease a doughnut pan with a generous amount of butter.

2. Melt butter and let cool. Sift all dry ingredients together into large mixing bowl. In a separate bowl, whisk together eggs, melted butter and beer until well-blended. Pour the liquid blend into the dry ingredients all at once, and mix just until blended (do not overmix, or the doughnuts will be tough).

doughnut batter


3. Fill each doughnut form half full. Bake in the preheated oven in the middle rack for 9-12 minutes. The doughnuts should not be browned on top. Remove pan from oven, let cool for a minute, remove from pan and roll in castor sugar.

doughnut batter in doughnut pan


July 25, 2010

Bastille Day 2010

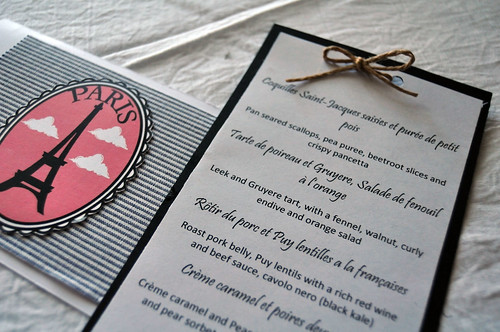
french party menu


Every year I host a French Party in celebration of Bastille Day, and this year was no different. Loads of French inspired food, and a few corny French accents to boot. It usually involves alot of preparation, followed by even more drinking, which usually ends in a massive hangover. I’m proud to report that 2010 was no different to any other year....except this year I let Daz help with the dishing process. He did an awesome job at handing out the plates to everyone, but when I asked him to help with the actual food to plate process he didn’t quite listen to me as closely as I had hoped, so some of the dishes looked a bit wonky. Not to worry, they tasted pretty darn fine in the end.
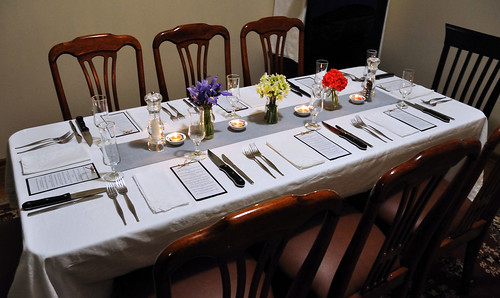
tale setting french party


Since this may possibly be the longest post I’ve ever written, I’ll keep my intro short. I prepared a 4 course meal with petite fours to end. I’ll explain the dish with the recipe to follow straight afterwards.

scallops


First we had Coquilles Saint-Jacques saisies et purée de petit pois (Pan seared scallops, pea puree, beetroot slices and crispy pancetta). I had a little issue with presentation on this one. I trial the dish 2 times before hand and each time the presentation was different. In the end I went with simply stacked together. In this photo you can’t quite see the pea puree in the background and the crispy pancetta.

PAN SEARED SCALLOPS WITH PEA PUREE

INGREDIENTS

Serves 8 entree size portions
16 scallops
200 gram baby peas
2 cloves garlic, finely diced
3 shallots, finely diced
1 tbsp cream
1 tsp butter
4 thick slices of pancetta
1 beetroot
1 Star anise
1 cinnamon quill
2 tbsp white vinegar
2 tbsp white sugar
Olive oil

METHOD

1. Start by poaching the beetroot. In a small pot place the beetroot, star anise, cinnamon quill, sugar and vinegar and fill with enough cold water to just cover the beetroot. Place over medium heat and simmer until the beetroot is tender. Cool under running water. Gently peel the beetroot and thinly slice it.

2. To make the pea puree, boil the peas in some salted water until the peas are just cooked. Drain and keep to a side. In a frying pan melt butter and sauté garlic and shallots. Add peas and then transfer to a food processor. Add the cream and process until a smooth puree forms. You may need to add a little more cream to achieve the right consistency. Season with salt and pepper to taste.

3. For crispy pancetta, preheat oven to 180C. Slice pancetta into small triangles and place on a baking paper lined tray. Cook in the oven until the pancetta is crispy. 10-15 minutes. Remove form tray and drain on a paper towel.

4. For scallops, season the scallops with salt and pepper, drizzle a little olive oil over the scallops – just enough to coat the scallops. Heat a frying pan until very hot, then add the scallops. A very hot pan is important to get nice caramelisation on the surface of the scallop without overcooking it. Cook for 1 minutes or so on each side, depending on the size of the scallop.

To assemble dish, on a small plate place a quenelle of pea puree, then in front place one scallop followed by a slice of beetroot and then another scallop. Place a piece of pancetta to the side of the scallop.
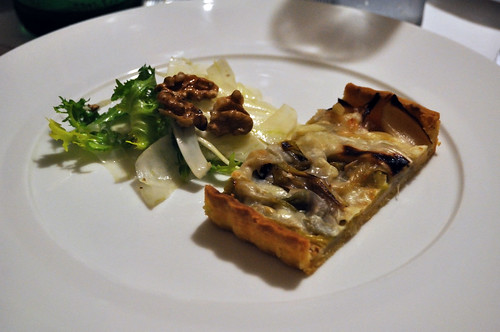
leek and gruyere tart


Next we had Tarte de poireau et Gruyere, Salade de fenouil à l’orange (Leek and Gruyere tart, with a fennel, walnut, curly endive and orange salad). To make my life alot easier I served this course cold. Except I think it would have tasted a little better slightly warmed, just so the cheese was a little softer. Despite my criticism, this was one of my favourite dishes or the night. My pastry was so crumbly and short I was really impressed with myself. There were 3 portions of this tart left over. Daz made short work of them and polished them off while I was preparing for the next course. At least he helped with the shortage on bench space!

LEEK AND GRUYERE TART, FENNEL AND WALNUT SALAD

INGREDIENTS

For Shortcrust pastry (From Gourmet Traveller)

250 gm (2/3 cups) plain flour
190 gm unsalted butter, coarsely chopped, chilled
1 egg yolk

For Tart

3 medium sized leeks
50 grams Gruyere, grated
50 grams Parmesan, grated
20 grams butter
2 shortcrust lined tart tins, blind baked

For Fennel and Walnut salad

1 fennel bulb, thinly shaved
50 gram walnuts, shelled roasted and roughly chopped
Juice of 1 orange
Yellow leaves of 1 bunch of curly endive
Oliver oil
Salt and pepper

METHOD

For Short crust Pastry
Cooking Time Prep time 10 mins, cook 25 mins (plus chilling, resting)
Makes 2 x 12 cm rectangular tarts

1. Process flour, butter and a pinch of salt in a food processor until fine crumbs form.

2. Add egg yolk and enough chilled water (about 3-4 tsp) and process until mixture just forms a dough (2-4 seconds).

3. Turn pastry onto a floured surface and lightly knead with the heel of your hand until the pastry comes together.

4. Form pastry into a disc, wrap in plastic wrap and refrigerate until chilled (2-3 hours).

5. Roll pastry, using a rolling pin, on a lightly floured surface to 3mm thick.

6. Brush excess flour from pastry with a pastry brush, then use pastry cutters to cut lining for individual cases or roll pastry backwards over rolling pin to lift pastry and line large tart case. Refrigerate for 30 minutes to rest.

7. Preheat oven to 200C. Blind bake pastry until golden (15-25 minutes), then cool on a wire rack.

For Tart

1. Preheat oven to 170C.

2. Slice leeks into long batons, making sure to only use the white flesh of the leek. In a small frying pan, melt butter over medium heat. Add the leeks and cook until leeks have completely softened. Approximately 10 minutes. Season to taste with salt and pepper.

3. Sprinkle the parmesan over the base of the two blind baked tart shells. Layer the leeks over the cheese. Sprinkle the Gruyere cheese over the leeks. Place in the oven and bake for 20 minutes, or until the cheese has become golden.

4. Remove from the oven and leave in the tin for 5 minutes. Then remove from the tin and allow to cool on a cooling rack. This will ensure that the pastry will not sweat and that it will be very crisp and crumbly.

For Fennel and Walnut Salad

1. In a large bowl add, walnuts, fennel, endive. In a separate small bowl add orange juice, olive oil and salt and pepper. Add enough olive oil/orange juice to get a nice vinaigrette. Add to the fennel/ endive and toast until all components are covered in the dressing.

To assemble the dish, slice the tart into individual portions. Add to the plate with a little Salad to accompany.

roast pork


For main we had Rôtir du porc et Puy lentilles a la françaises (Roast pork belly, Puy lentils with a rich red wine and beef sauce, cavolo nero (black kale)). This dish tastes almost a life time to prepare, but I swear every last moment of it is worth the result. The pork becomes so tender with the long cooking time, especially decadent with the really crispy crackling. And the rich puy lentils are a thing to be marveled over. I actually tried to recreate the puy lentils I had a Bistro Vue, I got close – but I don’t care, my version is different but just as nice. I do have one bone to pick though. Everyone at the table got such crispy crackling, mine wasn’t quite as crispy throughout the whole piece. I didn’t need praise at the end of the meal, all I need to do is remember the lack of talking and crunching sounds coming from everyone’s smiling faces.

SLOW ROASTED PORK BELLY

Will make 8 serves
This recipe needs to be started 24 hours in advance

INGREDIENTS

2 kg pork belly
1 tbsp fennel seed
1 tbsp chilli flakes
2 tbsp rock slat
2 carrots, roughly chopped
1 garlic head cut in half
2 celery stalks, roughly chopped
2 brown onions, quartered
300 mL white wine
150 mL water

METHOD

1. Wash and thoroughly dry the pork belly. With a sharp knife cut diamond shape cuts roughly 2mm into the pork skin. In a mortar and pestle, add salt, fennel seeds and chili flakes, crush until a coarse powder is formed. Rub this mixture into the skin of the pork belly, making sure to get into the cuts on the skin. Place in the fridge over night uncovered. This process will both flavour and dry out the skin, so it will result in a super crisp pork crackling.

2. Pre-heat the oven to the highest temperature it can go. Season the flesh part of the pork with freshly ground pepper and salt. Transfer to the very hot oven and sear for roughly 1 hr. In this time, you should notice that the pork will take on a very golden colour and the crackling will begin to form.

3. Remove pork from the oven and decrease the temperature to 160C. Transfer pork to a plate and add vegetables to the roasting pan. Add the water and white wine, this will work as a humidifier for the meat while it cooks in the oven, keeping the meat moist. Return the pork to the roasting pan, placing it on top of the chopped vegetables. Wrap the outside of the pork with aluminium foil, leaving the crackling exposed.

4. Cook for 3 hours at this very low heat. At the very end, if the crackling is still not to your liking, turn the grill portion of your oven on for 5 minutes, this will crisp up the remaining moist parts of the skin. The pork will now be very tender, moist with the crackling super crispy.

CAVOLO NERO (BLACK KALE)

Serves 8 small sized portions

INGREDIENTS

2 bunches of black kale
2 tbsp olive oil
salt and pepper

METHOD

1. Rinse kale, remove the end 3 cm of the stalk. The stalk can be pretty tough and horrible to eat. Chop into 5 cm long pieces.

2. Heat a shallow frying pan and add olive oil. Throw in kale and sauté for 1-2 minutes. Add small splashed of water at a time while flipping the leaves. This will act as a steamer and slowly cook the kale. Since kale is a tougher green vegetable compared to normal cabbage, it may take a little while for it to cook. Continue to cook in this way until the steam part of the leaf has begun soften, about 5 minutes or so. Season with salt and pepper.

PUY LENTILS WITH RICH RED WIN SAUCE

Serves 8 small sized portions

INGREDIENTS

For Beef /Pork Stock, makes roughly 2 litres – this can be prepared well in advance and frozen if necessary

1 kilo beef bones
1 kilo pork bones
2 brown onions, quarters
1 garlic head, halved
2 carrots, roughly chopped
half a cup of dried mushrooms
half a bunch of fresh thyme
half a bunch of sage
2 leeks, cut into 3 pieces each
3-4 sprigs of rosemary
5-6 bay leaves
5 white pepper corns
5 black pepper corns
Olive oil

For Puy lentils

200 gram puy lentils, rinsed under cold water
1 carrot, finely diced
1 celery stalk, finely diced
1 clove of garlic, finely diced
2 shallots, finely diced
2 tbsp olive oil
1 tbsp bi-carb soda
300 mL red wine
400 mL beef/pork stock

METHOD

For Beef/Pork Stock

1. Pre-heat the over to 230C.

2. Rinse bones under cold running water. Alot of butchers cut their bones with blade saws, so it is very important to remove as much of the bone dust as possible. Place on a baking tray with onions, garlic and carrots. Add a little olive oil and mix bones and vegetables together until they are lightly covered in the oil. Place in the oven and bake until the bones have taken a deep golden colour, roughly an hour.

3. Transfer bones/vegetables to a large pot. Add a little boiling water to the roasting tray and remove as much of the baked on particles on the baking tray. The caramelized flavours of the stock will come from this process. Add the liquid to the stock pot. Add the herbs, peppercorns, leek, and mushrooms to the pot. Cover with plenty of cold water.

4. Place pot over low-medium heat, gently simmer for 6-7 hours. During the cooking process remove as much of the scum that comes to the surface as possible. Continually top the pot up with fresh cold water.

5. Once all the vegetables have almost disintegrated, and the bones have all fallen apart, strain thorough a fine sieve and place in a container. Transfer to the fridge and allow to completely cool. Roughly 2 hours. Once all the fat has settled on the top, remove and discard. The stock can now be used.

For Puy Lentils

1. Bring a large pot of water to the boil. Add the lentils and the bi-carb soda. The bi-carb soda will lock in the green and speckled colour of the lentils. Make sure not to add any salt during this cooking process, as the salt will make the lentil skin tough and unpleasant to eat. Cook the lentils until they are tender. Puy lentils remain firm after cooking, they do not become soft like other varieties of lentils. Once they are cooked, drain and keep in an bowl covered with cling wrap. This process can be done well in advance.

2. In a large frying pan over medium heat add olive oil, garlic and shallots. Saute for 2-3 minutes until the garlic/shallots have become soft. Add the carrots and celery and sauté for 2-3 minutes until they begin to soften. Add the wine and reduce by half. Add the beef/pork stock and reduce to a 1/3 of the original volume.

3. Add the lentils and lightly season with a little salt and pepper. Continue to cook until the sauce become very thick and sticky. You can wish to stop the coking process earlier and have a much thinner sauce. At the very end season to taste with salt and pepper.

To assemble dish, place a slice of pork, a little lentils and some cavolo nero on a plate
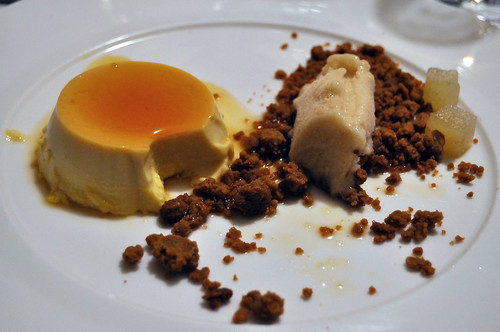
french party dessert


For dessert we had Crème caramel et poires deux voies (Crème caramel and Pear two ways – poached pear and pear sorbet on a burnt butter shortbread crumb). Apologies for the half eaten dessert, by this stage the wine had taken over and I forgot that I was taking photos. I had quite a bit of trouble coming up with something for dessert. I wanted something that I could prepare in advance, but still looked lovely. In the end I went we a dessert that can almost be called two desserts on one plate. The shortbread crumbs and sorbet was inspired by the awesome pear dessert we had a Cummulus Inc.

CREME CARAMEL RECIPE from Taste.com.au

Preparation Time

30 minutes
Cooking Time

60 minutes

INGREDIENTS (serves 8)

270g (1 1/4 cups) caster sugar
80ml (1/3 cup) water
375ml (1 1/2 cups) milk
250ml (1 cup) thickened cream
4 eggs
2 egg yolks
55g (1/4 cup, firmly packed) brown sugar
2 tbs golden syrup

METHOD

1. Preheat oven to 160°C. Place the caster sugar and water in a saucepan over low heat. Cook, stirring, for 2 minutes or until sugar dissolves. Increase heat to high and bring to the boil. Boil, without stirring, occasionally brushing down side of pan with a pastry brush dipped in water, for 3-4 minutes or until golden. Pour sugar mixture evenly among eight 125ml (1/2-cup) capacity ovenproof ramekins. Set aside for 5 minutes or until set.

2. Combine the milk and cream in a medium saucepan over medium heat. Bring to a simmer (do not boil). Remove from heat.

3. Place the eggs, egg yolks, brown sugar and golden syrup in a large heatproof bowl. Use a fork to whisk until well combined. Gradually whisk the milk mixture into the egg mixture. Transfer the mixture to a large jug, then carefully pour over the caramel in the ramekins.

4. Line the base of a large roasting pan with a tea towel and fold to fit. Place the ramekins on the tea towel in the roasting pan. Pour enough boiling water into the pan to reach halfway up the sides of the ramekins. Cover the roasting pan with foil. Bake in preheated oven for 40-45 minutes or until custards are just set. Remove from oven.

5. Transfer the ramekins to a baking tray and set aside for 2 hours to cool. Cover the ramekins with plastic wrap and place in the fridge for 6 hours or overnight to chill.

6. To serve, run a flat-bladed knife around the inside edge of the ramekins and carefully turn onto serving plates.

CARAMEL AND BURNT BUTTER CRUMBS

INGREDIENTS

60 grams castor sugar
100 grams butter, cut into small cubes
170 grams plain flour

METHOD

1. Make a caramel first. Add castor sugar to a small pan and add a few tablespoon of water, just enough to wet the sugar. Heat sugar over medium heat until a dark caramel develops. Make sure not to stir the sugar as it will crystallize. Brush down the sides of the pan during the cooking process with a pastry brush dipped in water, this will stop any sugar stuck to the sides from burning.

2. Add the butter and stir until the butter and caramel form something similar to a butterscotch sauce. Continue to cook until the butter and caramel take on a dark golden colour. This wont take very long at all because the sugar is already extremely hot. Remove from the heat and allow to cool slightly.

3. Add flour to the pan and stir with a wooden spoon until all ingredients are combined. Turn out onto a clean surface and gently work the dough and form a flat disc. If the butter begins to bleed out too much you can add a little extra flour to soak it up. Wrap tightly with cling film and refrigerate for an hour. Preheat oven to 170C.

4. Crumble the dough into crumbs. Chunky pieces are fine, as they will add texture. Scatter on a lined baking tray and bake for 10-15 minutes until the crumbs take on a very golden colour. Make sure to mix the crumbs once or twice during the cooking process as the crumbs on the outer edge will cook quicker.

5. Allow to cool complete and store in an airtight container. Will last about a week. These can also be frozen.

PEAR SORBET AND POACHED PEAR CUBES

Makes roughly 500mL of sorbet and 24 cubes (depending on size)

INGREDIENTS

100 g castor sugar
1 vanilla pod - cut lenthways with beans scrapped or 1 tsp vanilla paste
4 medium sized pears, peeled and cored
1/4 cup honey
150 mL water
1 cinnamon quill

METHOD

1. Place water, sugar, honey, vanilla bean and cinnamon quill into a medium sized pan. Place over low heat and slowly begin to heat.

2. Place a small ceramic bowl or plate in the freezer. This plate will be used to place the poached pear on, the coldness of the plate will quickly cool the pear after the cooking process, prevent it from cooking any longer.

3. In the mean time, cut as many equally sized cubes from the pear as possible. It doesnt matter if you get alot of thin or oddly shaped pieces of pear left over, as these will all be put in the pot to create the sorbet.

4. Poach the pear cubes in the sugar and honey mixture. The cooking time will depend on the ripeness of the pear. The pear should be soft but still firm in the center. Usually 3-5 minutes should be enough. Sample cubes during the cooking time to achieve the perfect texture. Once the cubes are cooked, place on frozen dish and place in the fridge.

5. Roughly chop the remaining pear and place in the sugar and honey mixture. Cook on low to medium heat until the mixture is reduce by half and the pears are soft but not falling apart. Place on a small baking tray and place in the freezer for 1 hr

6. Once the pears have cooled in the freezer for an hour and the syrup is very thick but not frozen, place the whole lot in a food process and process until a very pale and fluffy mixture forms. This will instantly give you a sorbet mixture. Place the sorbet in an airtight container and return to the freezer until it is required.

To assemble dish. Turn out the crème caramel onto a plate. Directly next to the crème caramel, place a long line of burnt butter crumbs. Place three poached pear cubes next to the crumbs and finally top the crumbs with a quenelle of pear sorbet. Serve immediately.
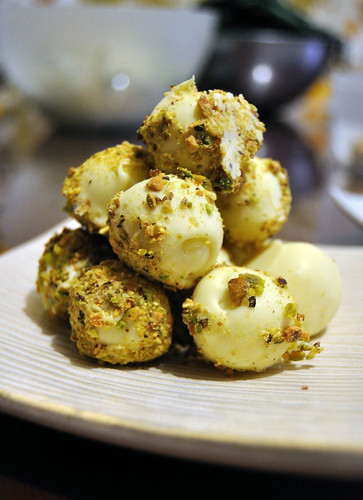
white chocolate champagne truffles


And to end the meal we had Truffes de champagne et chocolat blanches (White chocolate Champagne truffles, with a crushed pistachio coating). I made so many of these, over 30. I was certain that I would have some left over. I remember only eating one on the night. The next morning in my groggy state I went in search for a sweet fix, the truffles would be perfect. I stumbled into the kitchen to find that one mere truffle was left. I sobbed gently before shoving in my mouth and quickly forgetting my troubles.

WHITE CHOCOLATE CHAMPAGNE TRUFFLES WITH PISTACHIOS CRUMBS

Makes roughly 30 truffles

INGREDIENTS

200 grams white chocolate
3 tbsp of cream (45% fat)
1 tbsp butter
50mL champagne
150 grams white chocolate to coat
80 grams pistachios, toasted and crushed

METHOD

1. In a duble boiler, melt 200 gram of white chocolate, cream and butter. Once the chocolate had completely melted, add the champagne and stir until thoroughly combined. Place cling wrap over the surface of the melted mixture and place in the fridge for 1 hr

2. Roll the chocolate ganache into small 2 cm balls and place on a baking paper lined tray. Place in the fridge to harden.

3. Melt remaining white chocolate, then individually roll the ganache balls in the melted chocolate followed by rolling them in the crushed pistachios. Store in an airtight contain and keep in the fridge. Allow to come to room temperature before eating. Will last for 1 week.

There’s only one thing I truly hate about having dinner parties. And that's dirty glasses. I hate not just washing them, but having to put them away. There’s no wonder I don’t own a complete set of matching glasses, I’m more likely to break them before washing them and putting them away safely.

July 1, 2010

Leek and Broccoli Soup

leek and broccoli soup 2


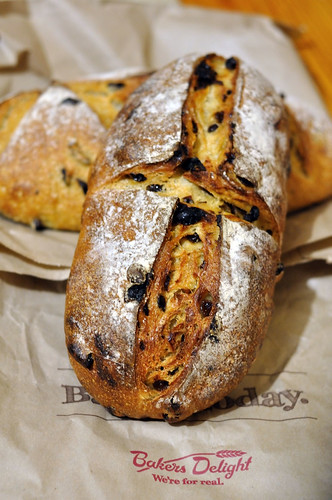
Recently Bakers Delight sent me a couple of complimentary samples of their new sourdough. They have two varieties, fruit and olive. So once I received the bread I thought I might make something to go with it. Considering the recent cold snap we’ve experienced, I thought there’s no better way to warm up then by eating a big hot bowl of steaming soup. Not to mention soup is a great way to up your veggie consumption.


bakers delight bread


I often make a broccoli soup with crisp chorizo sausage on top. But I thought I might try something a little different and added leek to the mix. The leek adds a sweetness to the finished soup. I usually blend my soup up and make a thick puree, but because I felt especially lazy that night I decided to skip that step and kept the soup chunky. Eating the chunky soup actually makes you feel fuller, and not feel like a baby eating soft mushy food. I had my tonsils out a couple of year ago and for two weeks I survived on mashed peas, chicken soup (just the liquid) and KFC mash potatoes and gravy. I lost quite a bit of weight, but gained an unusual anxiety about mushy food.

leek and broccoli soup 5

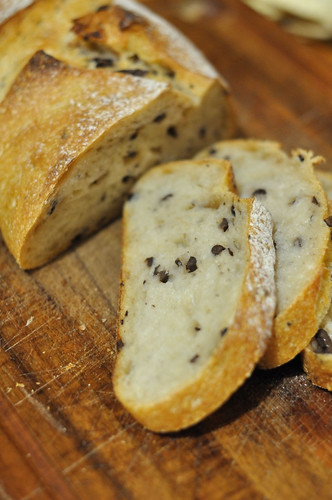
I cut a couple of thick slices of olive bread and dunked it into the soup. The saltiness of the sourdough went really well with the smoky oily sausage. Daz and I went a little bread mad that night and managed to polish off the entire loaf. Well bread is best at its freshes, so we had no choice but to eat the entire thing.


bakers delight olive bread


This is a really easy and quick recipe. In fact its all cooked and served within 30min, great for a work night.

Leek and Broccoli Soup

Makes 3 big serves

INGREDIENTS

1 leek, sliced
2 heads of broccoli, stalk chopped into small pieces and florets chopped roughly
3 cloves of garlic, sliced thinly
1.5 litres of chicken stock or vegetable stock
2 chorizo sausages, sliced

METHOD

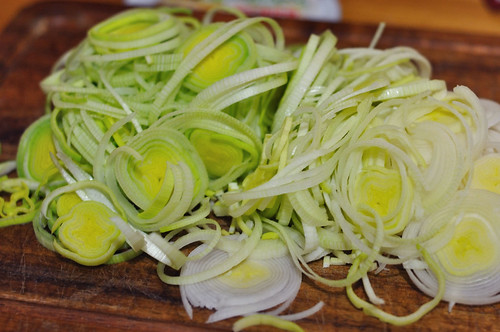
1. In a large saucepan add a little olive oil over medium heat, add the leek and sauté. Allow it to soften, but not colour. This will take around 5 minutes. Add the garlic and allow to soften.

leek


2. Add the stalk of the broccoli and cook until slightly softened. Add the stock and the remaining broccoli. Cook on medium-high until all veggies are soft and the liquid has reduced slightly. You can add other veggies to the mix if you wish, potatoes are a really good addition – making the soup very thick and hearty. Season with salt and pepper to taste. You can leave the soup chunky or blitz it in a food processor to get a smooth soup.

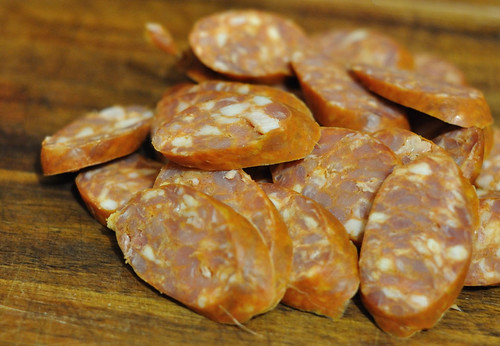
3. Just before serving fry the chorizo sausage in a fry pan with a little extra olive oil. Allow the fat from the sausage to slightly render out.

chorizo


4. Serve the soup with a few pieces of sausage on top and a teaspoon or two of the oil from the fry pan. This will add a real smoky flavour to the soup.

leek and broccoli soup

May 12, 2010

Grilled Trout with Orange and Fennel Salad

Every year, through work, I buy a few fresh trout from the Australian Rainbow Trout Farm in Macclesfield. Its a fantastic distraction form work, we get to drive all the way out to the Dandenong Ranges, enjoy the last remaining sunshine of autumn and stop along the way to get some snacks from the local bakeries. Its a great day out, especially when its still counted as working!

trout salad 3


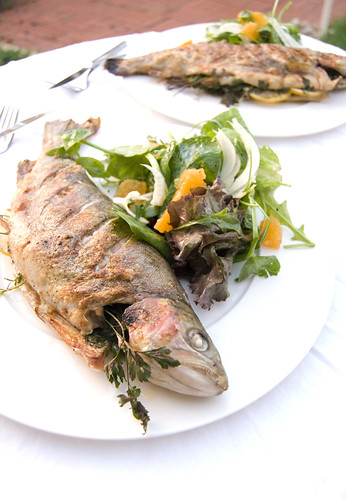
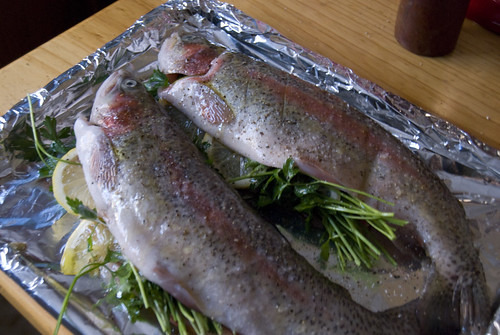
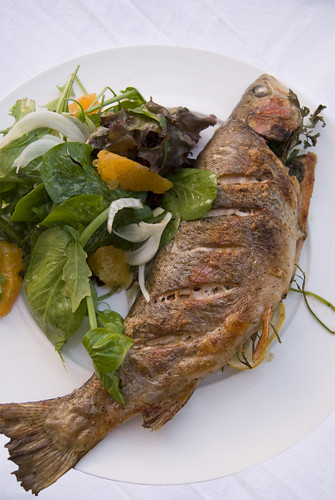
For a picnic I had made a salmon and fennel salad and ended up with a lot of unused fennel and salad, all the salmon got eaten. So I decided to simply grill the trout and pair it with a very traditional fennel and orange salad. Daz is not a fan of adding fruit to his salad, he doesn't seem to mind apple pieces and walnuts, but oranges just don't get a chance. Those poor oranges have been discriminated against for too long!! Luckily he didn't grow up in my family, where this salad was pretty common.

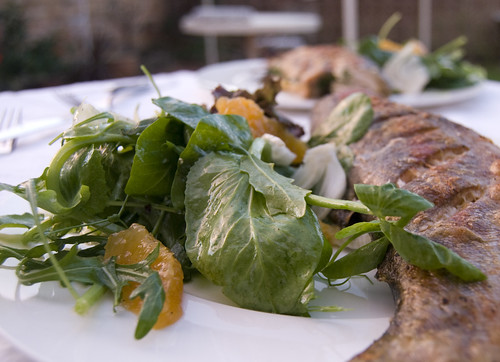
orange fennel pea shoot salad


Daz and I are quite lucky, in that the previous owners of our house were migrant Italians, so there are plenty of fruit and citrus trees in our back yard. I've planted quite a few herbs, so whenever I get the urge to make something, a lot of the fresh ingredients are not too far away. I'm surprised that most things in my garden are still alive, I'm a terrible gardener - you only have to ask Daz about the doomed bonsai to find that out - it lasted 3 weeks before it decided death was more appealing than being looked after by me!

Instead of serving this whole you can cook the trout in advance and then flake big chunks into the salad, great for a warm day - which I don't think we'll be seeing again for a little while.

trout salad 2


Grilled Trout with Orange and Fennel Salad
Serves 2

INGREDIENTS

2 medium sized trout, gutted and cleaned
1 lemon
1 bunch of parsley
1 medium sized orange
1 small fennel bulb, sliced very thinly, include a few fronds
a few handfuls of mixed salad leaves, I like using pea shoots to add a bit of sweetness
a few tsp butter
good quality olive oil
salt and pepper

METHOD

For trout

1. Rinse trout well and remove as much of the slimy outer film as possible. You can wipe them down with a bit of vinegar to remove more of the slime, but its not necessary.

trout


2. Lay on a large grill pan, and score the skin with a sharp knife, season the inside and out side of the fish. Stuff the cavity with parsley and thinly sliced lemon. Drizzle some olive oil onto the skin and grill until skin turns golden and the eyes are opaque. Once the skin is golden add a little butter and return to grill, allow the butter to melt and crisp the skin further (optional step)

For Salad

1. Combine mixed salad leaves and sliced fennel. Segment orange and add to salad mix. Squeeze the segmented orange to extract as much of the juice as possible. Add olive oil and season with salt and pepper.

Serve on a large white plate and enjoy in the sun!

trout salad 4

April 28, 2010

Hazelnut Cupcakes with Nutella Swiss Meringue Frosting

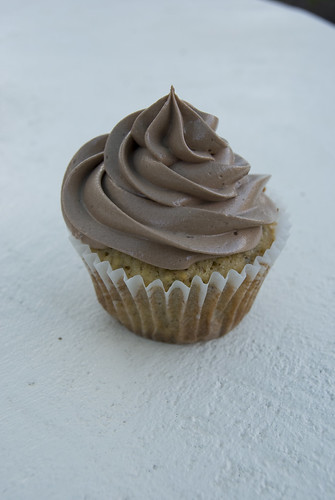
Hazelnut cupcakes with nutella swiss meringue frosting 2


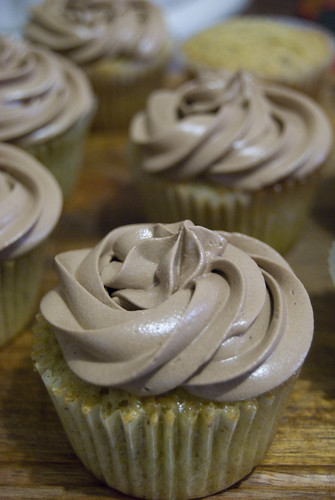
Its been so long since I've baked cupcakes. In a way these cupcakes don't even count as being baked by me, so I still haven't baked any cupcakes since the end of last year. These cupcakes were baked by V1 from the dynamic V duo, with me as the baking supervisor. Sadly I didn't get an official supervisor hat - I imagine it would have been in the shape of a cupcake.....one can only dream right? So before hand there was a feverish email exchange as to what flavour cupcakes to bake, we settled on Hazelnut cupcakes due to their moist crumb and nutty flavour, and Nutella Swiss meringue frosting because I had copious amounts of egg whites in my freezer.

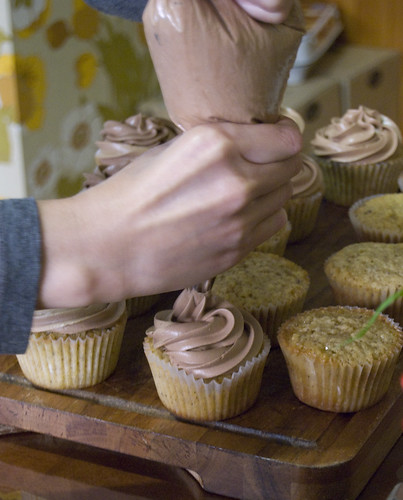
V1 did an awesome job. When coming out of the oven the cupcakes all looked identical, a feat I am still yet to master and her piping skills are pretty impressive considering it was her first time. It took her a couple of go's to get the hang of it, but in the end she got it. I was well impressed, her first cupcake looked like a rose! You know what the best thing about having someone over to bake cupcakes? you get all the joy of baking them, but dont have to worry about eating them all yourself! Not that that would be an issue for me, its just that I've become TOO efficient at eating cupcakes!

frosting is hard to do


There are heaps of recipes for swiss meringue frosting on the internet. After making this frosting quite a few times I've come up with a recipe that doesnt use a tonn of butter. Sometimes if I feel inclined I'll add extra butter to give a more creamy finish. Its a little scary to make, it seriously looks like the mixture has split, but then buttery magic happens and it all comes together and become fluffy and just perfect. Just persist and you'll get there. For a step by step and VERY american video, go here. I remember the first time I bought these cupcakes into work, my workmates were eating the frosting as if it was an ice cream! If you're a little worried about the egg-whites and want to refrigerate the cupcakes just make sure to let the cupcakes come back to room temperature before eating - or else the frosting begins to take on the consistency of mock cream - some people like it, I'm not a fan.

Hazelnut cupcakes with nutella swiss meringue frosting


Hazelnut, Vanilla Cupcakes

Ingredients (makes 18)

* 170g unsalted butter, softened
* 100g caster sugar
* 3 eggs
* 250g plain flour
* 1 1/2 tsp baking powder
* 1 tsp salt
* 1 tsp baking soda
* 100g hazelnut meal
* 1 cup (250ml) buttermilk

Method

1. Preheat oven to 170°C. Line a muffin tray with cupcake liners

2. Place butter and caster sugar in bowl of electric mixer, beat for 5 minutes until pale and fluffy.

3. Add eggs one at a time, beating well after each addition. Sift together flour, baking powder and baking soda and salt. Add hazelnut meal to flour mixture then fold into egg mixture. Stir in buttermilk, mix to form a smooth batter. Carefully divide evenly into cupcake liners.

4. Cook for 12-14 minutes, or until cupcakes are firm to the touch

naked cupcakes


Swiss Meringue Frosting

Ingredients

* 200 g egg whites
* 3/4 cups granulated sugar
* 200g (roughly) unsalted butter, cut into 1cm pieces, slightly cool but not at room temperature
* 200g dark chocolate and 1 small jar of Nutella

Method

1. Melt chocolate over a baine marie, put aside and allow to come to room temperature

2. Add sugar to egg whites and whisk together over simmering water until egg-white mixture is hot to touch or a candy thermometer reads 60°C.

3. Pour hot whites into a room-temperature bowl and whip on medium-high speed until doubled in volume.

4. Continue to whip the mixture on low-medium. Add half the butter into the bowl and continue to whisk until all melted. Add the rest of the butter one piece at a time until all butter has been incorporated. Dont worry if the mixture looks sloppy, it will fluff up as the mixture cools and forms an emulsion.

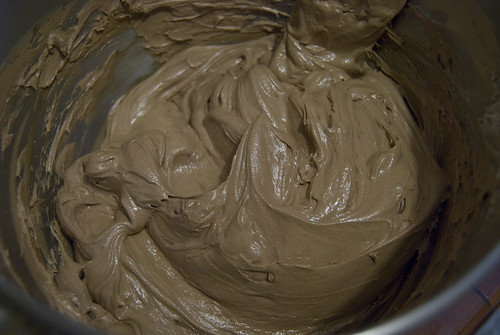
5. Continue beating until the mixture begins to look light and fluffy. Replace whip with a paddle and add melted chocolate, and enough Nutella to make you happy and continue to beat. The chocolate adds colour while the Nutella will add flavour. Before frosting cupcakes, place in the fridge to slightly firm, this helps with pipping onto cupcakes. If the mixture becomes too cool, re-whip and use immediately. Any left over frosting can be stored in the freezer.
nutella swiss meringue frosting

February 8, 2010

Pavlova

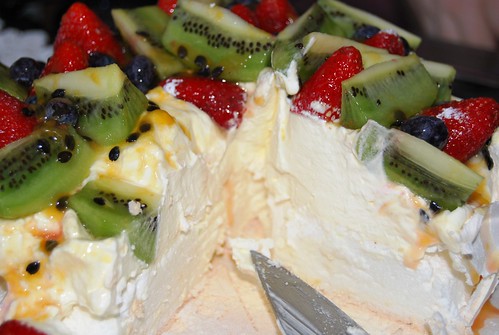
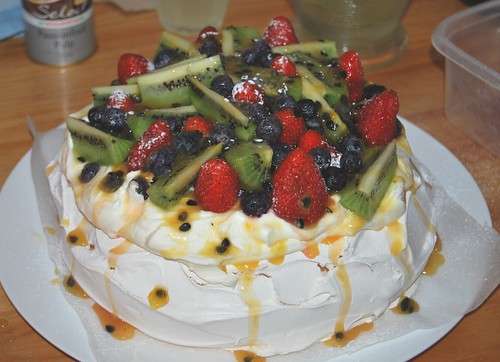
pavlova

This year for Australia Day we did something very traditional, we ate Pavlova and threw thongs. It was such a lovely day that we decided to have a few friends over for a bbq and of course, beers. The day was fantastic, the sun shone and the beers were cool, just the way I like them.

cut Pavlova

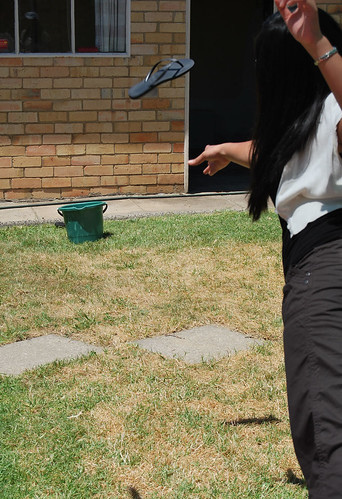
We feasted on our bbq and then held the first annual thong throwing competition. Now, my backyard is not massive by any stretch of the imagination, so the good old throng throwing competition where the furthest thong wins was probably not a good idea. Just for the shear fact that the neighbors probably would have gotten annoyed if we kept coming over to retrieve our wayward thongs. So instead I came up with a cleaver plan, it would involve concentration and accuracy. I set a bucket up a fair distance from the thrower, and whomever got the most amount of thongs into the bucket would win. You would think the person who invented the game would be fairly hard to beat.....sadly I was an easy walkover, and was only beaten to last place by Daz. But I suspect he threw the game because he knew last place was in for a cherry ripe!

thong throwing

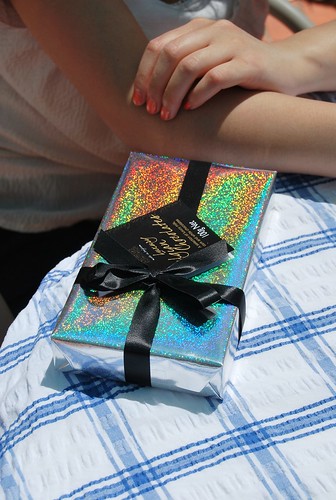
The winner was announced, after a sudden death face off. Some how no one else had managed to get any thongs into the bucket, except for Miss Coco Chanel and Mad Scientist who both managed to get three in each. After a nail biting last round, Miss Coco Chanel came out the victor.

winning prize

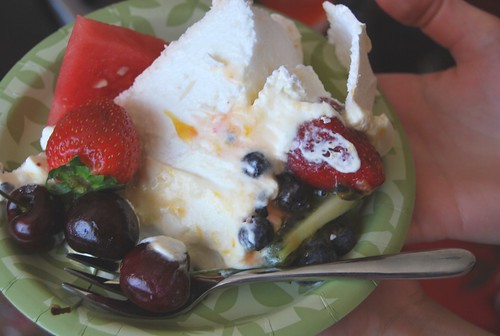
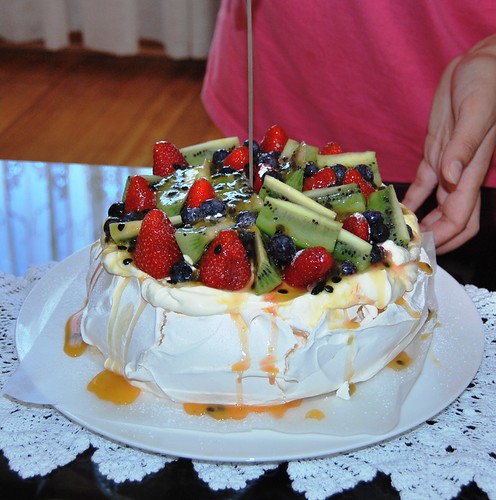
We then all went inside to the comfort that only air conditioning can give on a hot summers day and devoured an entire Pavlova. You can tell a pavlova is good when the only thing you can hear is the crunch of the crispy shell and muffled moans coming from the eaters. I was pretty pleased with myself, the actual Pavlova looked magazine worthy and the inside was just perfect, marshmellowy and heavenly. Daz thought that the crispy shell needed to be thicker, but I guess you cant pleased everyone. The only thing that would have made the Pavlova better was if it was covered in ice cream, I don't know if it would still be technically a Pavlova if it was covered in ice cream.

pavlova piece

Pavlova (I used a Donna Hay recipe with a few very minor modifications)
Serves 8–10.
INGREDIENTS

150ml eggwhite (approximately 4 eggs)
Pinch of cream of tartar and
Pinch of Salt
1 cup (220g) caster (superfine) sugar
2 tablespoons cornflour (cornstarch), sifted
2 teaspoons white vinegar
1 cup (250ml) single (pouring) cream
½ cup passionfruit pulp (approximately 4 passionfruit)
250g strawberries, hulled and halved
Preheat oven to 150°C (300°F).

METHOD

1. Place the eggwhite in the bowl of an electric mixer with cream of tartar and salt, whisk until stiff peaks form. Gradually add the sugar, whisking well, until the mixture is stiff and glossy. This may take a while, at least 5 minutes
2. Add the cornflour and vinegar and whisk until just combined. Shape the mixture into an 18cm round on a baking tray lined with non-stick baking paper. Reduce oven to 120°C (250°F) and bake for 1 hour 20 minutes.
3. Turn the oven off, open the oven door and leave ajar and allow the pavlova to cool completely in the oven.

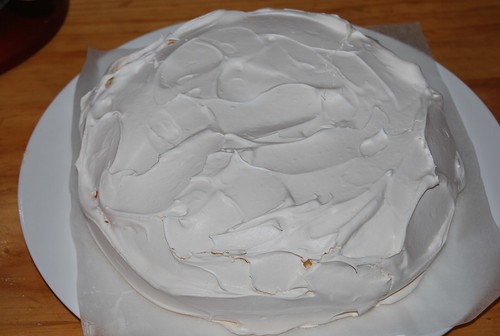
pavlova shell

4. Whisk the cream until soft peaks form. Spread over the pavlova, top with passionfruit and strawberries and serve immediately.

* You’ll know when the meringue is stiff and glossy because the mixture will have tripled in volume and stands up when the beaters are lifted.
* The low heat puffs up the meringue while the long cooking time dries it out to give you a lovely crisp shell.
* Store your pavlova, undressed, in an airtight container at room temperature for up to 5 days.

pavlova2