Showing posts with label Restaurant Recipes. Show all posts

February 11, 2011

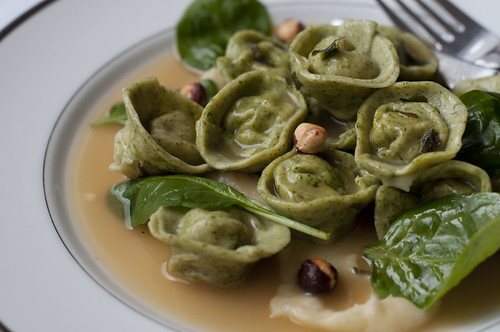
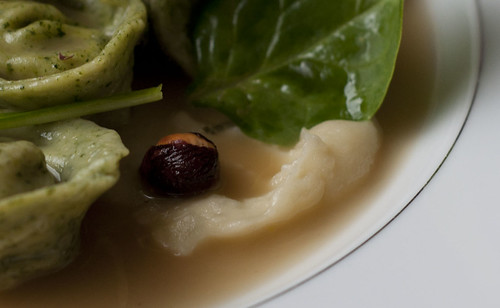
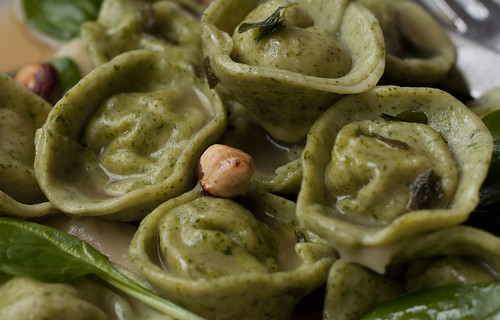
Rabbit tortellini, Jerusalem artichoke Puree and Rabbit Broth

rabbit tortellini2

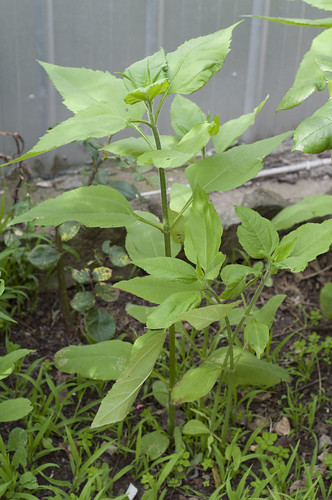
To be honest, I made this recipe a little while ago. After eating at Sarti I was inspired by the flavours in their rabbit tortellini with Jerusalem artichoke puree, so of course me being me I decided to recreate the dish. I actually made the dish back when Jerusalem artichokes were in season. They grow in my garden and at the moment the plant is well above my head ready to burst out into its floral prettiness. Anyway back to the dish, since its Chinese new year and it’s the year of the rabbit, I thought what better time to post this recipe than now.
jerusalem articoke plant

Jerusalem Artichoke plant

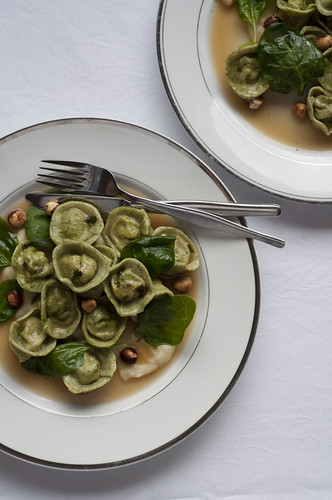
I love all the flavours in this dish, the nuttiness from the hazelnuts, the richness from the broth and the subtle gamy flavour from the rabbit all work so fantastically together. I’m actually very proud of my effort, and without tooting my horn too loudly I actually think my dish turned out better than the one I had at Sarti.
rabbit tortellini


The whole recipe is pretty straight forward, the only difficult part is folding the pasta so it looks pretty, I’m getting better but by no means am I perfect yet. As a kid, my mum never had the patience to fold all her tortellini properly, they were usually plain half moon shaped so I’ve had to learn the art of tortellini making as an adult. The other piece of advice I would offer is to really invest some time and effort into producing a good quality rabbit stock, it’s really the star of the dish and any hard work put in the preparing stage will pay off when it comes to the eating. So without any further delay, here is the recipe.
jerusalem articoke puree


Rabbit Tortellini Filling
INGREDIENTS

1 medium sized rabbit
2 egg whites
2 small golden shallots, peeled cut in half
2 cloves garlic, peeled cut in half
2 tablespoons of double cream
Salt and pepper

METHOD

1. Debone the rabbit, make sure to remove as much meat from the rabbit as possible. Set the bones aside, you will need these to prepare the rabbit stock.

2. Roughly cut the rabbit meat into small pieces and place in a food processor. Pulse the meat until it has been roughly chopped by the food processor, this step helps to get the whole process underway.

3. Add the shallots and garlic and processor further. Then add the eggwhites and cream, not forgetting to season well with salt and pepper, process the mixture until you get the consistency of sausage meat. Once this is achieve place in the fridge until needed.

Rabbit Broth
This can be flavoured any way you want. If you like it plain it can be just the rabbit bones and some simple white wine, if you like it herb infused you can go mad with plenty of different herbs. I’ll give you the ingredients that I used which resulted in a subtle but rich flavour.

INGREIDENTS

1 rabbit carcass (left over from rabbit tortellini filling)
4 golden shallots
4-5 garlic cloves
100mL dry white wine
2 bay leaves
4-5 large sage leaves
10 whole black peppercorns
1 tablespoon butter
Olive oil

METHOD

1. In a large stock pot add a splash of oil olive and heat over medium heat. Add the rabbit bones and sear until the rabbit bones and any meat left on them turn a deep golden colour. This is a very key step, a big portion of your flavour will come from the browning of the bones, so take your time here. Don’t do it too fast because you’ll just burn your bones and add a bitter flavour, however a nice golden colour will add a caramelised flavour.

2. Add the shallot and garlic to the pan and cook until fragrant, 1-2 minutes. Add the white wine to deglaze the pan. Cook until the alcohol in the wine has evaporated, 2-3 minutes. Add the bay leaves, sage leaves, pepper corns and enough cold water to cover the bones, and a little salt to season. Allow the water to come to a simmer and leave it to gently simmer for at least 45 minutes. The longer the better.

3. Allow the broth to reduce down to a ¼. Once at this stage strain the bones and transfer the broth to a small clean saucepan. Add the butter, check the seasoning – adjust if necessary and set aside until needed. Before serving, reheat the broth.

Jerusalem Artichoke Purée
INGREIDENTS
500g Jerusalem artichokes, peeled
500ml whole milk
30g butter
One small potato, peeled
1-2 tbsp double cream

METHOD
1. Cut the Jerusalem artichokes into pieces along with the potato, ensure that all the pieces are roughly the same size so that they cooked evenly. Place in a pan with the milk. Bring the milk to a simmer and cook the artichokes for about 20 minutes, stirring occasionally, until they are very soft.
2. Remove the artichokes and potato from the milk, do not discard the milk as it may be required later. Place the artichokes and potato in a food processor bowl.
3. Add the butter and process until a puree is achieved, you may need to add some of the reserved milk to achieve the right consistency. At this point you may be left with a few lumps in you puree, to remove the lumps pass the puree through a fine sieve. Transfer the puree to a pan and add the cream and season well with salt and pepper. Set aside for later, before serving re-heat puree.

Spinach Pasta with Semolina Flour

INGREDIENTS

1/4 cup very finely ground semolina flour
3/4 cup plain flour
2 egg yolks (room temperature)
3/4 teaspoon salt
1 tablespoon olive oil
2 cups of spinach leaves

METHOD
1. Remove stems from spinach leaves and blanch in boiling water for 2 minutes. Remove from water and rinse in cold water to quickly cool the spinach. Squeeze as much water out of the spinach leaves as possible. In a blender or food processor, blitz spinach to get a smooth puree.

2. In a food processor, combine the egg yolks and spinach puree and mix until combined, this will only take a few seconds

3. Add the remaining ingredients and pulse until a firm dough is formed. If the mixture seems a little dry then add a few drops of lukewarm water until the mixture comes together.

4. Turn out onto a lightly floured surface and knead the dough for a few minutes, just to make sure that everything is incorporated evenly. Wrap the dough in some glad wrap and Put aside to rest for 10-20minutes.

5. After resting, roll the pasta out thinly and put together the rabbit tortellini. Since I always have trouble with my tortellini (sometimes they get a little soggy before I get them into the boiling water) I give my self a little insurance. As I make the tortellini, I place them on a freezer tray and snap freeze them. That way they stay exactly as I made them and are easier to handle come cooking time. This also means I can make my pasta well in advance. Just make sure to adjust your cooking time according to the state of your tortellini.

6. Cook tortellini in boiling salted water until the pasta is al dente. I won’t give a cooking time because it depends on too many factors, thickness of your pasta, the temperature of your tortellini, the quantity of tortellini that go into the pan and so on. The best way to judge is to taste test, always an excuse for a sneaky nibble right?
Plating
To garnish -

A few spinach leaves
A few roasted hazelnuts
Place a big tablespoon of puree on the plate. Add a few of the tortellini and sprinkle the spinach and hazelnuts on top. Spoon a few tablespoons of the broth over the entire dish and enjoy.
rabbit tortellini4


January 19, 2011

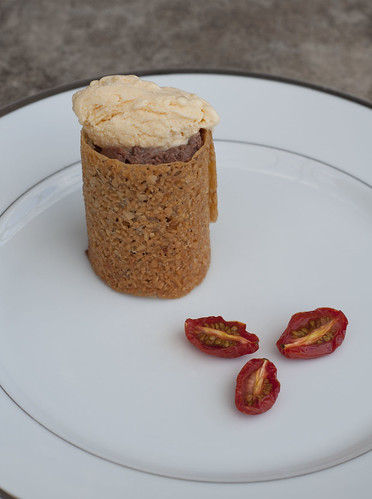
Results - Crispy Orange Tuile, Chocolate Mousse and Szechuan Pepper Ice-Cream

“Forgive me father for I have sinned, it has been over 4 weeks since my last blog post”. Can you believe that it’s been 4 weeks since I posted this recipe and I still haven’t managed to post the results!?! Well I am now here with the long awaited results. I had this all ready to go before the Christmas break, but then a trip interstate, coupled with a few trips to hospital kind of put a dampener on my plans. Everything is ok now, and I can get stuck into filling cyber space with more pictures of food.

orange tuiles 5


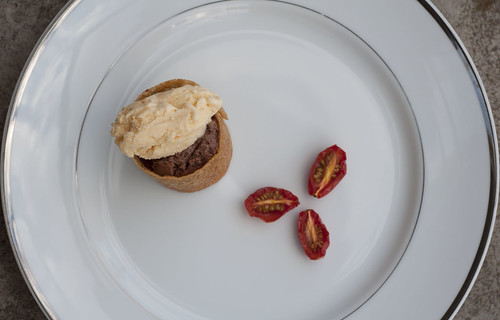
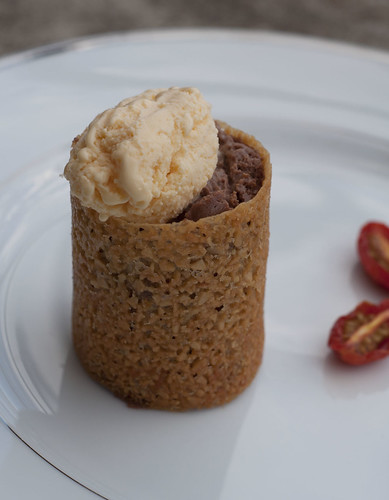
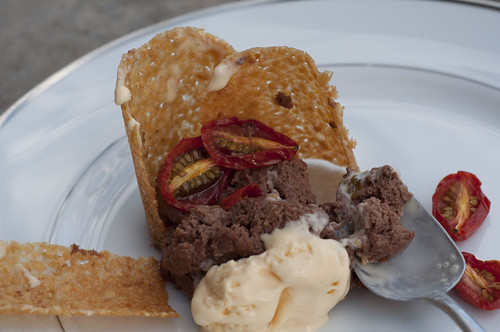
This dessert was a little peculiar, but still packed a punch with taste. The Szechuan ice cream was slightly peppery with a lovely fragrant taste which went really well with the tart but sweet candied tomatoes. And before making this dessert, I could never have imagined that tomato and chocolate are a really great combo. I don’t know if I’ll be replacing butter for chocolate in my tomato sandwiches though. I enjoyed the crunch of the zesty tuile too, all in all it was a pretty impressive dessert, at least flavour wise. But the recipe wasn’t exactly my smoothest experience in the kitchen.

orange tuiles 6


I’ve cooked a fair few top 100 recipes since starting this blog, but by far this was the most disastrous of them all. It started with the actual recipe, the mousse called for a sheet of gelatin….of what strength? Who knows. I kinda guessed it and got it wrong, of course, so my mousse turned out a little more rubbery than I had expected, there was no whipping it once it had set, it was set to stay baby!

Then there was the orange almond tuiles. I moulded them into the perfect length and width before going into the oven, but every time the tuile came out of the over a little fatter and wonkier than it had gone in, so all my moulds turned out to be 15ft higher than I was hoping (ok that’s an exaggeration, but you get the point)

orange tuiles 3


Onto the ice cream…“Make sabayon by heating sugar and water to 118C”….errrrrrrr……what water? Did I miss something? In the ingredients list there was no mention of water and how much of it I was supposed to use, so I decided for my sanity’s sake to ditch the recipe and just make ice cream my way, and it turned out pretty good if I don't say so myself.

Another issue with the recipe, in the candied tomatoes section, it didn’t specify whether to drizzle the sugar syrup over the top or toss the tomatoes in it, I went with tossing and thankfully I got it right….sometimes tossing is the right thing to do. I normally don’t have a problem with trying to figure stuff out for myself, but on this particular day it was hot, I was running out of time and using my brain was the last thing I wanted to do, which leads me to the very last problem.

By the end of the whole saga I was over it, I wanted to just eat the darn thing. Spooning the mousse into the freakishly tall tuile moulds seemed all too hard, I broke a fair few before finally getting it in without damaging the shell. Then when it can to making the ice cream quenelles I didn’t care anymore, so I just dumped it on top. I regret it now, but at the time it was the easiest thing to do. A few happy snaps later it was all over, dessert was eaten and the turmoil of slaving in the kitchen was well and truly behind.

orange tuiles 4

December 17, 2010

Crispy Orange Tuile, Chocolate Mousse and Szechuan Pepper Ice-Cream

And now for the very last course in the Great 3 Course Jacques Reymond Challenge. Dessert is my favorite course of all time, so this one is going to be a doozie. So far we've had balls, balls and duck, hope you've been keeping track or that just sounds like I have a bit of a fetish....ok no guarantees I "DON'T" have a fetish. So strap your self in people, for this is the course to end all courses.....Chocolate, pepper and orange on one plate. As always, here's the recipe with results and photos to follow.


Crispy Orange Tuile, Chocolate Mousse and Szechuan Pepper Ice-Cream

Serves 4-6

The Candied Tomatoes will be the subject of some lively discussion among your guests, as well as the spicy chili pepper flavour of the Szechuan pepper Ice-cream, which perfectly compliments the chocolate and orange

Orange Tuile
100g sugar
50g butter, melted
25g flour
zest 1 orange
75g almond flakes, extra finely chopped
50ml orange juice

Chocolate Mousse
3 egg yolks
20g sugar
150mL milk
75mL cream
1 gelatin sheet, soaked in cold water
100g milk chocolate
30g dark chocolate (70%)

Candied Tomatoes
50mL sugar syrup
1 vanilla bean
1 punnet Roma cherry tomatoes, halved

Szechuan Pepper Ice cream
200g sugar
8 egg yolks
300mL milk
400mL cream
1 1/2 tbs Szechuan pepper

METHOD

Orange Tuile

Preheat oven to 140C. In a bowl, whisk together sugar and melted butter. Add flour, orange zest, almond flakes and orange juice, mix well. Spread thinly onto plastic baking sheet in a 8cmx4cm rectangle shape and bake until golden. Remove and while still hot, mould into a cylinder shape, using a small rolling pin or small bottle

Chocolate Mousse

In a bowl, whisk egg yolks with sugar to make a thick sabayon. In a saucepan, bring milk and cream to the boil and pour into the sabayon. Place back in saucepan on low heat and continue to cook slowly until it thickens, do not boil.

Remove gelatin from cold water and squeeze out excess water. Whisk gelatin into custard mix. Cool to room temperature. In a double boiler or microwave, melt chocolate, and allow to cool to room temperature. When the two mixtures are the same temperature, fold them together. Allow to set in the fridge. Once set, whisk mouse and spoon into piping bag. Set aside.

Szechuan Pepper Ice cream

Make sabayon by heating sugar and water to 118C - use a sugar thermometer to get an accurate temperature. Pour the egg yolks over the mixture and whisk until cool.

Bring milk and cream to the boil and infuse with pepper. Strain after 10 minutes and mix with sabayon. Once cool, churn in an ice cream machine.

Candide tomatoes

sugar syrup is one part sugar to one part water. Add water to a small saucepan and bring to the boil. Once boiling add sugar, stirring until sugar dissolves completely. Remove from heat and allow to cool completely.

Preheat oven to 50C-60C. In a small saucepan, place the sugar syrup and vanilla bean and warm slightly for 5 minutes to infuse. Strain.

Place tomatoes, cut side up on a tray lined with baking paper and bake in the oven on very low heat until dry and chewy but not hard.

Serving

On serving plate, place orange tuile upright and slightly off center. Fill 1/3 of the tuile with the chocolate mousse. Place 3 pieces of candied tomato on top and fill another 1/3 of the tuile, balancing a quenelle of Szechuan pepper on top.

November 30, 2010

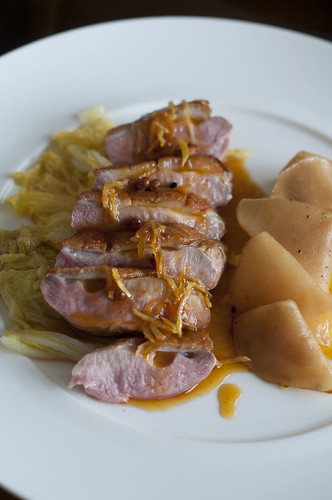
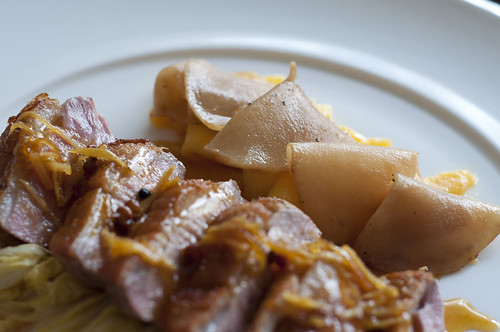
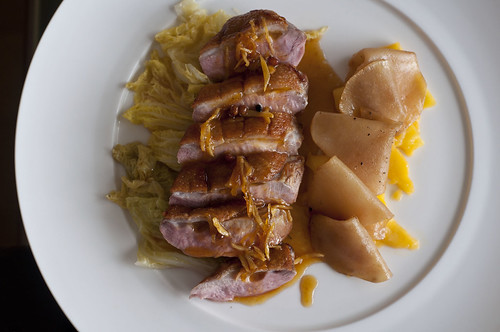
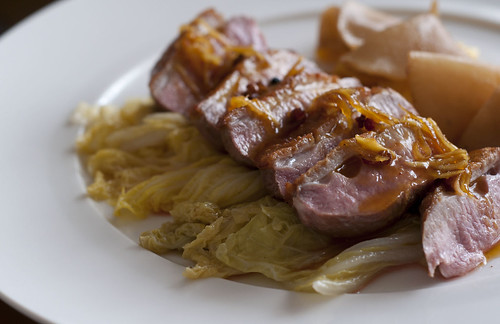
Results - Roasted Duck Breast, Braised Turnips, and a Mango and Lemon Sauce

roasted duck with mango and turnip

Sometimes I wonder how chef's come up with flavour combinations. Do they have the Issac Newton moment when an apple falls out of a tree smacking them plainly in the face?, or do they purposefully set out to challenge our traditional take on flavour unions? I'm not exactly sure how Jacques Reymond thought of putting mango and turnip together, but let me tell you it was a stroke of genius! I really didn't think that my favourite part of this dish would be the combination of the sweet juicy mango with the soft but tender turnip. And to be brutally honest, that is the only aspect of this entire dish that I will probably be making again. Before yesterday I had no idea that there was more than one use for a turnip, the first being a implement to throw at your partner when they eat the last piece of chocolate in the pantry.

turnip and mango

I totally failed with the pickeled wombok (aka a Chinese cabbage that sounds strangely like a small furry animal). I don't know if I read the recipe wrong, or I totally missed the point, but I followed every step and at the end of it I was left with slightly damp crisp cabbage. I stared at it for a little while, kinda hoping it would magically turn into the right thing, but 20 minutes later and nothing. So I got frustrated and just wilted the whole lot in a hot pan, I may have committed a culinary sin, but in the end I wasn't exactly overcome with a taste sensation, so I'm not too upset that I got it wrong.

roasted duck with mango and turnip above

The other thing that I really liked about this dish was the orange and lemon sauce. I really enjoyed the fragrant star anise and szechuan pepper in the sauce, and I thought that the whole thing came together really well, who would have thought that orange and duck were a match made in heaven!!! The French may be onto something here. Once again though, the big spoiler was the limp, drab tasting cabbage. I strongly recommend making the rest of the dish and leave out the accompanying pickled cabbage. Maybe just steam some crunchy string beans, or better yet just save your stomach for a huge serving of dessert. Speaking of dessert, onto my last challenge in the Jacques Reymond 3 course dinner. Stay tuned for the sugar high!

roasted duck with mango and turnip side

November 28, 2010

Roasted Duck Breast, Braised Turnips, and a Mango and Lemon Sauce

And now for the main course to the Jacques Reymond 3 course delight! So far the appetizer and the starter have gone well. I'm not so sure about the main course though. While flipping through the Cuisine du Temps book I had a real hard time settling on something. Nothing really caught my eye, other than the suckling pig. But that seemed a little indulgent considering normally you have to buy a whole suckling pig, a challenge even to the well seasoned gluttons that Daz and I are. So instead I'm going to attempt the roasted duck breast. I'm a fan of duck, so hopefully this will turn out well, however the mango and lemon sauce screams a little "sweet and sour" to me which apparently is the whole point to this dish, hopefully it will be a good combination.

After reading through the recipe, it also suggests to serve the dish with a side of pickled wombok. Now, if your a little ignorant like me....no its not a small hairy Australian marsupial, its actually Chinese cabbage. So in fact this recipe includes a bonus side recipe, helping with the all important veggie count.

As always, here is the recipe and stay tuned for the happy ending.

Roasted Duck Breast, Braised Turnips, and a Mango and Lemon Sauce, Serves 4

This Dish is all about the four tastes, saltiness (duck), acidity (lemon), sourness (turnip) and sweetness (mango)

4 duck breasts, skin on
1/2 teaspoon flaked sea salt

Lemon Sauce

2 tablespoons palm sugar, grated
1/4 teaspoon Szechuan pepper
1/4 cinnamon stick
1/2 star-anise
3 cardamon pods
zest 1/2 lemon
1 teaspoon julienned ginger
25 mL sherry vinegar
250mL orange juice
1 teaspoon custard powder
juice of 1 lemon
1/2 teaspoon ginger juice

Braised Turnips

2 small turnips, peeled and sliced
1 tablespoon sugar
30g butter
100 mL chicken stock
salt and pepper to taste
1 mango sliced

Clean the duck breast of excess sinew, score the skin and rub with salt. Place the duck skin side down in a heavy frying pan on low heat to render out the fat layer between the skin and the meat. It is not necessary to preheat the pan. Do not turn the breast until it has cooked three-quarters of the way through - approximately 15 minutes. Cook the other side for 30 seconds to a minute. Remove from pan and rest for approximately 5 minutes

Lemon Sauce

Caramelise the palm sugar in a small saucepan. Add the spices, lemon zest and ginger and cook until fragrant. Deglaze with sherry vinegar and orange juice and reduce by half to 125 mL. To finish the sauce add the lemon juice and ginger juice to taste. Adjust consistency with custard powder.

Braised turnips

Caramelise sugar in a frying pan until golden. Add a couple of small knobs of butter and the turnips. Once glazed lightly, add a little chicken stock and simmer gently until tender. You need just enough chicken stock so that by the time the liquid has evaporated, the turnips are cooked. Season with salt and pepper to taste.

To Serve

Put sliced mango in the center of the plate and place braised turnips on top, then duck breast, skin side up. Pour over lemon sauce. Pickled wombok is also and excellent accompaniment to this dish

Pickled Wombok

A fresher, more textured alternative to traditional sauerkraut.

1/2 wombok
1 salad onion, sliced
1/2 teaspoon black peppercorns, lightly crushed
1 tablespoon clarified butter
125 mL white vinegar
125mL white wine
1 bay leaf
2 stalks thyme
3 juniper berries
2 garlic cloves, crushed
75mL chicken stock
pinch of salt

Separate the leaves and stalks of the wombok. Slice the stalks thinly on an angle.

In a medium sized saucepan, sweat onion and pepper in a little clarified butter until soft. Add vinegar and reduce until almost evaporated. Add white wine, bay leaf, thyme, juniper berries and garlic and reduce by half. Add chicken stock to taste, season with a pinch of salt.

To cook wombok, bring pickling liquid to the boil and pour over the wombok. Remove from liquid to serve.

November 13, 2010

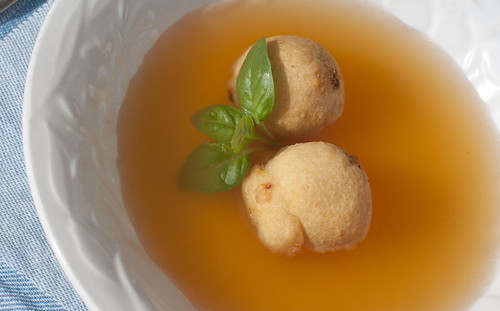
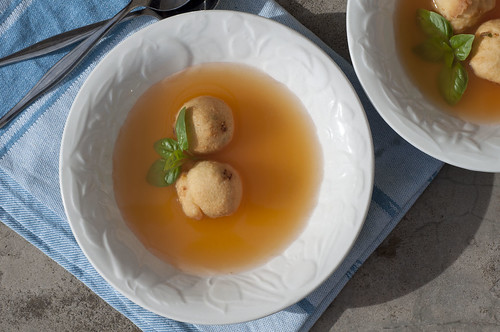
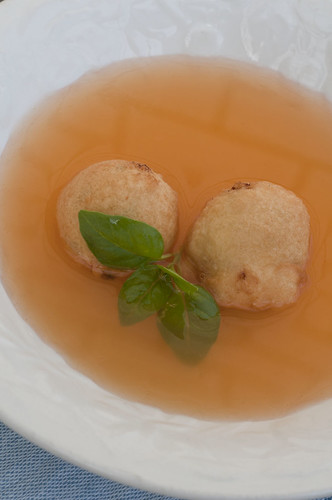
Results - Fresh tomato Broth with Saffron, Ricotta Fritter

tomato broth with ricotta fritters2

Has anyone else noticed that I seem to be cooking alot of "balls"? For some reason I seem to be attracted to spherical shaped food items, and you know what?.....I'm not complaining. How can you not love ball shaped food, they're easy to handle, are oh so cute and fit nicely in your mouth.....wait, am I still talking about food? Maybe I should get back on track.

tomato broth with ricotta fritters

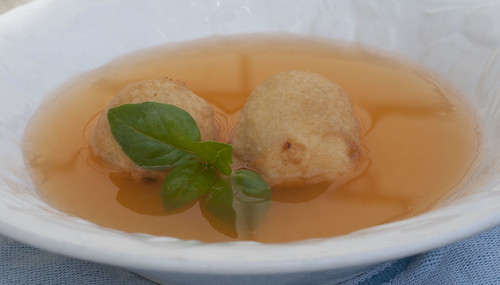
First lets talk about the taste. I made the broth and decided to serve it at room temperature, not warmed or chilled like the recipe suggested. It was a pretty warm day when I made it so the soup temperature was just right. All of the flavors blended together reminded me of warm summer day, fresh coriander, tomato, a hint of chili and the freshness of lemongrass . My only problem is that for some reason tomato soups/broths always cling to the back of my throat and give me an unpleasant sharp feeling. I enjoyed the first 5 or 6 mouth fulls, but then I was over it. I did however love the ricotta balls, so cute and tasty. I will definitely be making the fritters again, but as small finger food to kick start a party.

tomato broth with ricotta fritters3

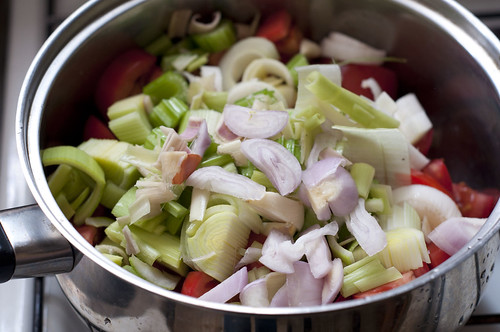
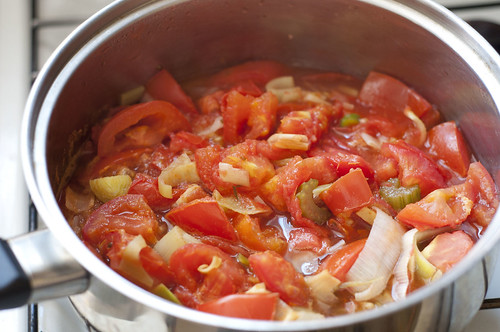
Onto the actual recipe, it could not have been easier. Put everything in a pot and let it reduce, you don't need any skill for that. I was a little concerned at the end of the cooking time when I noticed that the whole process only made about a cup full of broth. I only made a half serve, but that wasn't enough for one person let alone two. So I decided to deviate away from the recipe and crushed the veggies while they were still sitting in my strainer and that seemed to extract some extra juice. I managed to squeeze out more than a few extra serves, so that fixed my problem. I ended up with a lot more tomato pulp but the second straining took care of any extra tomato bits.

tomato consume before cooking

Before cooking

tomato consume after cooking

After cooking

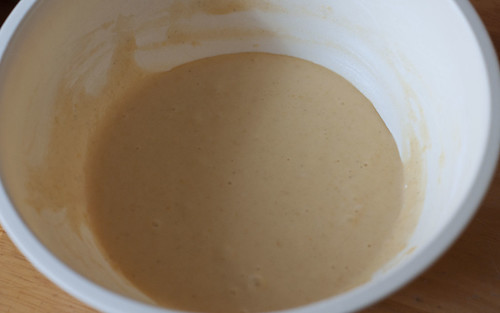
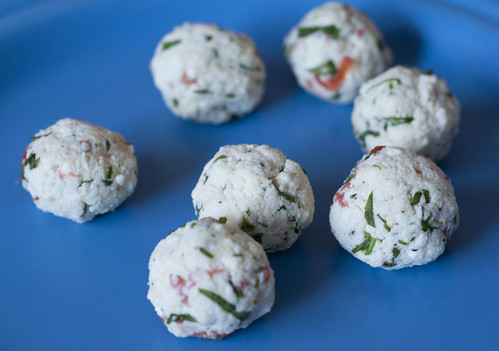
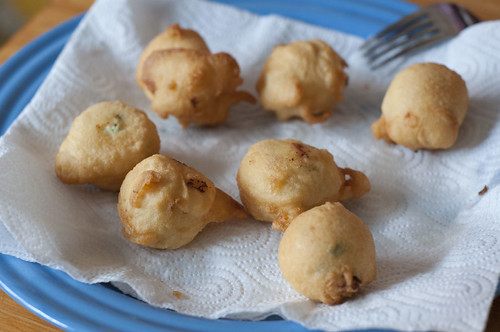
The ricotta balls were even easier. The only difficult part was waiting for the batter to be ready, and that was only difficult because I've always had a issue with patience. At the end of all the frying I was left with a fair bit of batter, so I decided to whack in a heap of cracked pepper, a little extra slat and make little salt and pepper beignet...oh they were so yummy! Might throw in some cheese next time and make cheese and black pepper balls. I've decided that Jacques Reymond is the batter king, so far anything that I've cooked involving flour and liquid has turned out to be awesome. At the end of this, I might turn into a batter ball myself!

biegnet batter

ABOVE PLUS BELOW

ricotta balls

EQUALS =

ricotta fritters

So, we've eaten the appetizers and now we've consumed the consommé, I guess next is the main attraction. And guess what? I haven't even worked out what its going to be!! I think I will have look through the book again........maybe after dinner though.

tomato broth with ricotta fritters4

November 10, 2010

Fresh tomato Broth with Saffron, Ricotta Fritter

My attempt at making the appetizers for my Jacques Reymond 3 course dinner went really well, and now for the starter course. I decided to choose something light and and refreshing, something that reminds me of summer - considering we have some nice warm weather coming our way. So here is the recipe for Fresh tomato Broth with Saffron and Ricotta Fritters. Of course photos and the full wrap up is on its way shortly.


Fresh tomato Broth with Saffron, Ricotta Fritter
Serves 4

TOMATO BROTH

1.5kg tomatoes, each cut into 6
1 celery stick, sliced
1 leek
3 shallots
2 garlic cloves, halved
2 red birdseye chillies, halved and deseeded
2 fresh kaffir lime leaves
1 knob of ginger, peeled and sliced
1 stick of lemon grass, crushed
400 ml of water
1 teaspoon sea salt flakes
1 teaspoon of sugar (or to taste)
1/4 bunch of coriander
1/4 bunch basil
1/4 teaspoon saffron threads

RICOTTA MIXTURE

100g ricotta
1 teaspoon basil, chopped
1 1/2 teaspoons coriander, chopped
2 teaspoon of semi dried tomatoes, cut into small cubes
salt and pepper

BEIGNET BATTER

50g plain/all purpose flour
1/3 teaspoon baking powder
pinch of salt
1 egg
35 mL soda water
10g melted butter
Note: The Beignet batter needs to be made an hour before being used

BROTH

In a large saucepan, combine all ingredients except for herbs and saffron. Cook gently at a low simmer for 20 minutes. Remove from the heat, add basil and coriander and let herbs infuse for 5 minutes. Pass through a fine sieve and collect broth. Add saffron threads and let infuse for 5 minutes. Strain again and set aside until ready to serve.

RICOTTA MIX

In a medium bowl, mix ricotta, herbs and semi dried tomatoes and season. Roll into balls and set aside

BEIGNET BATTER

In a bowl, mix flour, baking powder and salt. Make a well in the centre, add the egg and mix lightly. Add the soda water and gently whisk. Add the melted butter and mix

TO SERVE
In a saucepan, heat the broth, but don't boil.

Heat a frying pan with enough oil to deep fry. Dip ricotta balls in the batter and coat well with a fork. Add to the pan and deep fry. Remove and place on a paper towel to absorb oil.

Pour broth in the bowl and place the ricotta fritter in the center.

NOTE: the broth is also delicious served cold as a very refreshing chilled summer soup


November 2, 2010

Results - Gougères

gougeres ready to be eaten

Gougères are French for yum!
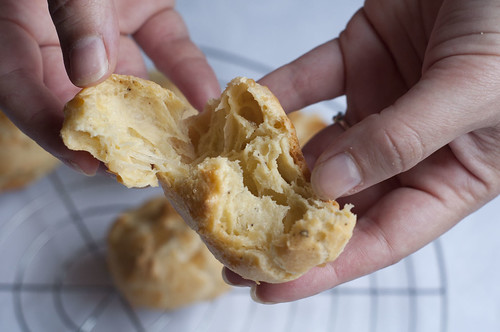
* I thought I would do the smart thing and only make a half serve of the recipe. You know, there’s only Daz and I and I don’t want to be tempted with too many cheesy puffs lying around the house. I know that’s a common problem people could face, so I don’t want to subject myself to it. With these delicious puffy, cheesy clouds of joy Daz and I set a new record. They were all eaten before I even finished taking photos of them. Thats really impressive!! And then came the wave of sadness...no more cheese puffs to snack on.

air pockets within the gougeres

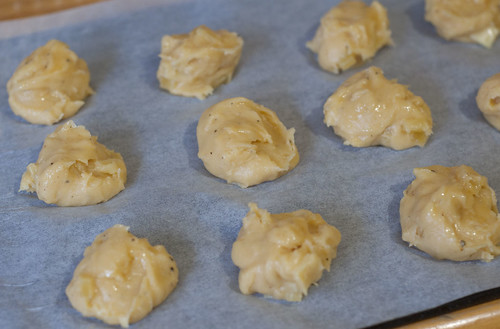
This has got to be the easiest top 100 recipe I’ve tried so far. It seriously couldn’t be similar, prepare your ingredients, add them together in the assigned order, bake and eat. And yet I still managed to stuff it up!!

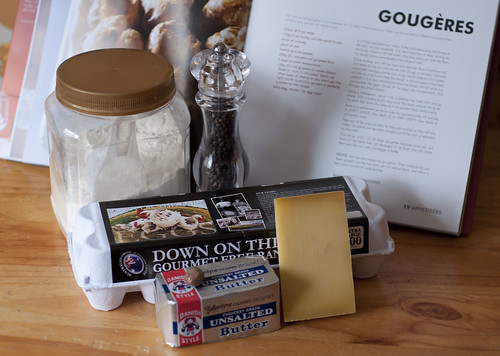
gougeres ingredients

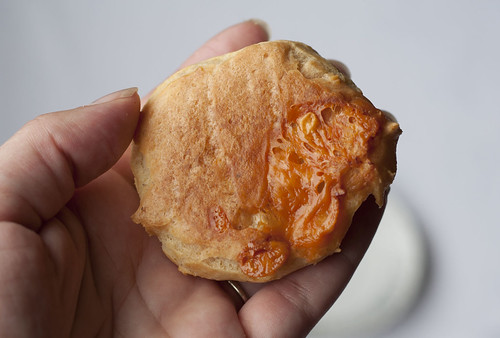
The recipe calls for diced gruyere, so that’s what I did. But when I added it to the hot flour/butter/egg mixture the cubes of cheese weren’t melting like I had expected them to. Did I cut them too big? Did I fiddle and fumble too long and my mixture was now too cold for the cheese to melt? The recipe said nothing about chunky pieces of cheese in it. So I thought I would stir the mixture a little more. Still no difference. Ok, I’ll just spoon them onto the tray, cross my fingers and hope they’ll rise.....and thats what they did. But even better than that, the chunky pieces of cheese melted and then went all crispy and caramelised so in every gougère you would have a lovely big pieces of chruncy cheese...oh I’m in heaven. I totally understand now why Jacques said “Don't use other types of cheese or you won't get the right result”, its well worth the result. But I think my over mixing prevented my puffs from “cracking” like Jacques. A small price to pay, but I wont be making that mistake again!

cheesy gougeres bottoms

My other issue was that the puffs took alot longer than 25 minutes to cook. More like 35 minutes, in the end I took them out because I was frustrated by the wafting smell of cheese throughout my house making me extremely hungry, so they weren’t quite as dark as I would have liked. But that had absolutely no impact on the deliciousness of them!

What I really love about this recipe is....no piping bag!!!! Usually with choux pastry you have to pull out the old bag and leave half of the mixture stuck to the side of your implement. Not in this case, all you need is a trusty spoon......oh oh....which means there are much more finger licking opportunities! Bonus score!

raw gougeres

Now I’m really looking forward to the next challenge of my three course Jacques Reymond meal. By the way I’m glad I’m having other meals in between the courses, that way there’s no chance of me starving, considering I’m only cooking one course every couple of days.

ready to be eaten

I’m definitely going to be making these again, although next time I’m going to fill them with crab!!!

*Not actually French for yum.....that's petit miam!

October 29, 2010

Gougères

Restaurant: Jacques Reymond (Vic)
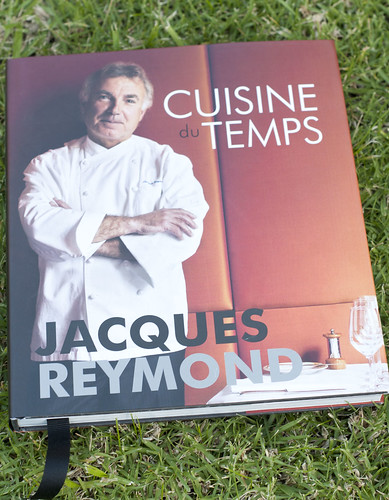
Recipe from Cuisine du Temps, Jacques Reymond
2011 Rating: Number 15, 2 Stars

jacques reymond book

I'm setting myself a challenge within a challenge. I recently purchased a copy of Jacques Reymond's book, Cuisine du Temps, for two reasons really 1) He's a hot, older French guy and 2) I'm a sucker for fine dining cook books. I was sitting on the couch flipping through my new purchase deciding on which recipes I wanted to try, so I thought wouldn't it be great if I could cook a three course meal using the recipes in this book. So that's exactly what I'm going to do. I'm going to bring you a three course meal!! Lets start with something easy and most likely extremely yummy....the Gougères. Gougères are savory choux pastry puffs and can be often filled with a multitude of ingredients. In this case they will be serve filling-less. The gougères themselves have been on the Jacques Reymond menu for over 25 years, they gotta be good if they've been on the menu for that long.

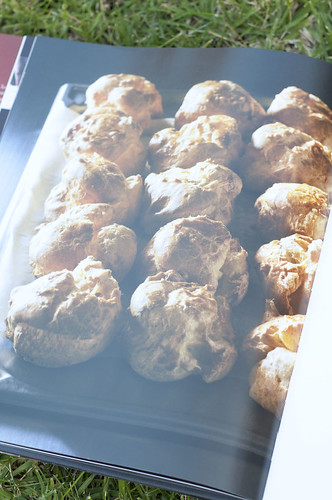
So here's the recipe and a picture of what they're supposed to look like. Fingers crossed mine will turn out similar.

gougeres

INGREDIENTS

250ml water
150g butter, cut into small knobs
pinch of nutmeg
pinch of salt
freshly ground pepper
200g plain/all purpose flour
5 eggs at room temperature
120g Gruyere or comte cheese, dices in 1/2cm cubes. Don't use other types of cheese or you won't get the right result. Australian Gruyere is perfectly suitable for this recipe
extra egg, beaten, for egg wash

METHOD

In a large saucepan put water, butter and seasoning and bring to the boil, stirring constantly. It is very important to keep stirring so the butter mixes in with the water; that way when you add the flour the dough forms immediately and it doesn't split.

Once boiling, turn off the heat and add the flour. Combine well and keep stirring for one minutes until dough is compact and well combined. Add eggs one by one using a small mixer at a low speed, or if you do it by hand, keep the dough in the saucepan it has been cooked in. It is very important to have the dough still hot while you incorporate the eggs. Once all the eggs are incorporated, fold through the diced cheese.

Using a tablespoon, spoon onto a baking tray lined with baking paper, with a pastry brush, egg wash the tops - ensure not to let the wash drip down the sides as it will prevent them rising evenly.

Bake in a preheated fan-forced over for approximately 25 minutes at 200C or 180C convection oven.

Take out of the oven as soon as they are cooked so they will stay crispy. Gougères can be eaten straight out of the oven or reheated as required.

This recipe is for 15-18 large gougères because once you put them on the table they will disappear in no time. You can make them any size you wish, but bigger is better.

NOTE: You can also freeze raw gougères. When ready to eat, put them straight into the hot oven, do not defrost them, and allow a few more minutes of cooking time.

October 13, 2010

Results - Passionfruit Tart

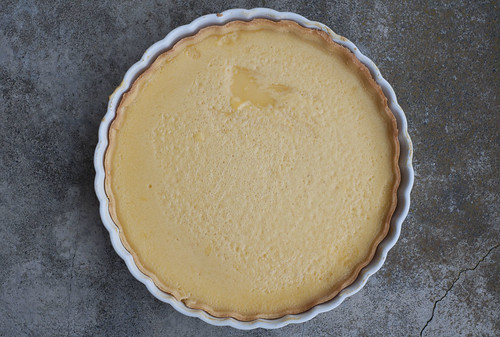
passionfruit tart whole

I've had a terrible day, not the worst in my life, but definitely in the top ten. It kicked off with mega awful traffic, something that I've sadly become accustomed to, it just means theres more time for Daz and I to talk rubbish and perv at passers by.....my fav was when we spotted a short skirted very high heeled gorgeous babe who suddenly tripped over her heels and came very close to falling over. Sorry, I'll get back on track.

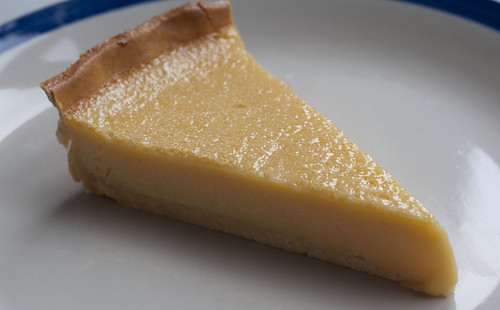
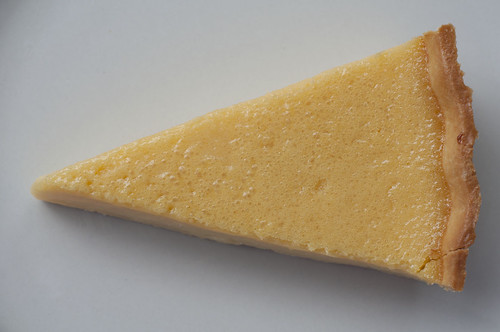
passionfruit tart slice

I took the day off today to take care of a few things for my mum, I decided that I desperately needed a coffee. But with no cash in my wallet I needed to go to the ATM. So in the pouring rain I found the ATM, or where the ATM once existed. You see it seems that the ATM had caught fired....either through foul play or spontaneous combustion and was not in any kind of working order. So my morning coffee ended up costing me an extra $2!! Stupid ATM fees. I decided to buy a berry/coconut muffin to perk my spirits and the muffin had almost no coconut in it!! More of an annoyance rather than bad luck. Then my car battery decided it had enough and died. I was stranded....the clincher is that we had recently bought a new battery and it was sitting at home in our garage. So what is a girl to do?, there was no one around to offer a jump start, I don't want to call the RACV for two reason really, I'm not a member and I had a perfectly working battery sitting in my garage. So I caught a taxi, retrieved the battery and changed it. Did I mention that it was pouring rain??

So back on track to do my errands. By this stage I was in a cranky mood and when I was faced with an arrogant sales assistant, I think I kinda cracked. He pretty much only spoke in grunts and was the most unhelpful person I have ever met. So I shoved his paper work back and told him I wasn't interested. I got back in my car and bango, one of my windscreen wiper blades decided to join the battery and ATM, all gone to hopefully better places.

passionfruit tart whole from above
I had a gladwrap accident where the gladwrap stuck to the top of the tart, hence the big gaping hole. Otherwise it was a very good looking tart...hehehe

So at the end of the day, I'm slightly damp, I have grease under my fingernails, cranky and lucky that I haven't been in a car accident due to limited visibility. So of course the perfect thing would be something to sweeten my day. What better way than with a sweet little tart. The tart turned out perfectly, well as perfectly as Neil Perry intended. I made it exactly as the recipe stated, and the result was a very soft wobbly custard, creamy with a perfect crumbly pastry. The passionfruit really came through and to my surprise the overnight resting did wonders!! The sugar in the mix slowly cooks the egg, so when you pour it into the tart shell it is almost custard like in texture.

passionfruit tart slice above

I have two issues with this tart, firstly the custard was way too sweet for my liking. I'm not a massive fan of overly sugary desserts, so I would curb the quantity of sugar. Secondly, the recipe makes no mention as to what temperature the custard should be before it goes into the tart shell. Is it supposed to be straight out of the fridge? at room temperature? or what? So my cooking time was well off. I ended up cooking it for double the recommended time, and I had taken the custard out of the fridge an hour earlier. It wasn't quite fridge cold, but it was still relatively cool. In future, I will actually warm the mixture up over a double boiler so the cooking time will be quite short. I'm already planing to make a mango tart......just waiting for the mangoes to catch up with my craving.

October 10, 2010

Passionfruit Tart

Restaurant: Rockpool (NSW)
Recipe from Neil Perry (Originaly seen in Rockpool by Neil Perry)
2011 Rating: Number 2, 3 Stars

Sometimes a girl just feels like a tart. A little while ago I stumbled across a recipe for Passionfruit Tart by Neil Perry in my local paper, originally seen in Neil Perry's book - Rockpool. I thought I would give it a go, the fact that the filling needs to be made 24 hours in advance intrigued me. I noticed that the recipe that appeared in the paper didnt include the recipe for the shortcrust pastry, so I turned to the internet, hoping that I would stumble across the very Neil Perry recipe I was looking for. Luckily I found it at epicurious, and then quickly discovered that the recipe for the actual Passionfruit tart is all over the net. So here is my contributions to spreading it some more.

Will I still feel like a tart? Will the filling be eaten before it can be baked into a tart? Photos and results to follow soon!

Sweet Shortcrust Pastry (found at epicurious)

INGREDIENTS

250 g (1 1/2 cups) all-purpose flour
75 g (2 1/2 tablespoons) unsalted butter, cubed
a pinch of sea salt
90 g (1 cup ) confectioner's sugar, sifted
55 ml (1/4 cup) milk
2 egg yolks


METHOD

Place the flour, butter, salt, and confectioner's sugar in a food processor and process for 20 seconds. Add the milk and egg yolks and process for a further 30 seconds until a mass forms.
Turn out to a lightly floured surface and knead lightly for a few moments. Flatten and form a disk. Wrap in plastic and place in the refrigerator for 1 hour.
Roll out the dough with a rolling pin according to the recipe. Refrigerate until needed.


Passionfruit tart
Serves 8

Ingredients

9 x 55g eggs
350g castor sugar
300ml double cream (45 per cent butterfat)
350ml passionfruit juice, strained
plain flour for rolling
500g sweet shortcrust pastry
a little egg wash for glazing
icing sugar for serving

Method

Put the passionfruit mix together the day before you wish to bake the tart (resting it in the refrigerator helps avoid splitting).

Break the eggs into a bowl and whisk.

Add the sugar and continue to whisk until well incorporated.

While stirring gently, pour in the cream. Add the passionfruit juice and continue to stir until well blended. Cover and refrigerate overnight.

Spray a 26cm tart tin with Pure and Simple.

Lightly flour a bench and roll out the pastry until it is 2 cm wider than the tart case.

Roll the pastry over your rolling pin and gently ease into the tart case , pushing the sides in gently so that it takes the fluting. Rest in the refrigerator for 20 minutes.

Preheat the oven to 180°C (350F).

Line the tart case with foil, place rice in the foil and bake blind for 20 minutes.

Remove the rice and foil, brush the tart shell with egg wash and cook for a further 10 minutes.

Remove from the oven and lower the temperature to 140°C (290F). Return the tart case to the oven.

With the case sitting in the oven, carefully pour in the passionfruit custard.

Fill the tart right to the top with a cup or small dariole mould. Bake for 40 minutes.

Check the tart, it should be halfway set but still quite wobbly in the middle. If you take it out too soon it will not set and run when you cut it; if you leave it in too long it will set too firmly ad lose its elegance. Through experience you'll find the optimum set for the tart in your oven.

Remove the tart from the oven, balance on a cup and remove the sides. Put on a cake rack and, with a palette knife, slide the base off the tart tin.

This will allow the tart to cool and the pastry to crisp up rather than sweat.

Invert the pastry ring back onto the tart to help hold the sides in as it cools and sets. Allow to cool for 1 hour.

Carefully cut with a serrated knife and place in the middle of large white plates.

Dust with icing sugar and serve.

August 20, 2010

Results - White bean velouté with salsa verde and candied pancetta

DSC_3123

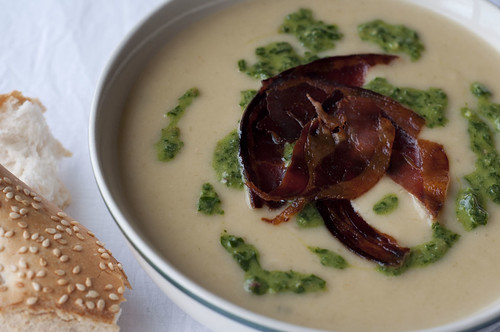
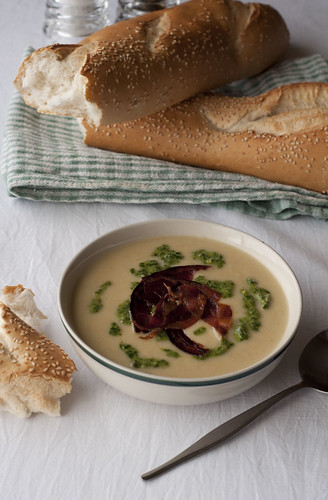
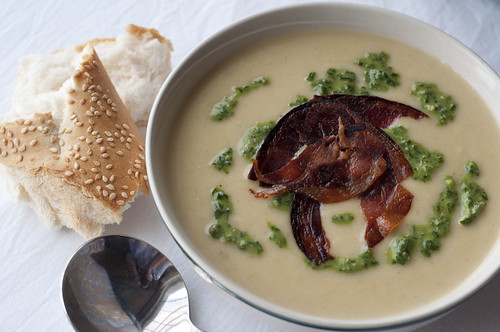
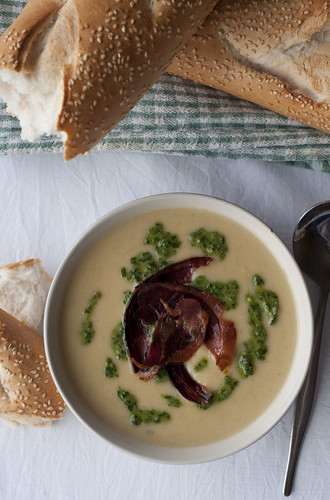
I like beans in dip, I like beans on toast and now I've discovered I like beans in soup. Who would have ever thought! Overall I was pretty pleased with my attempt at the Comme Kitchen recipe. The leek soup was sweet and extremely filling with all the extra fiber coming from the beans. Overall it was extremely healthy too, if you chose to ignore the fact that there was about a bucket load of cream added to the finished product.


DSC_3118


I really enjoyed the crispy pancetta ontop, giving the otherwise vegetarian soup of bit of flavour twist. Although I've had sweetened pancetta before, it was still a little strange for my taste buds. You would take a mouthful of the soup, taste the minty freshness from the salsa, creamy buttery-ness from the soup and then the sweet candy element from the pancetta. All a little strange, but oddly pleasing. It was a wintry cold when we had this, so curling up with a hot bowl of soup, some crusty bread and a warm heater was the order of the day.

DSC_3108


I do have a couple of bones to pick though. Whenever I chose a recipe to tackle, I'm usually lured in by the pretty pictures. I had grand fantasies of my dish turning out as spectacular as the original. In this case I was hoping for a pristine white soup accented with the vivid green salsa. Somehow my soup ended up yellow with splodges of green glop.

I know what happened to the salsa verde. I had a pretty hopeless food processor. The minimum amount of liquid require to get a good result is about 1L, so my chopping and emulsifying didnt quite turn out the way I had imagines, in fact it turned out more like a pesto than an actual sauce. The salsa was also slightly bitter, which I attribute to the whole making process, rather than cleanly chopping alot of the herbs ended up bruised. It tasted quite nice when mixed into the soup, but was a little unpleasant when eaten in a large blob.

DSC_3143

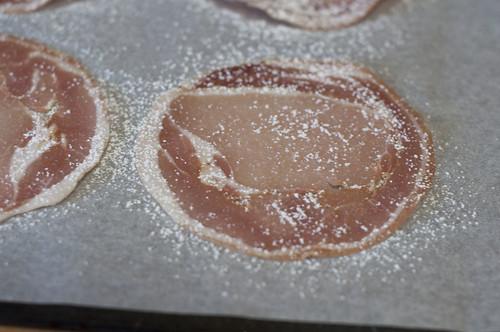
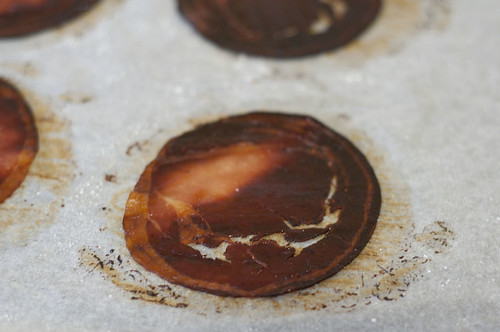
My next issue was with the candied pancetta, well more an issue with me really. I dusted the pancetta shoved it in the oven and waited a little while. I tested the pancetta and it was still overly soft, not to the crispy result I had desired. So I shoved it back in and waited a little while longer, by the time I thought it was time to pull it out, it was too late. The sugar had began to caramelise and turned the pancetta into a dark mess. And after all that the pancetta was still not as crispy as I had expected. oh well.

panchetta icing sugar


panchetta icing sugar 2


This recipe is pretty easy, it can be put together in under 45 minutes, especially if you use canned beans which have already been soften. Although, the next time I make this I might pay a little more attention to my pancetta. If you would like to see the recipe again, go here.

August 17, 2010

White bean velouté with salsa verde and candied pancetta

Restaurant: Comme Kitchen (VIC)
Recipe from Chef Daniel Southern (recipe from Gourmet Traveller website)
2010 Rating: Number 93, 1 Star

Its funny how sometimes you come across recipes. On this occasion the thinking process went a little something like this;

I have a leek and a can of beans, I wonder what I can make with them? Google my old friend, bingo....leek and bean soup.

So simple, and the recipe looks pretty darn simple too. So heres the recipe with the results to follow soon.


White bean velouté with salsa verde and candied pancetta
Serves 4

Cooking Time Prep time 20 mins, cook 1 hr 25 mins(plus resting, proving)

100 gm unsalted butter, coarsely chopped
2 leeks, white part only, finely chopped
1 celery stalk, finely chopped
4 garlic cloves, finely chopped
4 thyme sprigs
1 fresh bay leaf
2.2 litres chicken stock
110 gm dried cannellini beans, soaked overnight in cold water, drained
200 ml thickened cream
120 gm round mild pancetta, thinly sliced (about 8 slices)
For dusting: pure icing sugar
Salsa verde
1 cup (loosely packed) flat-leaf parsley
½ cup (loosely packed) mint
¼ cup (loosely packed) basil
3 anchovy fillets, coarsely chopped
2 garlic cloves, finely chopped
1 tbsp small capers in salt, rinsed
1 tbsp Dijon mustard
175 ml extra-virgin olive oil


1 Melt butter in a large saucepan over low heat, add vegetables, garlic, thyme and bay leaf and stir occasionally until tender (7-10 minutes). Add stock and beans, bring to a gentle simmer and cook until beans are very soft (1-1¼ hours). Discard herbs, process mixture in a blender until smooth, pass through a fine sieve, stir through cream, season to taste and keep warm.

2 Meanwhile, preheat oven to 160C. Place pancetta on a baking-paper-lined oven tray, sift icing sugar over in a thin, even layer, top with baking paper and weight with another oven tray. Bake until crisp (10-12 minutes), set aside.

3 Meanwhile, for salsa verde, process herbs, anchovies, garlic, capers and mustard in a food processor until finely chopped. With motor running, add oil in a continuous stream until emulsified and set aside. Makes 270ml.

4 To serve, divide white bean velouté between bowls, drizzle with salsa verde and crumble over candied pancetta.